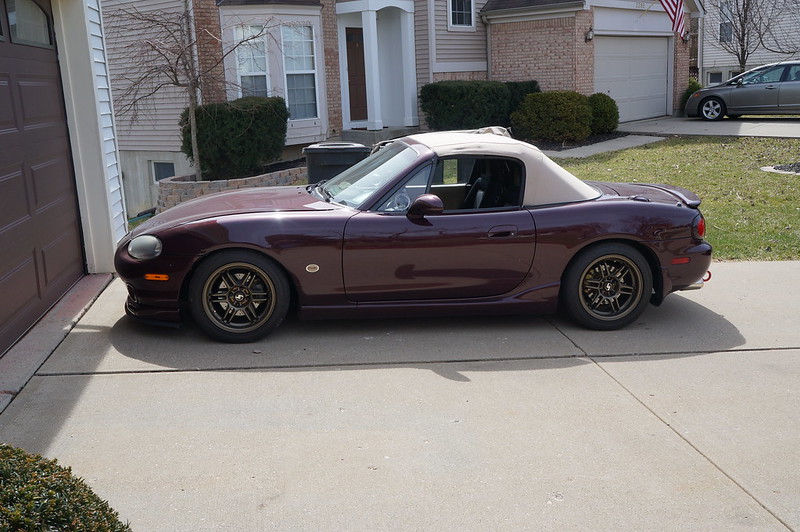
NB MX-5 Hey, it's Minnie!

Did some tuning on her using the VEAnalyze autotune feature. AFRs were a lot better already, I was back to around 14.3-.5 at idle. I think what happened is when I was burning coolant and did the tuning, it was putting too much fuel in to make up for things. While I still had some fuel smell after getting on it, it was less. It just takes some time getting the upper rev range tuned as you have to have your foot down to keep the boost up.

Screw me sideways part II: a few days later while out driving, I started getting the same stutter as I had before when coolant was leaking into the cylinders. Pulled the plugs last night and sure enough, coolant in cylinder 4 (again). Dammit. This was getting frustrating. It really sucked as I planned to go on a cruise that day with a local group, and autocrossing the next. Took a break from car work (spent three days fixing a friend's Taurus), and pulled it all apart the next day to see if anything presented.
 
Got the head pulled, there was absolutely nothing apparently wrong that would have caused the coolant leak. Took it to the shop that milled it the first time and they found some extra clearance in way of the exhaust side of #4 cylinder on the head. So that got milled again, and I also asked them to adjust the valve lash since I had several with too much clearance (FYI Mazda's shims don't allow fine tuning of clearances, there are a limited number of thicknesses available).

Picked up the head a couple of days later. Got started putting everything back together after lunch the next day. Job completed and a successful test ride done. I may have discovered the source of the gas smell under heavy throttle, it looked like a couple of the injector O-rings had some minor leak-by. I sent an e-mail to 5-O Motorsports to see if they have replacements available.

When I was putting the timing belt on I had the same problem with some looseness between the cam gears as last time. I ended up slightly modifying the factory procedure for tensioning the belt. I ran it around the 1 5/6 turns as required, then continued to move it until the belt was tight between the cams and on the idler side (in other words, so all the looseness was on the tensioner side). I then tightened the tensioner. Turned the engine over several times and made sure the timing marks lined up the way they are supposed to. Worked like a charm!
 
The last cylinder head problem happened a week before I had to go back to work. After going back to the ship I did some research (difficult since some of the sites I need to go to are blocked for some inexplicable reason) to try and get a handle on some of my issues. First thing I've found was that I should not have put the MAF back on. The MegaSquirt has an integral MAP sensor that it uses, and with my having the GM IAT sensor that's all it needs for fueling. I'm wondering now if any of the input from the MAF has affected the other inputs. Removing it and reloading my base map was the first item once I got back home. I just had to see if the air filter will fit directly on the pipe mounted to the supercharger, or if I'd have to get a short extension piece. None of my pictures allow me to see that. I may also be able to use a longer Mazdaspeed air filter I bought off eBay several years ago thinking it would fit on the Speed6 (it didn't).

After a lot of thought back and forth, I decided to just go ahead and buy a new clutch. Went with the SuperMiata one from 949 Racing this time. There was something going on with the FM one, I don't want to pull things apart and then have to wait for a replacement. This way I can either return it if something is wrong, or if my problem stems from something else then sell it and recoup some of the expense.
 
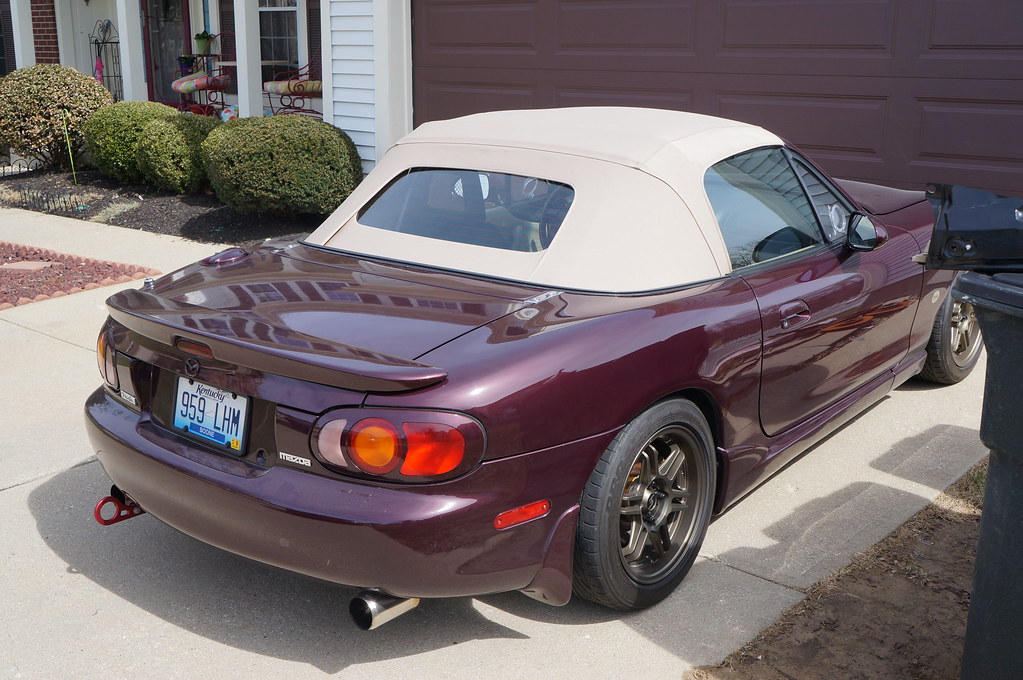
I bought a new top while out along with a new rain rail and tension cables. Those were waiting on me when I got home. It took me a while to find a top that would match the factory parchment color but based on the color swatch they sent me this one does. I went with a cloth/canvas top as I personally feel they add a classy touch. I need all the class I can get! I'll be sure to post about changing that out, as we all know there aren't enough posts about Miata top replacement.

Stay tuned...
 
Got home a few weeks after I ordered the top (this was in February), when I woke up early the next morning took a look at some of my parts collection. The new top was going to look great.

I removed the MAF and put the air filter in its place. Still had to reprogram the MS with the original basemap, hoped things were be better road-wise the next day so I could take her for a spin.

I did reload the original basemap and took her for a spin. No change in the fuel smell under boost. I went ahead and ordered a new sensor for the wideband, I was away from home right then but when I got back I was going to put it in and see if the original got contaminated causing my problem.
 
Spent a week in the UK for a work conference so nothing got done. I received the midpipe right before I left, it's a nicely made piece. Stopped by the dealer one morning and ordered a few pieces to correct some minor issues (like the battery tray, mine has been modified from some other car which irritates me). I had been doing some more reading on the MS, even though I was sure I already did it I burned the wideband sensor type into the unit. After that I fired her up and went out with the computer connected to let TunerStudio do some autotuning. When I got that done my AFRs seemed a bit better, but I still had some gas smell under boost.

Researched for my top replacement. It didn't look like that big of a job, just time consuming. I figured to do it by removing the whole thing, it should be a little easier.

I entered a car of the month contest on this very forum. It was for boosted Mazdas, I was interested to see how I did.
 
I finally got the rest of the parts I had ordered to get the battery mounting in order, installed those. This was the proper battery tray and hold down clamp, as well as a new fiberboard piece that goes over the whole thing (the old one was missing the white plastic location piece). It was nice having it all correct.

Pulled the top. Got the old one removed ok, although I removed one of the tension cable guides before I realized I didn't have to. That ended up screwing me up, as I put it back on, discovered I missed putting a tab in a slot so drilled out the pop rivet. For some reason the drill bit walked while I was doing that so the rivet didn't get drilled properly. When I tried cutting the head off the rivet I broke the guide. That was going to mean a trip to the dealer before I can finish the top. The fabric does look pretty nice.
 
The dealer couldn't find the guide either (they had the exact same drawing I looked at) so they surmised it is part of the complete frame. So, I stuck the old one on with black silicone. Finished putting the new top on the frame and then put it back in the car. Hardest part was getting the adhesive residue off the weatherstrip channels, tried several different methods but what worked the best was wetting the stuff with acetone and then using my thumb to rub it off. Use double-sided foam tape to replace it. Getting the bolts back in the sides of the frame was a little bit of a pain, but the true PITA is getting the rear trim pieces over the rain rail. I put the center piece in (everything I read says that's the best way), but so far I had only gotten one nut on it. Since I'm not as flexible as I once was I took a break from straining to get the damn nuts on.
 
Hi, my name is Mike, and I'm a dumbass...

After fighting with those metal retainers for a couple of days, including putting the nuts on just the rain rail overnight to get it to set in place, I managed to get three nuts on the center piece. Ended up taking it back off as the threads on one of the studs got bunged up and I needed to chase it. When I went to put it back on, for some reason I looked at it differently and thought I might have been trying to put it on upside down. Yep, that was what I did. The retainers had a U shape, the open end of the U is on the bottom. Learn from my tribulations!
 
Got her done!

13544739364_f790c846d5_c.jpg


13544521663_80bd1c24b0_b.jpg
 
Hoping there’s more! 😍
Oh, there's lots more. As of now we are only up to about 2013 or 2014. I'm still getting caught up with family but I will be posting more over the next few days. I figure it's going to take me about a month at my present rate to get up to the current day.
 
Pulled the tranny to replace the clutch. No apparent problems with the Happy Meal (what looked like some chatter marks around 1/2 of the circumference, which is weird) besides the crappy engagement. Looks like I had some oil leaking from the tranny input shaft cover, so I redid that with the max oil resistant silicone. I'ma done for that day.
 
Took the next day off, then got back on it. Cleaned up the marks on the flywheel with brake cleaner and a ScotchBrite pad. Put everything back together up to the passenger side of the engine. I needed a plug for one of the O2 sensor bungs on the exhaust, have to go to my storage to get that so I decided to finish that the following day.

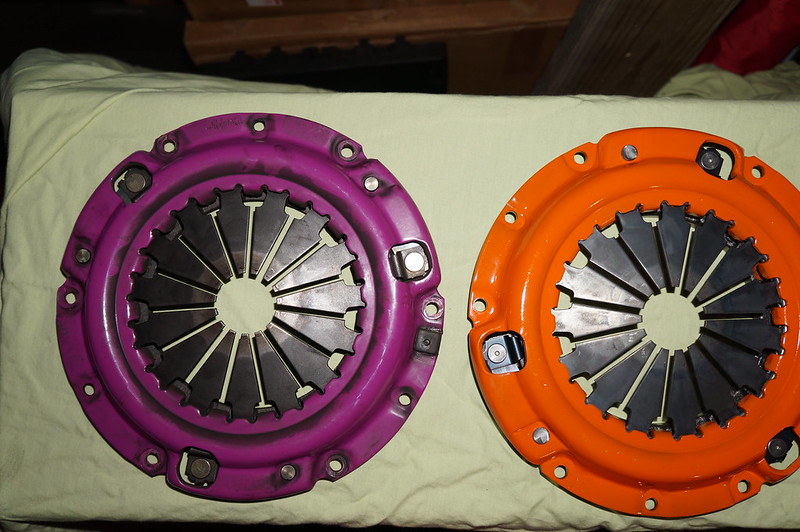
For anyone wanting to compare the FM clutch vs the 949 Racing one, here's a picture of the pressure plates:

13613620013_ef1af09cf7_c.jpg


The clutch disc is pretty much the same between the two (for the style I got anyway).
 
Picked up the O2 bung plug, when I was opening the fastener package for the RoadsterSport midpipe, I found one in there! Anyhow, got the exhaust bolted up. It took a lot of movement between the middle and rear of the car to get the RoadsterSport pieces put in and lined up correctly. I left off the stock front O2 sensor and put the Innovate wideband sensor in that location. The stock rear sensor is in place but not connected (this is mainly to seal the hole into the cabin). Calibrated the new sensor before installing it. I had noticed a coolant leak which turned out to be from the blanking plate on the stock thermo housing, so I stopped by the dealer to get a stock gasket. Put that on and filled the system. Put the supercharger back on, while that was in progress I noticed the blanking plate on the thermo housing was leaking again. Drained some coolant again, pulled the plate off and cleaned it up. Made my own gasket (one that covers the complete opening to minimize the chances of a leak), after cleaning everything up I used some blue silicone gasket maker to put it all back together. Waited to refill the system until it had set up for 24 hours.
 
Filled up the coolant and everything was tight, so I finished putting it all back together. Getting the clutch pedal adjusted back to stock specs was more of a PITA than I remember. Started her and she fired up with no problems. For the first time since I installed the MP62, the drive belt stayed in place across both pulleys. Went out for a drive to check things out, the clutch pedal action was back to stock (no more tractor!). Now I just had to moderate the thrust for the 500 mile break-in for the new clutch.
 
Washed her dirty butt! Checked things over and it all still looked good.
 
Borrowed my friend's polisher, turned out he had one of those that fits on a drill motor. I did some more researching and found that Meguiar's has a clay bar kit with white bars which is more aggressive than the yellow bar I tried previously. One day while I was deflooding my wife's 8, I clay barred the Miata. It worked like a charm. I hadn't had her out in the sun as yet (for the original posting) but from looking at it crosswise with a light it appeared the overspray is gone. The finish was as smooth as a baby's butt. I used the polisher on the trunk lid and hood as they seemed to have some spots the clay bar didn't take care of. It did a good job, but I figured it was time I invested in a Porter-Cable polisher.
 
Back