I apologize if someone has already described this in detail, but i've been searching the forum for hours and have messed around in my car with no luck.
I cannot figure out how to get the stock Kenwood (KDC-MP919) piece of crap deck out of my MSP.
I recently had the "no-display" later followed by the "stuck half-way down faceplate" issues. I've done a lot of my own deck replacements on vehicles in the past, but I can't quire figure this one out.
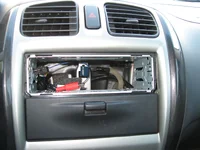
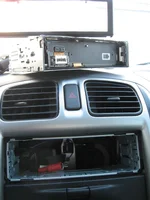
So, so far I've removed the trim. It's tight at the bottom where the climate control cables are at their limit. I saw the 2 screws on either side and below of the deck and loosened those off (shown in yellow on thumbnail pic). I thought I would just be able to slide the deck and/or the entire mounting bracket (with lower tray) out from there. But no-go. It's stuck. What am I missing? Can anyone please provide a detailed description?
Is this one of those jobs that everybody gets the audio retailer/installer to do for them?
Any help and pictures would be greatly appreciated!
And by the way, does anybody have any feedback on the Pioneer DEH-P5000UB Deck? That's the one I'm thinking of replacing with.
I cannot figure out how to get the stock Kenwood (KDC-MP919) piece of crap deck out of my MSP.
I recently had the "no-display" later followed by the "stuck half-way down faceplate" issues. I've done a lot of my own deck replacements on vehicles in the past, but I can't quire figure this one out.
So, so far I've removed the trim. It's tight at the bottom where the climate control cables are at their limit. I saw the 2 screws on either side and below of the deck and loosened those off (shown in yellow on thumbnail pic). I thought I would just be able to slide the deck and/or the entire mounting bracket (with lower tray) out from there. But no-go. It's stuck. What am I missing? Can anyone please provide a detailed description?
Is this one of those jobs that everybody gets the audio retailer/installer to do for them?
Any help and pictures would be greatly appreciated!
And by the way, does anybody have any feedback on the Pioneer DEH-P5000UB Deck? That's the one I'm thinking of replacing with.