OK, so I finally tackled this tedious job this weekend, and I'll try to explain the procedure.
Of course, I had everything but my camera on my mind when under the hood, so no original pictures, just the ones I had on the web...
Protege OEM valve stem seal manufacturers did not do a great job of making a lasting seals using the finest materials, so... hmmm, sometimes they go broke within first 60 000 miles...
Well, first the symptoms:
As the car stays cool over night, first start next morning it produces a cloud of white-blue smoke, lasting for 5 secs or so...
If your engine does NOT spend coolant (the coolant level stays the same within 3 months) (note the coolant level oscillates as the engine gets warm/cold), AND if you oil doesn't look creamy, (emulsion like, meaning it doesn't contain coolant)

then it means, your head gasket is ok, but your valve stem seals aren't...
The other symptom might be that id doesn't smoke every morning, or at least not as much all the time...
The reason being that depending on the position of you cam(s) when your engine stops, the problematic valve(s)-seals stay opened or closed, so the oil does or doesn't leak into the chamber...
One "on the fly" way of checking the stem seals is to take the spark-plugs out in the morning on a cold engine, and using a flashlight try to get the pistons in to TDC and look at them, if one or more appear to be wet (oily), -> BINGO you got your selves a leaking valve stem seals... (do the test for a couple of mornings, just to be on a safe side)
OK, now, the intro into the procedure...
First, you have to get a new set of seals (intake and exhaust seals ARE different) and and a pair of cam seals, as you will have to take the cams out of the head...
You'll need some SSTs, like:
valve removal players
http://media.uxcell.com/uxcell/images/item/catalog/ux_a08060200ux0208_ux_c.jpg
valve compressor device:
http://www.shophoenixproject.com/stemseals/pics/3.jpg
And a good old torque wrench!!!
All right:
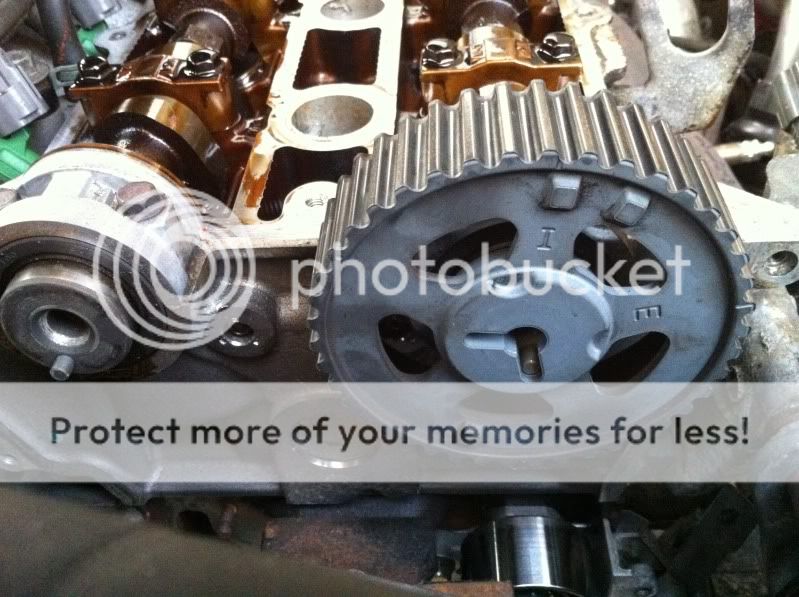
1. Take apart the entire assembly (belts, covers, pulleys) as you were about to change the timing belt, as I wrote in the DIY topic next to this one, EXCEPT you just have to take the timing belt off the cam pulley to take the pulleys off, to take the cams off... (whistle)
Well, one might ask: why then taking all apart, shouldn't just the head (valve) cover and upper plastic cover be enough?
Yes, to start with the procedure, but how will you be able to adjust the belt back on the cams once you are done without being able to see the crankshaft notch, and especially if you need to rotate the pistons up and down while replacing seals???
Ergo, you need to take apart the belts, covers, crankshaft pulley...
2. the basics:
Valves are held closed by a strong (and i mean one badass strong coil spring)...
the end of the spring pushes against the end-cone plate that has a tapered hole in which two small retainers sit, holding the bunch in place...
Not getting the picture? Here it is:
http://www.sweethaven02.com/Automotive01/fig0353.gif
http://www.vanpeltsales.com/FH_web/FH_images/FH_other-pics/valveassy_1948-54.jpg
Try to realize the 101 on the system, coz it is essential!!!
Ok, the spring pushes against the valve retainer but the retainer can not move coz it has been locked by two small tapered valve keepers that are locked into the small groove at the end of the valve stem...
Ok, and on our Mazdas, the entire system is covered by a valve cup, above which the cam lobes operate, pushing the valves down, ergo opening them...
Confused again???
No biggie,
V6, one side taken apart,
cams taken off, cups are visible:
http://www.shophoenixproject.com/stemseals/pics/2.jpg
One cup taken out by a strong pick magnet: Valve retainer and two keepers visible...
http://www.shophoenixproject.com/stemseals/pics/4.jpg
Ok, now, the goal of the operation is to get the spring, keepers and all out of the way, to reach to the stem seal:
There it is, the little bugger!!!!
http://lh3.ggpht.com/_lbtYMre2TDo/S0KJixsJldI/AAAAAAAAD28/lzH9rhJ-IEo/s800/IMG_2173.JPG
but if we take all out, what will keep the valve up?
well, nothing. It will fall down into the cylinder, and you are screwed!!!
Ok, that is the FIRST issue you have to cover, and thankfully, there are some guys who thought of an very convenient trick...
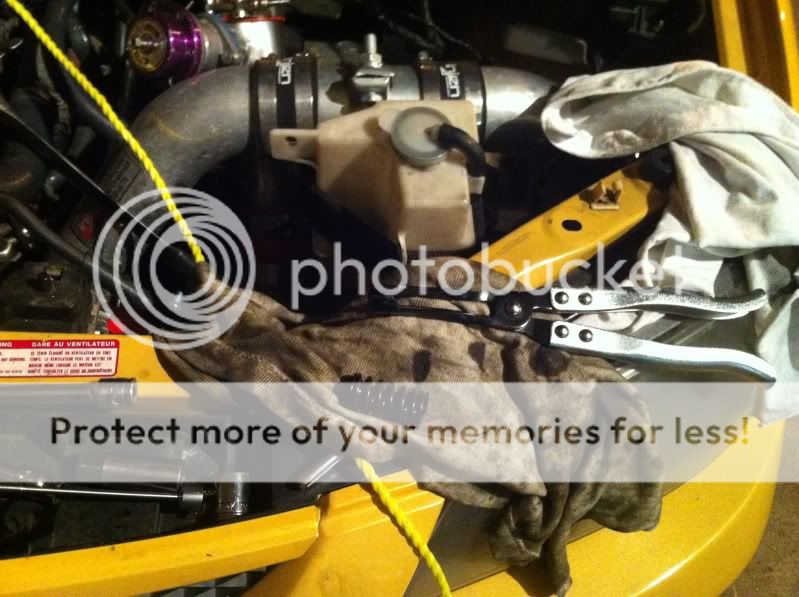
THE ROPE TRICK:
Take a standard issue clothes line rope, some 10 ft of it.
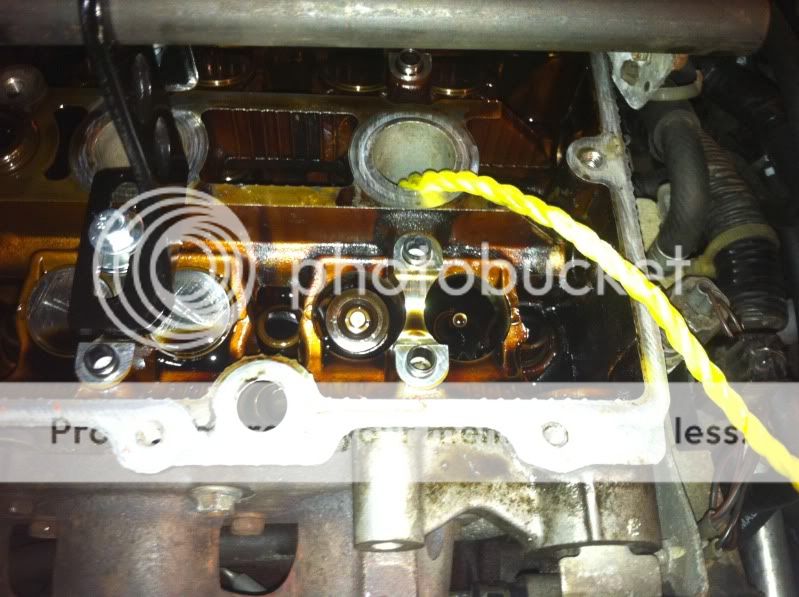
Rotate the crankshaft so the piston of the valves to be messed with is at the BDC. Push the rope through the spark plug hole into the cylinder as much as you can, it can accomodate some 9 ft of it.. Leave the other end out, not to drop into the cylinder...
Rotate the crankshaft BY HAND until the piston compresses the rope against the valves, and you feel the resistance on your hand...
Getting the picture?
The rope will stop the valves form dropping down...
Ok, once you've done that, it is just a matter of compressing the spring a bi to loosen the keepers, removing the keepers, removing the spring, removing the old seal, and replacing the new one, putting the spring back on, kompressing it to put the keepers back, nad voila: movi to the next valve...
YEAH RIGHT!!! In theory!!! but, here are the things and tips you should realise before even statring to think of doing this:
1. While removing the cams, the leftmost console(s) (closest to the cam pulleys will be a pain to un-stick, coz they are glued by the silicone sealant to the head... Be gentle, be patient... When putting back the cams and the leftmost consoles, clean them and reapply some sealant... Otherwise, oil will leak... other consoles do not need sealant...
2. Tighten back the consoles EVENLY, half a turn each, otherwise you risk snapping the camshaft(s)... at the end, tighten them to 11-14 Nm of torque.
3. The cam pulleys need to be removed, MARK the notch positions as they are attached, just as you are unbolting the pulley bolts... Block the cams from spinning by putting the fork or the open end wrench on the hex part of the cam between first and the second pair of lobes... Torque them back to 50-60 Nm...
4. The valve keepers are tiny, VERY TINY!!! It is VERY easy to get them to fly away, to fall into the oil passage, or to lose them... then, you are screwed!!! You'll have to take the entire engine apart... Put plenty of paper to plug all the holes in the head... to prevent this from happening...
5. Do not scratch the cup holes while compressing the spring and retainer...
6. Do not mix-up the intake and exhaust seals, coz they are different diameter.. Intakes are bigger, coz intake valves suffer vacuum, and vaccum closes the seals more... Exhaust ones are smaller to fit the stems tighter, coz exhaust valves (stems) suffer pressure, so the seals have to be tighter...
7. be sure to "feel" the double click while pressing the new seals on, so the grooves on the seals are fit into the grooves on the valve guides. They need to be tight, otherwise, if the seal "unhooks" and lifts and "floats" on the valve, it vill be as not having the seal at all.
8. Be generous on lubrication...
9. Mark every part, and put it back the same way, on the same position. (cups, covers, consoles...)
Here are the very good how-tos I found on the net, read them, and study them....
http://www.shophoenixproject.com/stemseals/stemseals.htm
http://faculty.ccp.edu/faculty/dreed/Campingart/jettatech/camshaftjob/camshaft.htm
http://www.saabcentral.com/forums/showthread.php?t=153593
And a footnote:
-Be aware what you are putting your self in to!
-If all ok, it will take you at least 8 hours to tackle this job...
-The risks are great IF you are not taking precautions...
And of course, I am NOT to blame if something goes wrong and damage occurs...
Of course, I had everything but my camera on my mind when under the hood, so no original pictures, just the ones I had on the web...
Protege OEM valve stem seal manufacturers did not do a great job of making a lasting seals using the finest materials, so... hmmm, sometimes they go broke within first 60 000 miles...
Well, first the symptoms:
As the car stays cool over night, first start next morning it produces a cloud of white-blue smoke, lasting for 5 secs or so...
If your engine does NOT spend coolant (the coolant level stays the same within 3 months) (note the coolant level oscillates as the engine gets warm/cold), AND if you oil doesn't look creamy, (emulsion like, meaning it doesn't contain coolant)
then it means, your head gasket is ok, but your valve stem seals aren't...
The other symptom might be that id doesn't smoke every morning, or at least not as much all the time...
The reason being that depending on the position of you cam(s) when your engine stops, the problematic valve(s)-seals stay opened or closed, so the oil does or doesn't leak into the chamber...
One "on the fly" way of checking the stem seals is to take the spark-plugs out in the morning on a cold engine, and using a flashlight try to get the pistons in to TDC and look at them, if one or more appear to be wet (oily), -> BINGO you got your selves a leaking valve stem seals... (do the test for a couple of mornings, just to be on a safe side)
OK, now, the intro into the procedure...
First, you have to get a new set of seals (intake and exhaust seals ARE different) and and a pair of cam seals, as you will have to take the cams out of the head...
You'll need some SSTs, like:
valve removal players
http://media.uxcell.com/uxcell/images/item/catalog/ux_a08060200ux0208_ux_c.jpg
valve compressor device:
http://www.shophoenixproject.com/stemseals/pics/3.jpg
And a good old torque wrench!!!
All right:
1. Take apart the entire assembly (belts, covers, pulleys) as you were about to change the timing belt, as I wrote in the DIY topic next to this one, EXCEPT you just have to take the timing belt off the cam pulley to take the pulleys off, to take the cams off... (whistle)
Well, one might ask: why then taking all apart, shouldn't just the head (valve) cover and upper plastic cover be enough?
Yes, to start with the procedure, but how will you be able to adjust the belt back on the cams once you are done without being able to see the crankshaft notch, and especially if you need to rotate the pistons up and down while replacing seals???
Ergo, you need to take apart the belts, covers, crankshaft pulley...
2. the basics:
Valves are held closed by a strong (and i mean one badass strong coil spring)...
the end of the spring pushes against the end-cone plate that has a tapered hole in which two small retainers sit, holding the bunch in place...
Not getting the picture? Here it is:
http://www.sweethaven02.com/Automotive01/fig0353.gif
http://www.vanpeltsales.com/FH_web/FH_images/FH_other-pics/valveassy_1948-54.jpg
Try to realize the 101 on the system, coz it is essential!!!
Ok, the spring pushes against the valve retainer but the retainer can not move coz it has been locked by two small tapered valve keepers that are locked into the small groove at the end of the valve stem...
Ok, and on our Mazdas, the entire system is covered by a valve cup, above which the cam lobes operate, pushing the valves down, ergo opening them...
Confused again???
No biggie,
V6, one side taken apart,
cams taken off, cups are visible:
http://www.shophoenixproject.com/stemseals/pics/2.jpg
One cup taken out by a strong pick magnet: Valve retainer and two keepers visible...
http://www.shophoenixproject.com/stemseals/pics/4.jpg
Ok, now, the goal of the operation is to get the spring, keepers and all out of the way, to reach to the stem seal:
There it is, the little bugger!!!!
http://lh3.ggpht.com/_lbtYMre2TDo/S0KJixsJldI/AAAAAAAAD28/lzH9rhJ-IEo/s800/IMG_2173.JPG
but if we take all out, what will keep the valve up?
well, nothing. It will fall down into the cylinder, and you are screwed!!!
Ok, that is the FIRST issue you have to cover, and thankfully, there are some guys who thought of an very convenient trick...
THE ROPE TRICK:
Take a standard issue clothes line rope, some 10 ft of it.
Rotate the crankshaft so the piston of the valves to be messed with is at the BDC. Push the rope through the spark plug hole into the cylinder as much as you can, it can accomodate some 9 ft of it.. Leave the other end out, not to drop into the cylinder...
Rotate the crankshaft BY HAND until the piston compresses the rope against the valves, and you feel the resistance on your hand...
Getting the picture?
The rope will stop the valves form dropping down...
Ok, once you've done that, it is just a matter of compressing the spring a bi to loosen the keepers, removing the keepers, removing the spring, removing the old seal, and replacing the new one, putting the spring back on, kompressing it to put the keepers back, nad voila: movi to the next valve...
YEAH RIGHT!!! In theory!!! but, here are the things and tips you should realise before even statring to think of doing this:
1. While removing the cams, the leftmost console(s) (closest to the cam pulleys will be a pain to un-stick, coz they are glued by the silicone sealant to the head... Be gentle, be patient... When putting back the cams and the leftmost consoles, clean them and reapply some sealant... Otherwise, oil will leak... other consoles do not need sealant...
2. Tighten back the consoles EVENLY, half a turn each, otherwise you risk snapping the camshaft(s)... at the end, tighten them to 11-14 Nm of torque.
3. The cam pulleys need to be removed, MARK the notch positions as they are attached, just as you are unbolting the pulley bolts... Block the cams from spinning by putting the fork or the open end wrench on the hex part of the cam between first and the second pair of lobes... Torque them back to 50-60 Nm...
4. The valve keepers are tiny, VERY TINY!!! It is VERY easy to get them to fly away, to fall into the oil passage, or to lose them... then, you are screwed!!! You'll have to take the entire engine apart... Put plenty of paper to plug all the holes in the head... to prevent this from happening...
5. Do not scratch the cup holes while compressing the spring and retainer...
6. Do not mix-up the intake and exhaust seals, coz they are different diameter.. Intakes are bigger, coz intake valves suffer vacuum, and vaccum closes the seals more... Exhaust ones are smaller to fit the stems tighter, coz exhaust valves (stems) suffer pressure, so the seals have to be tighter...
7. be sure to "feel" the double click while pressing the new seals on, so the grooves on the seals are fit into the grooves on the valve guides. They need to be tight, otherwise, if the seal "unhooks" and lifts and "floats" on the valve, it vill be as not having the seal at all.
8. Be generous on lubrication...
9. Mark every part, and put it back the same way, on the same position. (cups, covers, consoles...)
Here are the very good how-tos I found on the net, read them, and study them....
http://www.shophoenixproject.com/stemseals/stemseals.htm
http://faculty.ccp.edu/faculty/dreed/Campingart/jettatech/camshaftjob/camshaft.htm
http://www.saabcentral.com/forums/showthread.php?t=153593
And a footnote:
-Be aware what you are putting your self in to!
-If all ok, it will take you at least 8 hours to tackle this job...
-The risks are great IF you are not taking precautions...
And of course, I am NOT to blame if something goes wrong and damage occurs...
Last edited:
") I just picked up a '01 Protege DX 1.6 and it hasn't had its timing belt replaced yet. So I am going to tackle this job. Is it the same procedure for the 1.6 as it is for the 1.8 & 2.0?
I just picked up a '01 Protege DX 1.6 and it hasn't had its timing belt replaced yet. So I am going to tackle this job. Is it the same procedure for the 1.6 as it is for the 1.8 & 2.0?