- :
- 2002 BJFW, 2007 BK3P, 1979 SA22C, 2005 BK3P
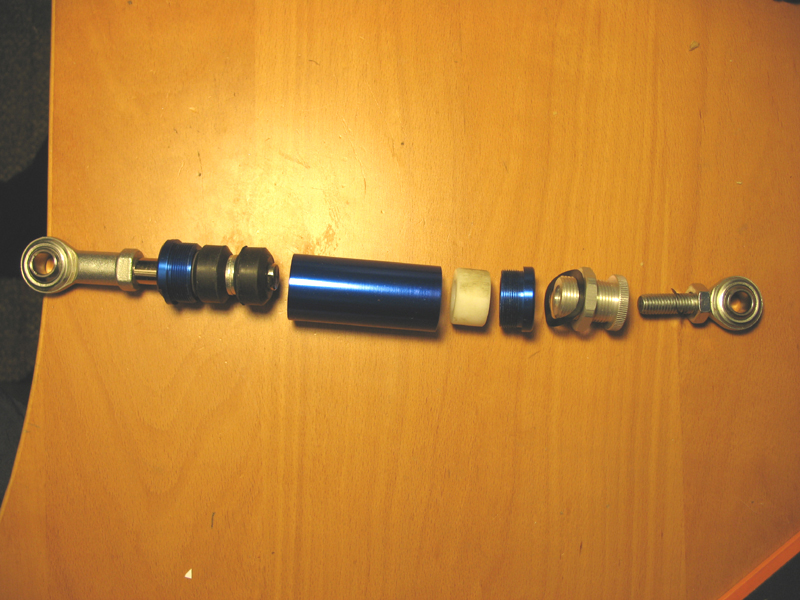
Heard a few people say they were having issues getting this long delayed damper installed. Here is the how to for this damper, which we will be selling from this point on in lieu of Mazda3Mods. It fits easier and better than the WeaponR damper on the mazdaspeed3 and provides a nicer looking addition to the engine bay with all the benefit and none of the negatives from a full replacement mount.
First thing you'll want to do is support the engine. A jack underneath providing just enough tension and support on the oil pan (with a block of wood or other such spacer) will do the trick. Last thing you want is the engine to sag. Makes the install difficult if not impossible.
These nuts on the engine/mount need to come off. They are usually pretty tight so pack some muscle or pack some leverage;


Next, the studs need to come out of the engine. You will be replacing these have no fear. Reverse torx socket is required for this;

Now, place the supplier spacer support atop the bracket;

This is how the bracket and bolts will drop in to the mount;


Tighten these bolts down TIGHT. I do not recommend an air wrench because you do not want strip out the threads on the aluminum.

Almost there. Now we need to remove the three bolts from this plate on the passenger side strut tower and place the new bracket on top;


Now we need to attach the damper to the two brackets with the supplied nuts and bolts as shown;


Once everything is in, retighten and recheck everything. The silver nut on the shaft of the damper itself should be tightened all the way shut for the maximum effect.
Enjoy!

First thing you'll want to do is support the engine. A jack underneath providing just enough tension and support on the oil pan (with a block of wood or other such spacer) will do the trick. Last thing you want is the engine to sag. Makes the install difficult if not impossible.
These nuts on the engine/mount need to come off. They are usually pretty tight so pack some muscle or pack some leverage;
Next, the studs need to come out of the engine. You will be replacing these have no fear. Reverse torx socket is required for this;
Now, place the supplier spacer support atop the bracket;
This is how the bracket and bolts will drop in to the mount;
Tighten these bolts down TIGHT. I do not recommend an air wrench because you do not want strip out the threads on the aluminum.
Almost there. Now we need to remove the three bolts from this plate on the passenger side strut tower and place the new bracket on top;
Now we need to attach the damper to the two brackets with the supplied nuts and bolts as shown;
Once everything is in, retighten and recheck everything. The silver nut on the shaft of the damper itself should be tightened all the way shut for the maximum effect.
Enjoy!
Last edited:
 so we simply cranked them down as tight as we could go