
- :
- Canada
I realized that I had promised a DIY for this process in another thread some time ago (can't seem to find it now), but never delivered. Anyway, better late than never, right?.. Right?? (silly)
This is a DIY How-To for a license plate bulb installation for the 2016-2018 Mazda CX-9 (and 2017-2018 Mazda CX-5). I decided to document this process because there has been a bit of confusion regarding how to remove the plastic bulb covers. Hopefully this clarifies it a bit.
This process was documented/photographed by myself, using my crappy cellphone camera and my 2018 Mazda CX-9 Signature as the "demo" vehicle. This DIY is provided as a learning aid and reference guide. I assume no responsibility for any damages you may inflict on yourself or your vehicle.
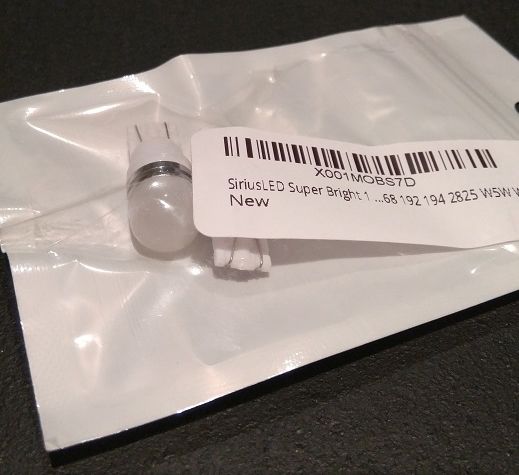
The CX-9 comes factory equipped with standard 194 bulbs. One for the first things I did to the car was upgrade most of the lighting to LED. Initially, I had upgraded to a pair of iJDMtoy LED 194 bulbs. I had used these bulbs briefly in my Lexus IS250 before I sold it. Shortly after I installed them on the CX-9, a few of the LEDS on the left side bulb crapped out and started flickering. I ordered a pair of T10/W5W/198 LED bulbs from SiriusLED on Amazon.ca to replace them.

What you'll need:
- Flathead screwdriver
- License plate bulbs (194/T10/W5W)
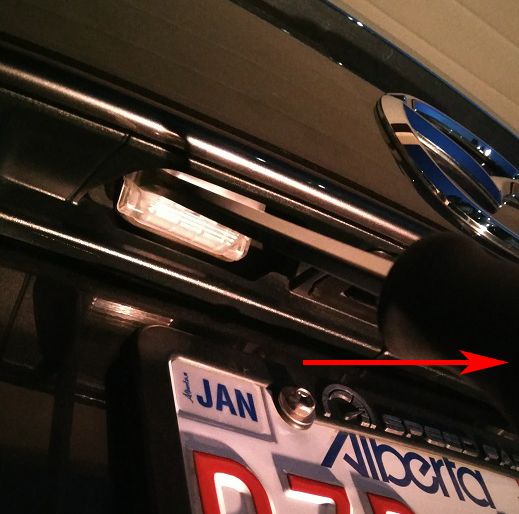
1. Open the liftgate to a comfortable working height that won't have you bending at weird angles. When the liftgate is in operation, you can press the door open/close button (by the license plate or by the latching mechanism on the inside) to stop it at your desired working height.
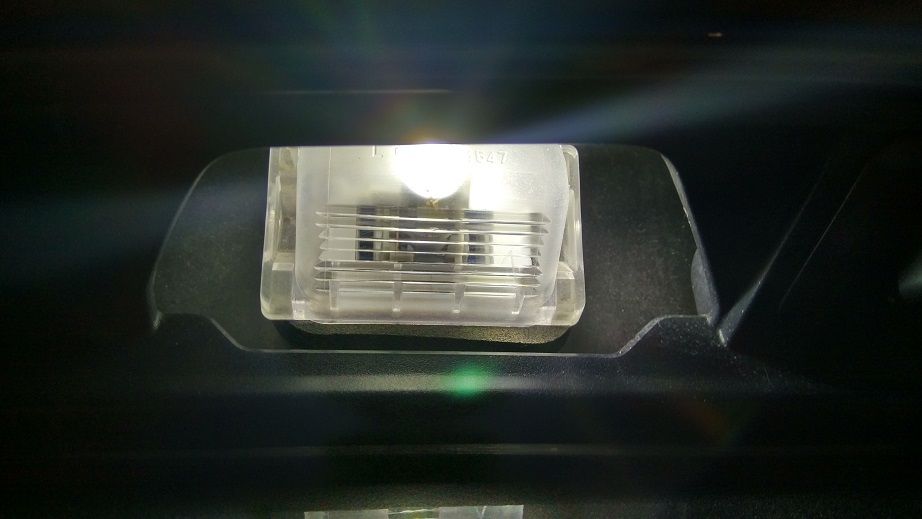
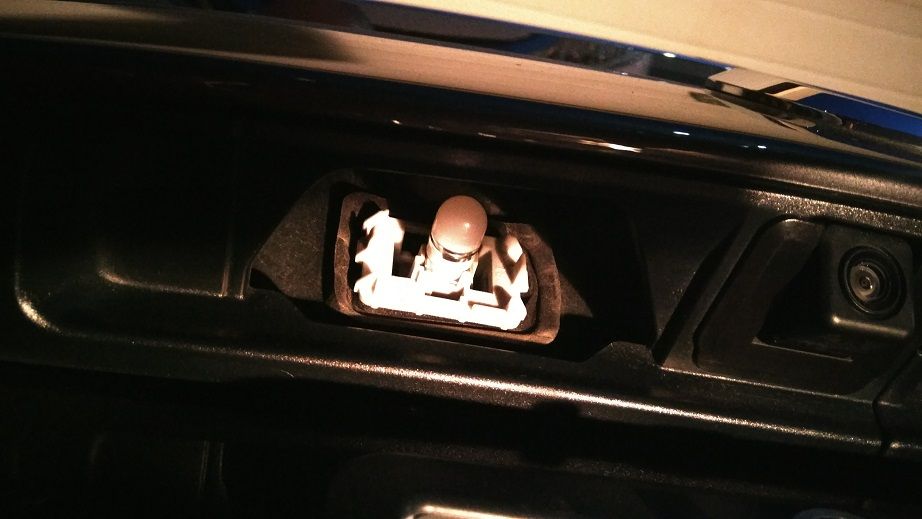
This next step is probably the hardest, which is removing the plastic covers. Here's what they look like:

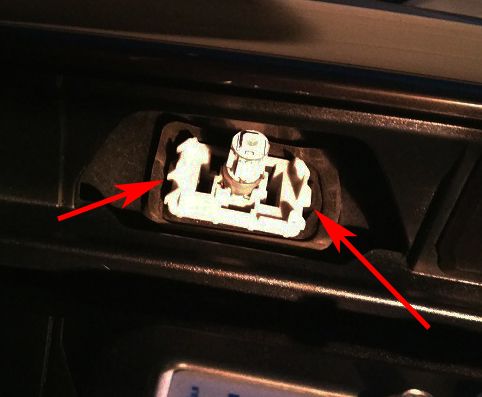
As you can see, each side has a slot that you can fit a flathead screwdriver into. Now, the reason these can be difficult to remove is because of the way they clip on to the bulb holder. In the photo below, you can see that the holder actually hooks on to the cover. Typically, it's the other way around.

With that said, here's what I did to remove them.
2. Insert the flathead into the slot of the cover that is furthest from the centre. If you're removing the cover on the left side, the flathead should be in the left slot of the cover, and vice versa for the other side.
3. Now push the screwdriver "in", towards the centre of the car. Gradually apply smooth, controlled pressure, and don't jam it back and forth. You might have to crank it pretty far before the cover pops off. Note: The bulb holder is also a bit loose by design, so if you notice that the entire assembly moves a bit while you're applying pressure, don't worry, that's normal.

4. With cover off, you can now easily swap the installed bulb for the new bulb. You just pull the old ones out and pop the new ones in. Ensure that you test each bulb before you put the covers back on by switching on your parking lights.

5. Reinstall the covers. They basically just snap right on, but require a bit of elbow grease.
And you're done! Hope this helps you guys out a bit")
This is a DIY How-To for a license plate bulb installation for the 2016-2018 Mazda CX-9 (and 2017-2018 Mazda CX-5). I decided to document this process because there has been a bit of confusion regarding how to remove the plastic bulb covers. Hopefully this clarifies it a bit.
This process was documented/photographed by myself, using my crappy cellphone camera and my 2018 Mazda CX-9 Signature as the "demo" vehicle. This DIY is provided as a learning aid and reference guide. I assume no responsibility for any damages you may inflict on yourself or your vehicle.
The CX-9 comes factory equipped with standard 194 bulbs. One for the first things I did to the car was upgrade most of the lighting to LED. Initially, I had upgraded to a pair of iJDMtoy LED 194 bulbs. I had used these bulbs briefly in my Lexus IS250 before I sold it. Shortly after I installed them on the CX-9, a few of the LEDS on the left side bulb crapped out and started flickering. I ordered a pair of T10/W5W/198 LED bulbs from SiriusLED on Amazon.ca to replace them.
What you'll need:
- Flathead screwdriver
- License plate bulbs (194/T10/W5W)
1. Open the liftgate to a comfortable working height that won't have you bending at weird angles. When the liftgate is in operation, you can press the door open/close button (by the license plate or by the latching mechanism on the inside) to stop it at your desired working height.
This next step is probably the hardest, which is removing the plastic covers. Here's what they look like:
As you can see, each side has a slot that you can fit a flathead screwdriver into. Now, the reason these can be difficult to remove is because of the way they clip on to the bulb holder. In the photo below, you can see that the holder actually hooks on to the cover. Typically, it's the other way around.
With that said, here's what I did to remove them.
2. Insert the flathead into the slot of the cover that is furthest from the centre. If you're removing the cover on the left side, the flathead should be in the left slot of the cover, and vice versa for the other side.
3. Now push the screwdriver "in", towards the centre of the car. Gradually apply smooth, controlled pressure, and don't jam it back and forth. You might have to crank it pretty far before the cover pops off. Note: The bulb holder is also a bit loose by design, so if you notice that the entire assembly moves a bit while you're applying pressure, don't worry, that's normal.
4. With cover off, you can now easily swap the installed bulb for the new bulb. You just pull the old ones out and pop the new ones in. Ensure that you test each bulb before you put the covers back on by switching on your parking lights.
5. Reinstall the covers. They basically just snap right on, but require a bit of elbow grease.
And you're done! Hope this helps you guys out a bit
Last edited:


