Last month I installed a direct-fit Class I trailer hitch on my 2012 Mazda5.
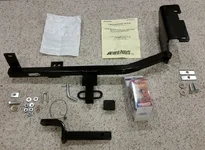
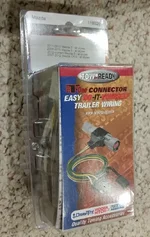
Hidden Hitch #60291 purchased from Carid.com. I bought the hitch originally in January as part of a great post-Xmas deal. I went with the Hidden Hitch because the price paid includes the draw bar unlike other hitches from Draw-tite or Reese. Along with the hitch I bought a Mazda-specific trailer wiring kit (Draw-tite Tow Ready #118520). The nice thing about this wiring kit is the fact that it connects in-series using the existing electrical connectors between the tail light assembly and the vehicle wiring harness.
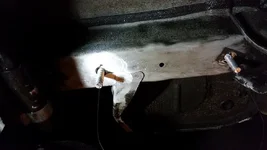
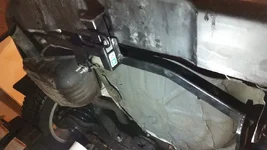
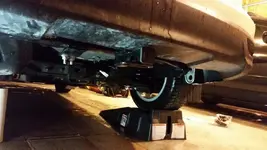
The most difficult part of the hitch install was doing it alone, having to hold the heavy hitch up against the mounting points, getting the bolts through the holes and starting to thread on the nuts. There was one hole in the frame that needed to be enlarged in order to fish some mounting hardware up into position. This was done with a 3/8 inch drill bit and a bit of filing (see image below). I made sure to paint newly exposed metal before final mount of hitch.
Per the instructions with the wiring kit, I mounted the controller in the driver's side rear storage compartment near the jack mount. I also drilled into the metal near the jack mount to use as the grounding point for the system as well. The wires to tap into the passenger side lights were routed beneath the trim panel at the back of the trunk area. The most difficult part of the wiring install was routing the power wire from the rear of the car up to the engine compartment to connect to the battery, with in-line fuse.
Hidden Hitch #60291 purchased from Carid.com. I bought the hitch originally in January as part of a great post-Xmas deal. I went with the Hidden Hitch because the price paid includes the draw bar unlike other hitches from Draw-tite or Reese. Along with the hitch I bought a Mazda-specific trailer wiring kit (Draw-tite Tow Ready #118520). The nice thing about this wiring kit is the fact that it connects in-series using the existing electrical connectors between the tail light assembly and the vehicle wiring harness.
The most difficult part of the hitch install was doing it alone, having to hold the heavy hitch up against the mounting points, getting the bolts through the holes and starting to thread on the nuts. There was one hole in the frame that needed to be enlarged in order to fish some mounting hardware up into position. This was done with a 3/8 inch drill bit and a bit of filing (see image below). I made sure to paint newly exposed metal before final mount of hitch.


Per the instructions with the wiring kit, I mounted the controller in the driver's side rear storage compartment near the jack mount. I also drilled into the metal near the jack mount to use as the grounding point for the system as well. The wires to tap into the passenger side lights were routed beneath the trim panel at the back of the trunk area. The most difficult part of the wiring install was routing the power wire from the rear of the car up to the engine compartment to connect to the battery, with in-line fuse.


