
You are using an out of date browser. It may not display this or other websites correctly.
You should upgrade or use an alternative browser.
You should upgrade or use an alternative browser.
What have you done to your CX-5 today?
- Thread starter Kayger12
- Start date
7eregrine
2016 CX5 GT
- :
- Land of Cleve
- :
- 2016 CX5
I bought some Blizzaks mounted on steelies.
And then we got snow for about 2 weeks in November and December. And that was it... They sat in the garage and gathered dust. LOL
Confused. You took them off after December?
Ordered some near 100k mile maintenance parts.. not many with free shipping still and local dealers don't seem willing to price match. Nothing wrong with current tensioner but just a matter of time...and making job easy on myself with a little less RTV to scrape on the AT pan.
Ordered from Med Center

Ordered from Med Center
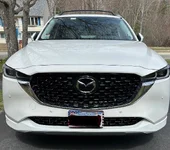
Lower front mesh grille installedFinally had temps high enough to apply the weathertech bumper topper
Before/after/comparison to my blue 21 cx5 with an eBay carbon fiber protector
Lower front mesh grill installedInstalled:
VIOFO A229 plus to ‘25 CX5 Premium Plus
Had no luck getting the power using the VIOFO hardwire kit, so ordered a DONGAR 10-A adapter and installed to the back of the rear view mirror…so simple and works great for those of us that won’t use parking mode
Car came with low wall all weather mats which lacked coverage, upgraded to
3DMAXspider Kanu front and back, much nicer coverage and look
Order OEM truck liner, not a fan of the 4 pieces , wish I ordered the 3DMAXspider for the trunk. My bad
Tymate wireless TPMS
American flag license plate frame
Waiting for temps to increase before installing:
WeatherTech bumper topper
Lower front mesh grill
Door sill protectors
Fortin One car starter
Attachments
I just had the diff and transfer case serviced too! I also had the transmission fluid and filter as well as he oil changed.Changed diff and transfer case fluid. Easy job.

Those lower grills are such great, easy, and inexpensive upgrade!Lower front mesh grille installed
Lower front mesh grill installed
If I'm not mistaken, they were the very first modification I did to my 5.
gtbigup
24 CX-5 SIG
This.

First time doing it on my CX-5. Love to easy access to the filter. Amazingly the same filter cup to remove it, is the exact fit I just bought from my local motorcycle dealer for my 25 Honda Goldwing filter. Its a bike master, and while I no longer have the part number from the package, inside the wrench says 65/14
First time doing it on my CX-5. Love to easy access to the filter. Amazingly the same filter cup to remove it, is the exact fit I just bought from my local motorcycle dealer for my 25 Honda Goldwing filter. Its a bike master, and while I no longer have the part number from the package, inside the wrench says 65/14


Did headlight surface restoration and protection on the headlights, today. Used the Cerakote Ceramic Headlight Restoration kit #AH-HLKIT. Well, one of the headlights, anyway. (Only had time for one of them, today.)
Instructions are, basically: clean off as much of the surface gunk as possible, with the included wipes; sand with 2000 grit and lots of water; then sand with 3000 grit and lots of water. Could have gotten some 6000 grit, but didn't bother. In my case, I then followed up with the Menzerna 3800 final polish, to ensure the last of any micro-swirls and hazing was eliminated. Fully flush the lens surface with lots of water, wiping with several different clean microfiber cloths; then dry completely, including every nearby crevice. Apply the single ceramic wipe across the lens, then let dry a couple of hours. I watched it for 1hr to ensure no gunge from the nearby trees wafted onto the still-wet surface.
Turned out amazingly well. Impressed. The coating is supposedly a "lifetime" coating. We'll see, but it is about as transparently clear as I can detect, now. Compared to the previous ugly haziness from UV damage to the lens's coating, it's absolutely night and day.
Photos of both lenses -- one untreated, one coated and finished. Apologies for the size of these things, but any smaller and the detail and clarity wouldn't be so obvious.
Untreated RH side lens:
Coated and finished LH side lens:
N7turbo
2023 CX-5 2.5T ... 2024 MX-5 RF GT
I highly recommend clear ppf on the headlights to keep them that way.Did headlight surface restoration and protection on the headlights, today.
Last edited:
Did headlight surface restoration and protection on the headlights, today. Used the Cerakote Ceramic Headlight Restoration kit #AH-HLKIT. Well, one of the headlights, anyway. (Only had time for one of them, today.)
Instructions are, basically: clean off as much of the surface gunk as possible, with the included wipes; sand with 2000 grit and lots of water; then sand with 3000 grit and lots of water. Could have gotten some 6000 grit, but didn't bother. In my case, I then followed up with the Menzerna 3800 final polish, to ensure the last of any micro-swirls and hazing was eliminated. Fully flush the lens surface with lots of water, wiping with several different clean microfiber cloths; then dry completely, including every nearby crevice. Apply the single ceramic wipe across the lens, then let dry a couple of hours. I watched it for 1hr to ensure no gunge from the nearby trees wafted onto the still-wet surface.
Turned out amazingly well. Impressed. The coating is supposedly a "lifetime" coating. We'll see, but it is about as transparently clear as I can detect, now. Compared to the previous ugly haziness from UV damage to the lens's coating, it's absolutely night and day.
Photos of both lenses -- one untreated, one coated and finished. Apologies for the size of these things, but any smaller and the detail and clarity wouldn't be so obvious.
Untreated RH side lens:
View attachment 382622
Coated and finished LH side lens:
View attachment 382623
I used the same kit on my mother's 2002 Jeep Liberty Sport with the same results. The kit does wonders with minimal effort.
I highly recommend clear ppf on the headlights to keep them that way.
Yup. All of my cars have clear PPF on the headlights. I had mine done shortly after taking delivery of my 2025.
- :
- Mazda CX-9 Signature
But when the ppf fails, wouldn't it take the coating off the headlights to?
N7turbo
2023 CX-5 2.5T ... 2024 MX-5 RF GT
If it's indeed a real ceramic coating, then no.But when the ppf fails, wouldn't it take the coating off the headlights to?
But their lifetime claim is surely false. Ceramic coatings last 6 months to a few years in real world use.
The point of the ppf is to help prevent the oxidation and scratches that clouded the headlight in the first place.
N7turbo
2023 CX-5 2.5T ... 2024 MX-5 RF GT
The only reason I haven't is because:Yup. All of my cars have clear PPF on the headlights. I had mine done shortly after taking delivery of my 2025.
1. They are at least ceramic coated which helps me clean the bugs off
2. The car has been driven 10k miles in 2.5 years and has been garaged a lot.
So it just doesn't see the kinds of stresses that ruin headlights.
New Posts and Comments
- Replies
- 3
- Views
- 487
- Replies
- 166
- Views
- 18K
- Replies
- 22
- Views
- 691
New Threads and Articles
-
-
-
Source for 1997 Mazda Protege right turn light assembly?
- By presque47
- Replies: 0