Protegekid504
Member
- :
- 2000 Mazda Protege ES
Hey ive been pretty budgeted lately but ive been DYING to work on my car. Soo i decided to black out my headlights. This is for a 2000 3g protege ES, but i bet you could probly figure out how to do it on your own if you have another year or anything. I got halfway done with this before but it got closed, (notcool) sooo im redoing it.
Here it goes DIY HEADLIGHT BLACK OUT
TOOLS
1) phillips screwdriver
2) flathead screwdriver
3) 10mm socket w/ wrench
4) Wide flathead screwdriver (not neccisary but helps remove lens of the headlight easier without marks)
5) oven
6) sandpaper (200-300 grit)
7) black paint and clear coat
This project isnt that hard but it just requires patience and DETAIL. But worth the results on a budget.
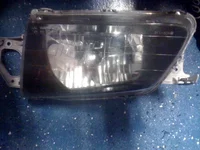
1) First off is removing the electrical connector behind the headlight, all you have to do is squeeze the sides and is should just slip off. After that you need to remove the two phillips head mounting screws on the top of the headlight. One of these screws is holding in the turn indicator light which is the next step, once unscrewed pop out the turn indicator light housing enough to where you can get to the other electrical connector in the back (dont pull the wires too tight so you dont damage them). All you have to do is rotate the connector (i cant remember which way but its easy) and it should just slip out. Then you can move the housing out of the way. Next is the headlight, the last thing holding it in is two 10mm bolts right where the turn indicator housing was that holds the plastic to the frame. After you remove those two bolts you should see that the headlight is free. To remove the headlight your gonna need to do some wiggling and rotating (you might find it helpfull to unbolt the 1/4 panel to give more clearance). And there you go HEADLIGHT OUT! (cabpatch)
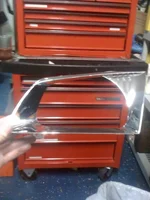
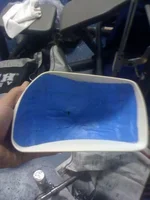
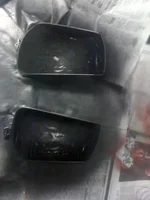
2) First off you need to remove all rubber pieces and the bulb from the headlight, there should just be 2 rubber elbows and the rubber covering the bulb (the reason for this is for when it goes in the oven). Once its all removed preheat your oven to 200 degrees, once its there put one headlight in the oven on a baking sheet with a wet towel or something lens down. Leave the headlight in the oven for about 8-12 minutes approx. Before you take out the headlight make sure you have your flathead, take it out and carefully pry the lock tabs up and put your flathead in-between the two sections of the headlight and pry them apart. (the reason for a wide flathead is that is will pry better and not make as many marks on the plastic, but any flathead is fine) Once pried apart you will see there are two parts to the chrome inside piece, an outside retainer and the bulb housing. Which is pictures 2 and 5. the retainer is held in by two philips screws and the bulb housing is held in by two 10mm bolts on the back of the headlight and an inside pop clip. (one side note one of the 10mm bolts is for some reason covered, i have no idea why..., but the cover is held on with a special screw that you can remove with just a vice grip or a pliers) once both pieces are removed your ready for sanding! (cool)
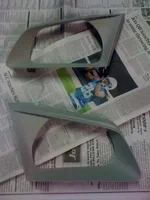
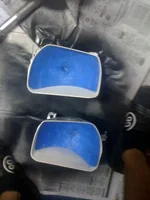
3) Now its sanding time, its not hard but requires patience and detail. First figure out where you wanna cover in black. You can see in my pictures 3 and 5 i sanded the whole retainer and the top bottom and one side of the bulb housing. But the great thing about this is you can do whatever you want!! (attention)( Make sure you DO NOT sand off the chrome on the back part of the bulb housing cause this is where the headlight reflects off of and it needs to be shiny and reflective!) But be creative its your car!! Make sure to sand down to the tanish gray factory color, do not leave any chrome where your gonna paint. After your done sanding and its clean tape off all the parts you dont want paint to get on like i did in picture 5!!! Now its paint time!
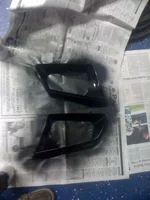
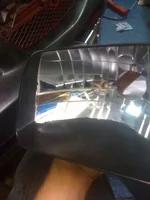
4) Once you've cleaned the pieces off your ready to paint, i did the retainers and the bulb housings different as seen in pictures 3, 4, 6, and 7. When i did the painting i did 3 coats of black and 2 coats of clear coat. Make sure you dont over do it on ANY of the painting cause you want a nice non blotchy or runny paint job. If you have to do more light coats it just depends on how good you are at spray painting. MAKE SURE you wait about 15-20 minutes between coats, they should be dry to touch before the next coat. (i put mine under a fan so it sped up the drying process). Once all the pieces are dry you can go ahead and place them back into the headlight. My finished product is pictures 4, 8, and 9. Putting them back in is reverse of the removal process.
5) When you get the pieces into the headlight you have to put the two pieces back together. What i did was just used a heat gut on the glue to soften it and push them back together right then and there. If not you can do the same oven process but i dont think you will have to put it in as long, maybe about 5-10 minutes then take it out and push it back together. When you finally did all that all you have to do is put the bulb and rubber stuff back on then put the headlight back in the car. (which is the exact same as removal but in reverse)
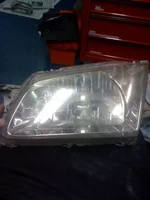
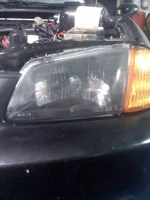
6) The finished product should look really nice i know mine did!! My finished pics are pic 10 (out of car) and 11 (in car). Which is a big difference from picture 1 lol.
Hopefully you find this informative enough and you people on a budget like me this is a good few hours to spend for the results! This is my first thread and everything so gimme some feed back!! Good luck!! (cabpatch)
I COULDNT ATTACH ALL PHOTOS SO ILL PUT THE REST UP AFTER THIS POST
Attachments
Last edited:

