You are using an out of date browser. It may not display this or other websites correctly.
You should upgrade or use an alternative browser.
You should upgrade or use an alternative browser.
Clear corners for MP5
- Thread starter CyberFormula
- Start date
Yeah, but I MUCH prefer these clear markers and they already cost me $37 US for these. No way I was gonna buy another set. Besides, no matter what I'd buy, if they don't have the exact shape and mounting method as the stock lights, I'd still see a heavy outline around the lights. If your bumper has never been painted, less work for you. I'm a professional model-maker, so I enjoy these types of projects... Just wish the weather would cooperate!
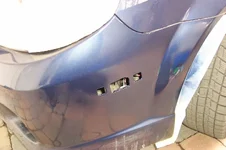
yeah, I actually thought about removing them completely, but I just spent $$ on these. I have a "look" in mind I wanna see through  As for the compound, it wouldn't have worked. The step is really noticeable and even more so on the passenger side. In any case, if I want to fill the gap *which I do, then I'd have no choice but to paint anyway.
ThanksWeborific said:BTW, iLisa, LOVE your P5. I looked long and hard at her when deciding what color to paint my calipers and which lights to buy. I opted for white lights rather than clear, and I bought orange paint for calipers, but might actually go with silver or black. Mine are naturally orange right now...unfortunately from rust!!
you have a pm.. (yes)
CyberFormula
Member
- :
- 2002 Mazda Protege 5, 2000 Cougar V6
Wow so much work just to get the sidemarkers on. I think that sidemarker looks pretty good on the picture so I was gonna buy the exact same one off ebay but I guess I wont do that anymore. Hopefully I can find one that doesn't require nearly that much work. Well good luck on your project. Please do post more pics once you get everything done.
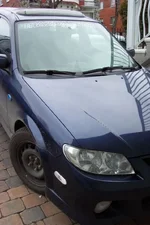
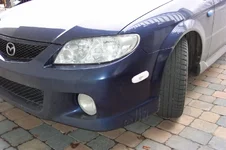
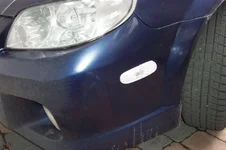
Well, i installed the lights. Here's the end result. No more gaps. No more paint outline of where the old marker was. The only thing that's left for me to do is wet-sand the paint with 1000-2000 grit, then polish. Good as new.
Attachments
silverpro5
Member
- :
- P5
CyberFormula said:Wow so much work just to get the sidemarkers on. I think that sidemarker looks pretty good on the picture so I was gonna buy the exact same one off ebay but I guess I wont do that anymore. Hopefully I can find one that doesn't require nearly that much work. Well good luck on your project. Please do post more pics once you get everything done.
There are a couple different Celica bumper lights to be found on Ebay, I think he ordered the "wrong" ones. Other ppl seem to get ones that fit w/o any modification other than inverting them.
I really want to give it a shot sometime soon, that yellow on my beautiful silver car makes me puke.
(thumb)Weborific said:Well, i installed the lights. Here's the end result. No more gaps. No more paint outline of where the old marker was. The only thing that's left for me to do is wet-sand the paint with 1000-2000 grit, then polish. Good as new.
- :
- 2006 Infiniti M
looks a goodsa
New Posts and Comments
- Article
- Replies
- 0
- Views
- 32
- Replies
- 21
- Views
- 2K
New Threads and Articles
-
For Sale Got tons of extra parts for mazda protege protege5 engine 2trans
- By JP mp5 VA
- Replies: 0
-
-


