Fiberglass Enclosure

livelyjay said:
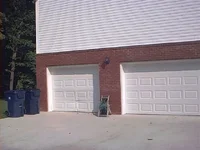
Very nice work. You should feel priveledged to have a garage to work in. I'll have to do my work on my cold a$$ porch this weekend and piss off the neighbors with the smell and noise from my dremel.

Yeah, the garage is very nice to have. I added a heater 2 years ago, so now I can work out there year round. Growing up I never had a garage to work in, so when I bought a house I swore that it would have a nice garage.
 
chuyler1 said:
Very nice work. I would finish it off with vinyl. Carpet requires no sanding but doesn't show off your handy work very well. Paint looks cool but requires endless sanding and will probably chip when you put things in your trunk. Vinyl is the best of both worlds. Its more durable than paint but it shows off the contours of your fiberglass work better than carpet.

I am actually thinking of finishing it in a light grey suede. I am going to wrap the A pilars in suede, so it will kind of go with that. I am also thinking of doing something custom with the rear deck lid, and I could cover that in suede too. Just trying to look at all of the options at this point.
 
cosigns, get marine grade.
chuyler1 said:
Very nice work. I would finish it off with vinyl. Carpet requires no sanding but doesn't show off your handy work very well. Paint looks cool but requires endless sanding and will probably chip when you put things in your trunk. Vinyl is the best of both worlds. Its more durable than paint but it shows off the contours of your fiberglass work better than carpet.
 
Next step, hit the glass with a 60 grit sand paper and then clean it off and go right to bondo. Don't even try to sand the fiberglass, its pointless. YOu should tape off the car again, but use drop cloth platic behind it as you no longer need shape. THen put the mold back in the car and bond around the endges so that all of the gaps are completely covered in and it will be a perfect fit. Then start bonding the rest of the mold.

You can make it even eaiser and use a high build spray on primer like feather fill. THis will cover in the little bumps so that you can be sure bondo will grab all the way through.

I would go with vinyl that matched your suede. Being in a trunk, this thing will eventualy take a beating and suede isn't the best for that task. www.selectproducts.com has a great assortment of vinyles that are ment for car audio applications. While there, you may want to get some of there spray on vinyle adhesive. Its really called Polypropalene.


Next time you do this, don't fiberglass the exterion at all. Use a thick polyester fleece and stretch over the entire mold exactly like you want it. Then use a mix of fiberglass resin and fiber reinforced bondo and just poor that on in to the enclosure. That will make it insanely strong and you will never have to worry about all the BS that comes with sanding Fiberglass again. All you need is a few coats of high build primer and your done other then some mild sanding.
 
Last edited:
Then use a mix of fiberglass resin and fiber reinforced bondo and just poor that on in to the enclosure.

I have never heard of this technique. What are the exact steps? I would think the bondo would weigh down the fleece and cause it to stretch unevenly. Wouldn't it be best to soak the fleece with fiberglass resin (w/ hardener), let it cure, then do a layer or two of the fiber-reinforced bondo, then finish it off with regular bondo?
 
chuyler1 said:
I have never heard of this technique. What are the exact steps? I would think the bondo would weigh down the fleece and cause it to stretch unevenly. Wouldn't it be best to soak the fleece with fiberglass resin (w/ hardener), let it cure, then do a layer or two of the fiber-reinforced bondo, then finish it off with regular bondo?

I will clarify

The fleece is the shape, it will never be the strnegth. So I stretch the fleece of the complete framing until it looks like what I want it to. Then I resin the fleece. Note, never resin the fleece that is wrapped behind the frame as it will throw things off. Once cured, I cut out the holes for the sub, amp, whateve, and mix up a 50/50 mix of resin and fiberglass reinforced bondo. Then poor that mix into the box and let it sit and cure around the joints of the fleece and frame. Obviously, you have to let one side cure per poor or you will be swimming in one hell of a mess. Use a little at first on the seems as if you use too much it will eat the spray glue used to adhere the fleece to the wood and again you'll have a nasty mess to deal with. Once a lite coating is on the seems, I poor a BAJESUS into the mold and start bulking up all of the fleeced areas from the back. This way, the enclosure can be as thick as you want and infanitly strong, all while not messing up the exact external shape you were going for. Once thats done, sand the exterior with some 60 grit to get the major bumps out of the fleece and use a high build primer to fill in the rest. Doing it this way will save 5 days worth of sanding and will all but guarentee a paintable fiberglass box.
 
I'll be working on mine this weekend. Hopefully I'll be able to measure out the right amounts of resin and hardener, because it's cold as hell out and you need more hardener when it's colder out.
 
Concept MSP said:
Yeah, the garage is very nice to have. I added a heater 2 years ago, so now I can work out there year round. Growing up I never had a garage to work in, so when I bought a house I swore that it would have a nice garage.

No doubt! I worked in the cold or heat/mosquitos for years, then when it came time to build a house I designed a 3-car garage and built a house around it. "Yeah, I guess we should have a bedroom or two and a bathroom, maybe a kitchen...whatever..."

Disregard the crunched single door. My psycho ex did that thinking she would crunch my 10th Anniversary Trans Am that lies just beyond it. Gotta love women.

Sorry for the threadjack. Great job on the enclosure. I agree with doing it in vinyl. I bought an extra stock enclosure just so I could play with enlarging it for better sound. Any chance you'll make another of these for a fee? It would be much easier the second time around.
 

Attachments

  • Sep12#45.webp
    Sep12#45.webp
    39.5 KB · Views: 175
Last edited:
Well, it has been a while since I posted pictures of the project. Here is the enclosure after 3 layers of Bondo and a lot of snding with 40, 80, 150, 120, 220:

DSC06667.JPG


DSC06668.JPG


DSC06670.JPG


Against the suggestions from most of the people here I decided to cover the enclosire in a black microfiber suede.

DSC06702.JPG


DSC06697.JPG


DSC06699.JPG


I also molded the tweeters from the Alpine Type R Components into the A Pilars and wrapped them in a light grey microfiber suede.

DSC06691.JPG


DSC06692.JPG


So, everything for the audio system is pretty much done now. I would still like to replace the Kenwood head unit, but that may have to wait.
 
Very nice work on the A-pilars (and the box also). That has got to be one of the ugliest subs I've ever seen though. I hope it sounds better than it looks.

How is the staging with the tweeters mounted there?
 
The Phoenix Gold Sub sounds very good, and I don't think that it looks that bad. I guess the fact that it performed well in a small enclosure was more important than looks to me.

The front staging is good. It sounds very clean & clear, and the highs and mids blend well together. The sound is not a seperated as you might think with the tweeters mounted so far from the mids.
 
I've got mine in the factory locations and it sounds decent...but it doesn't reflect across the windshield as well.

I just have this urge to rip that plastic thingy off the sub. I'm glad it sounds good though.
 
1sty said:
I will clarify

The fleece is the shape, it will never be the strnegth. So I stretch the fleece of the complete framing until it looks like what I want it to. Then I resin the fleece. Note, never resin the fleece that is wrapped behind the frame as it will throw things off. Once cured, I cut out the holes for the sub, amp, whateve, and mix up a 50/50 mix of resin and fiberglass reinforced bondo. Then poor that mix into the box and let it sit and cure around the joints of the fleece and frame. Obviously, you have to let one side cure per poor or you will be swimming in one hell of a mess. Use a little at first on the seems as if you use too much it will eat the spray glue used to adhere the fleece to the wood and again you'll have a nasty mess to deal with. Once a lite coating is on the seems, I poor a BAJESUS into the mold and start bulking up all of the fleeced areas from the back. This way, the enclosure can be as thick as you want and infanitly strong, all while not messing up the exact external shape you were going for. Once thats done, sand the exterior with some 60 grit to get the major bumps out of the fleece and use a high build primer to fill in the rest. Doing it this way will save 5 days worth of sanding and will all but guarentee a paintable fiberglass box.

Great tips. Add this to my list of upcoming projects.

R
 
What kind and where did you get your material to do the covering. I looked everywhere and couldn't find any microfiber or suede other than small reminants.
 

New Threads and Articles

Back