While I was sitting watching foreign action movies yesterday (one Korean, one Japanese) my mind was ticking over as it does sometimes. During this I realized that when I made the adjustment to the rear Ohlins I didn’t achieve what I was going for. I completely blew past the fact that the zero starting point for the adjustment was with the valve fully closed (so the hardest rebound setting). What I had done was stiffen the rear rebound from the initial setpoint. So today I cracked into the trunk and moved the right knob throughout its range so I knew where to go. I counted 33 clicks from full hard to full soft. Since I had set them (well one at least) to ten less than that previously and I was trying for something different, I went with five fewer clicks than full soft. That put me at 28 clicks on both sides. I set both rear shocks (with no more metal cuts from the left one, I can learn sometimes) to that and then drove to the store for an errand. Short run but in that time I could tell a difference in not getting tossed around as much. There are enough bumps in the pavement that I am familiar with to give me a good indication of where my ride is now. I’m happy with this. Be nice once the roads are clear of all the winter crud and I can flog her on a backroad run to see just how much better things are.

You are using an out of date browser. It may not display this or other websites correctly.
You should upgrade or use an alternative browser.
You should upgrade or use an alternative browser.
NB MX-5 Hey, it's Minnie!
- Thread starter chiefmg
- Start date
- :
- 92 & 16 Meyatas
YES!Great to see that you are getting the car dialed in before MATG.")
Hush you. You're gonna jinx me and I'll get stuck on the ship again.Great to see that you are getting the car dialed in before MATG.
- :
- 2016 GT ST 47A
Who, me? I said nothing....Hush you. You're gonna jinx me and I'll get stuck on the ship again.
Picked up one of the grandsons from school today. While waiting I put the front shock rebound at 15 clicks (softening it some). I like the ride better, it helped when some jackass in a rusty work van almost ran into me in a roundabout and I had to climb the curb.
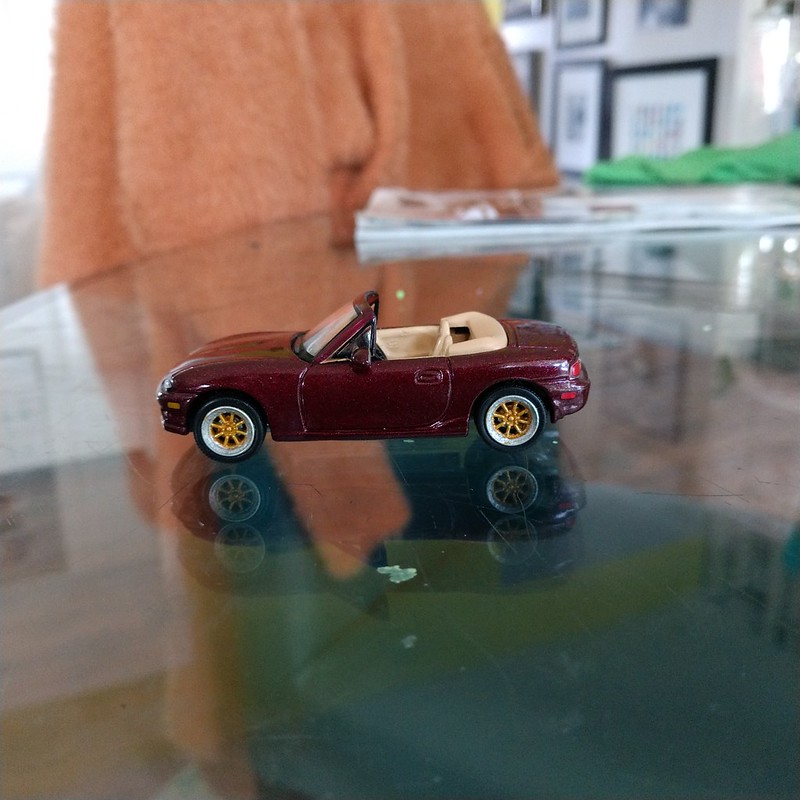
When you have time on your hands, you discover a set of wheels on a Hot Wheels diecast that match the ones on your car. You buy said car to obtain the wheels, then remove them for painting. You also remove the wheels from a Johnny Lightning diecast that is exactly your car (color combo/year), only to find the wire axle that company uses is smaller than what Mattell uses. You then buy a numbered drill index, dig around to find a pin vise bought decades ago for modeling purposes and open the slots in the JL chassis to accept the HW axles. Finished result is almost a match for mine (just missing the rear spoiler). Will give me something to look at while gone.
When you have time on your hands, you discover a set of wheels on a Hot Wheels diecast that match the ones on your car. You buy said car to obtain the wheels, then remove them for painting. You also remove the wheels from a Johnny Lightning diecast that is exactly your car (color combo/year), only to find the wire axle that company uses is smaller than what Mattell uses. You then buy a numbered drill index, dig around to find a pin vise bought decades ago for modeling purposes and open the slots in the JL chassis to accept the HW axles. Finished result is almost a match for mine (just missing the rear spoiler). Will give me something to look at while gone.
- :
- 92 & 16 Meyatas
Very cool Mike! Here’s mine…Picked up one of the grandsons from school today. While waiting I put the front shock rebound at 15 clicks (softening it some). I like the ride better, it helped when some jackass in a rusty work van almost ran into me in a roundabout and I had to climb the curb.
When you have time on your hands, you discover a set of wheels on a Hot Wheels diecast that match the ones on your car. You buy said car to obtain the wheels, then remove them for painting. You also remove the wheels from a Johnny Lightning diecast that is exactly your car (color combo/year), only to find the wire axle that company uses is smaller than what Mattell uses. You then buy a numbered drill index, dig around to find a pin vise bought decades ago for modeling purposes and open the slots in the JL chassis to accept the HW axles. Finished result is almost a match for mine (just missing the rear spoiler). Will give me something to look at while gone.
Attachments

It's nice finding your car in a diecast. I had to wait a long time to get one of my RX-7 (we're talking decades). I was surprised that JL made one for my specific trim, I have a small store of them.
FYI the one you have states it's 1/64 scale but I am not sure about that. Before I found the HW miata with my wheels, there was one of the MiniGT NAs in silverstone with my wheels already in gold. I bought it but when I went to swap the wheels I found they were markedly smaller than the ones for the JL. HW and JL seem to be fairly close scale-wise so I'm calling them 1/64th.
FYI the one you have states it's 1/64 scale but I am not sure about that. Before I found the HW miata with my wheels, there was one of the MiniGT NAs in silverstone with my wheels already in gold. I bought it but when I went to swap the wheels I found they were markedly smaller than the ones for the JL. HW and JL seem to be fairly close scale-wise so I'm calling them 1/64th.
- :
- 92 & 16 Meyatas
Interesting!It's nice finding your car in a diecast. I had to wait a long time to get one of my RX-7 (we're talking decades). I was surprised that JL made one for my specific trim, I have a small store of them.
FYI the one you have states it's 1/64 scale but I am not sure about that. Before I found the HW miata with my wheels, there was one of the MiniGT NAs in silverstone with my wheels already in gold. I bought it but when I went to swap the wheels I found they were markedly smaller than the ones for the JL. HW and JL seem to be fairly close scale-wise so I'm calling them 1/64th.

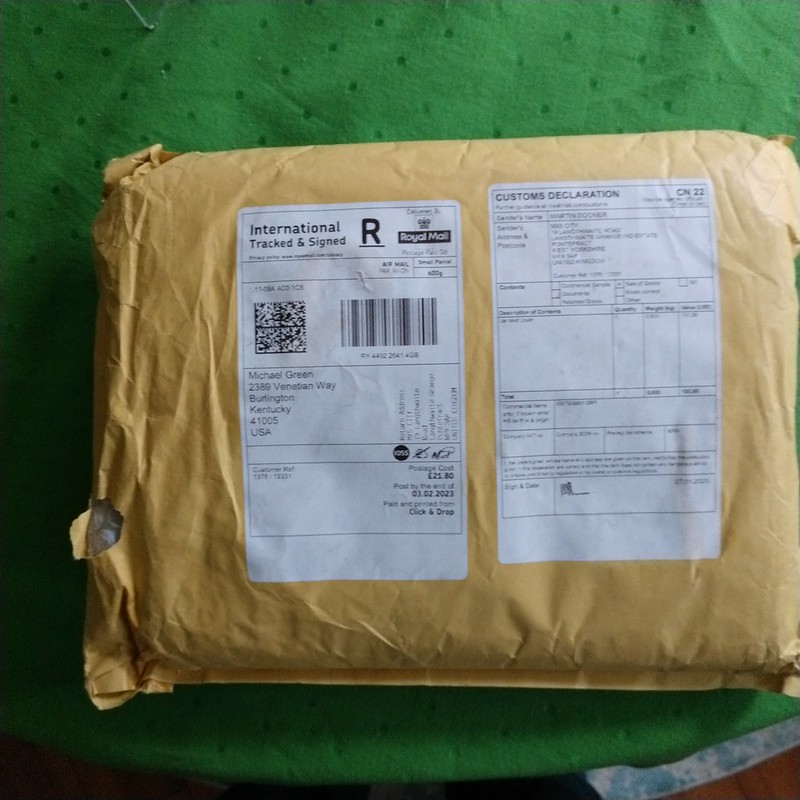
It has arrived (finally!). Let’s see what we have here. Package was basically intact (one small tear):
Open ‘er up:
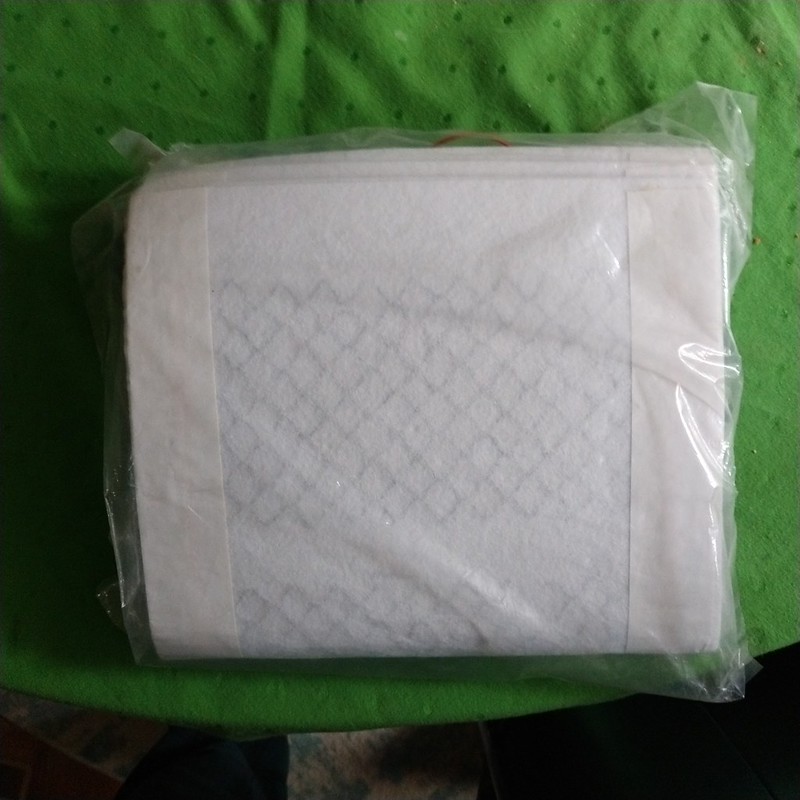
Did you figure it out yet? If not here is one last picture, if you don’t get it from this one I can’t help you.
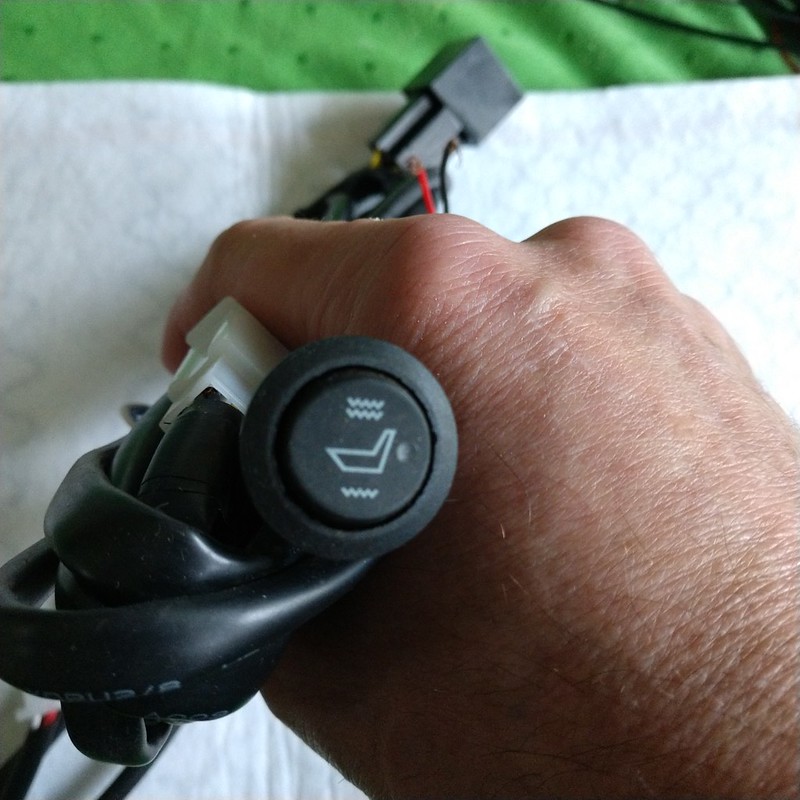
That’s right, a seat heater kit complete for two seats. I bought it from here: https://www.mx5city.com/heated-seat-kit. I see the price has dropped a few since I bought mine. I reached out to them to ask about shipping to the US before I ordered and they said they either used UK post for about $30 (said 7-10 days shipping), or $47.50 for FedEx (said that was 3-4 days). Being frugal (some might say cheap) I opted for the lesser charge. However that turned out to be an exercise in frustration. Below is the timeline for this transaction:
Seat heater kit timeline
Purchased- 01/25
Accepted at UK post office- 01/27
Sender preparing item (?)- 01/27
Item received Milton Keys PSC- 01/31
Item leaving UK- 02/02
Arrived USPS Chicago- 02/13
Delivered- 02/16
I do not know why it took so long to transit from the UK to the USA, but there you have it. Note this was the least expensive seat heater kit I found anywhere so I’m not too bothered by the time taken for shipping. Well, at least not now that it’s in my possession!
Open ‘er up:
Did you figure it out yet? If not here is one last picture, if you don’t get it from this one I can’t help you.
That’s right, a seat heater kit complete for two seats. I bought it from here: https://www.mx5city.com/heated-seat-kit. I see the price has dropped a few since I bought mine. I reached out to them to ask about shipping to the US before I ordered and they said they either used UK post for about $30 (said 7-10 days shipping), or $47.50 for FedEx (said that was 3-4 days). Being frugal (some might say cheap) I opted for the lesser charge. However that turned out to be an exercise in frustration. Below is the timeline for this transaction:
Seat heater kit timeline
Purchased- 01/25
Accepted at UK post office- 01/27
Sender preparing item (?)- 01/27
Item received Milton Keys PSC- 01/31
Item leaving UK- 02/02
Arrived USPS Chicago- 02/13
Delivered- 02/16
I do not know why it took so long to transit from the UK to the USA, but there you have it. Note this was the least expensive seat heater kit I found anywhere so I’m not too bothered by the time taken for shipping. Well, at least not now that it’s in my possession!
- :
- 2016 GT ST 47A
That is awesome Mike! Now you can keep your buns toasty during those cool/cold temp. top down driving days! Looking forward to your install post(s).
As for shipping, IME paying more for the expedited shipping takes just as long as the frugal shipping for the items I have bought from overseas.
As for shipping, IME paying more for the expedited shipping takes just as long as the frugal shipping for the items I have bought from overseas.
- :
- 92 & 16 Meyatas
I added seat heaters to my P5 and never used them…..and I’m not sure why either. I guess they made me wanna pee so on my commute to work I di want to ha to stop! 

That's what water bottles are for...I added seat heaters to my P5 and never used them…..and I’m not sure why either. I guess they made me wanna pee so on my commute to work I didn’t want to stop!
I have had a couple of people tell me that the delay in my shipment was due to Customs in Chicago. Apparently they regularly have backlogs. So if you are ordering from overseas be prepared for delays.
Didn’t have much going on today so decided to dive into installing the heater pads. Pulled the passenger seat and dug in. I am running NB2 seats so my disassembly relates to those. First you need to separate the back and bottom of the seat. First off you remove the recline lever by pulling it forward. It slides onto a metal lever and is only held on by a tab that provides a spring loaded function. Once that is off remove the small screw hiding behind that.
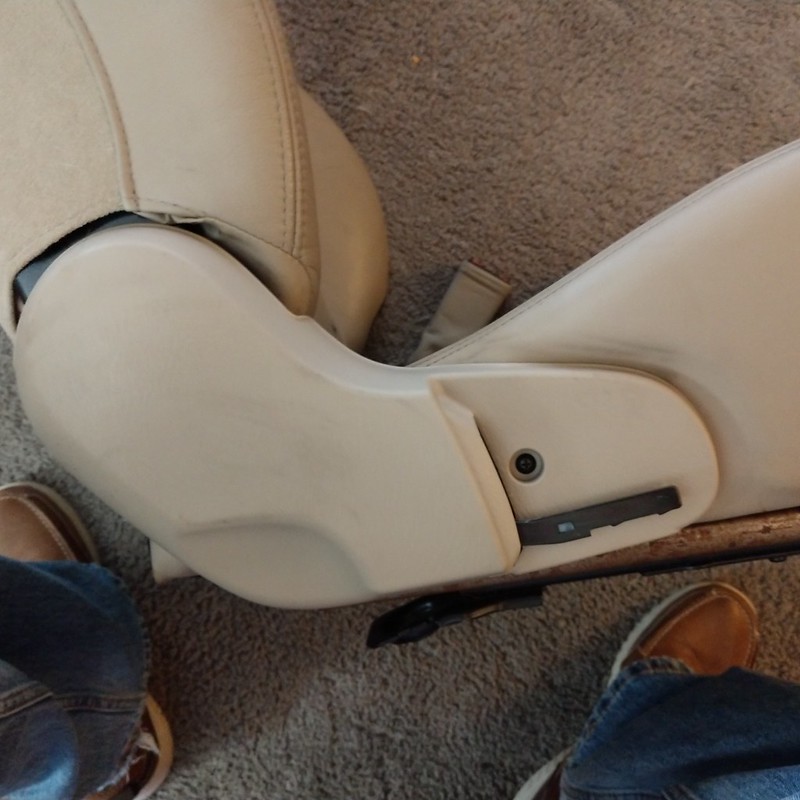
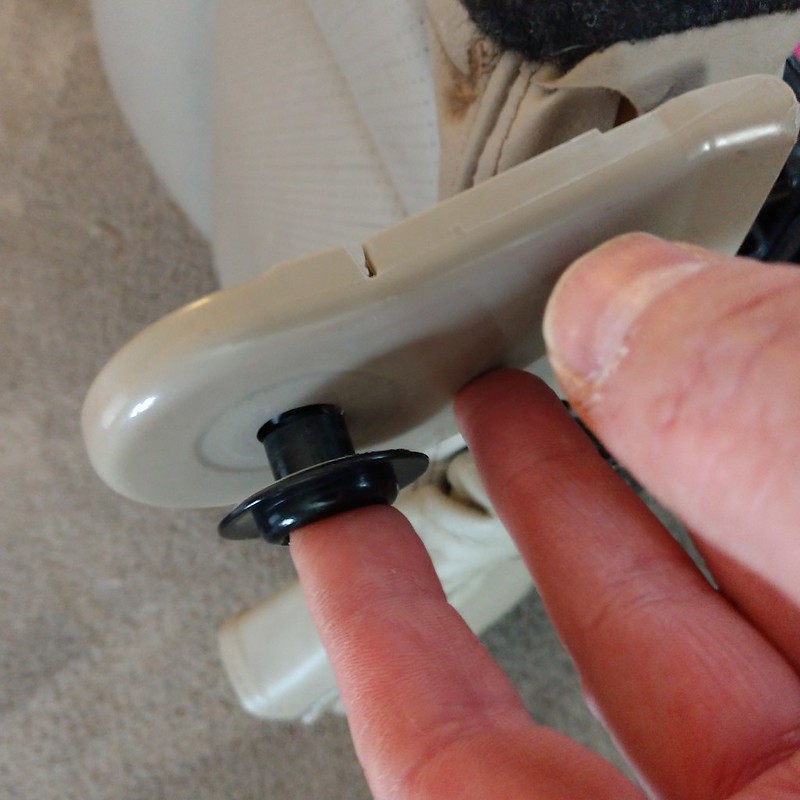
You next remove the trim piece. This is accomplished by sliding it back and upward to get it clear of the mechanism. You can see the half-moon shaped white piece that holds it on here:
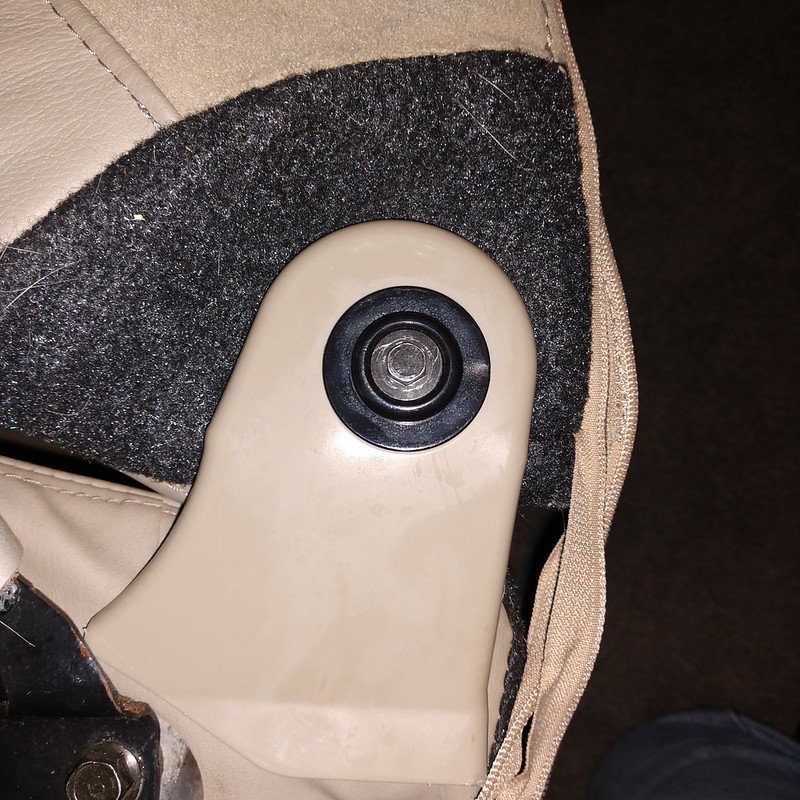
Next I removed the small inside hinge bolt, and then pulled the black insert out of the trim piece before removing the trim piece:
Next you undo the two zippers at the bottom of the seat back to access the outside bolts:

Once all that is off the seat back is free. Now you start removing the hog rings. I used two needle nosed pliers and a flat blade screwdriver to pry if I had to.
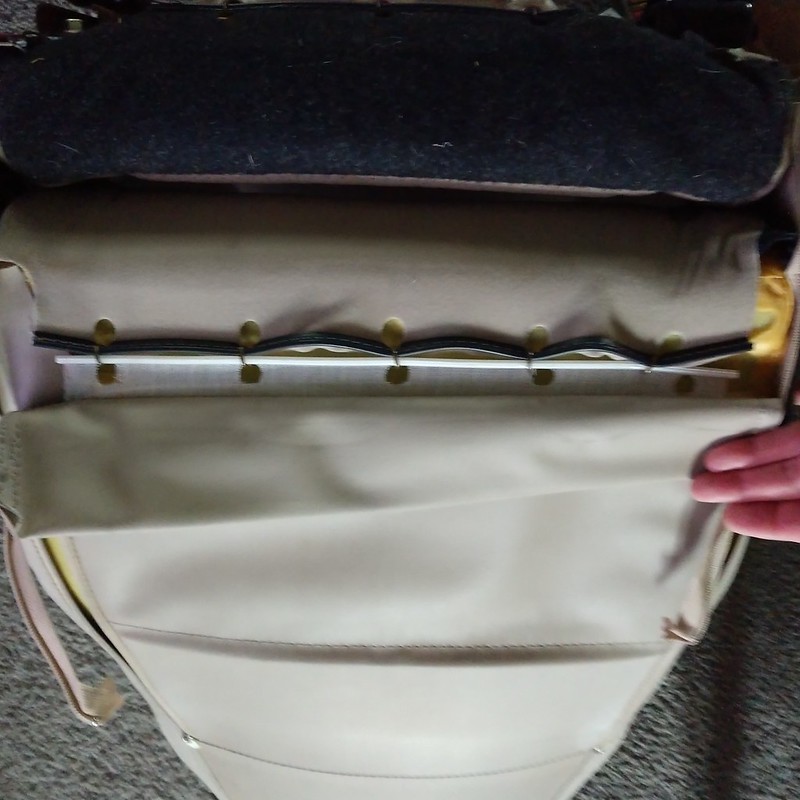
After these first five you peel the cover back and remove the hog rings as you go. I counted 16 total for what I got to. Here is the seat cover pulled back:
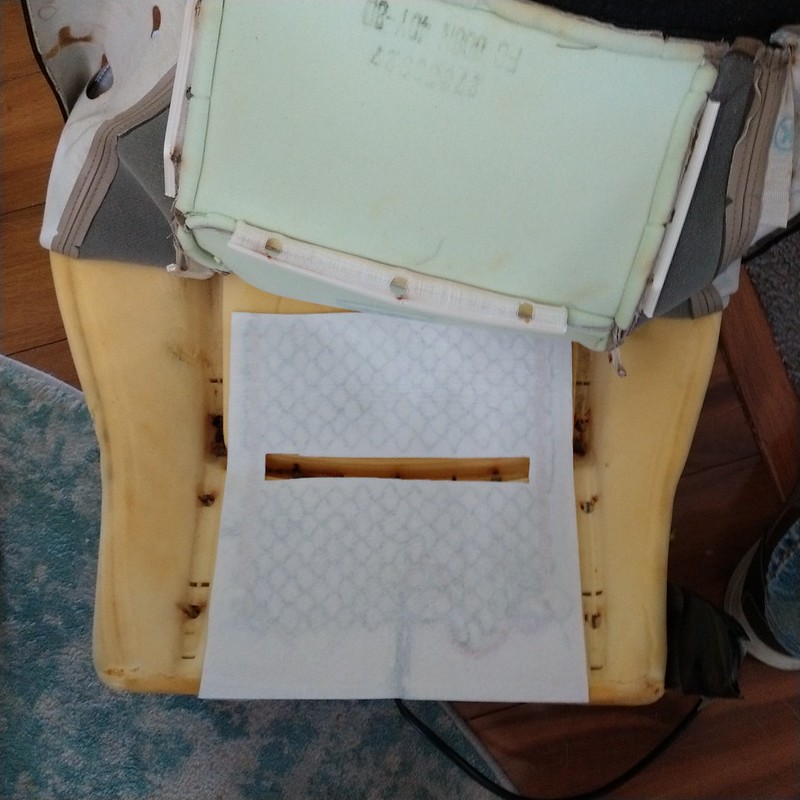
I then laid one of the heater pads on the foam to see where I need to cut it. The pads have two areas with space between the heating coils, you cut across those areas to shorten them as needed. Take care not to cut through any of the coils. For my use I removed one of the sections. The instructions say to not have the heating coils lay across any gap in the foam (used for hog rings to secure the cover). I cut out the space between the two remaining sections of the pad. Once you have that all set you remove the backing from the double-sided tape running down either side of the pad and lay it in place.
One tip to make life easier, figure out where you need to remove the fabric of the pad for cover hog ring access before you tape the pad in place and cut it then. I used an X-Acto knife for this but for the second pad I started the cuts and then did the rest with scissors before taping the pad in place.
After that is done all you need to do is replace the hog rings so the cover is back in place. I have seen some folks say to use zip-ties instead of the hog rings, but I’m a masochist so put the hog rings back on.
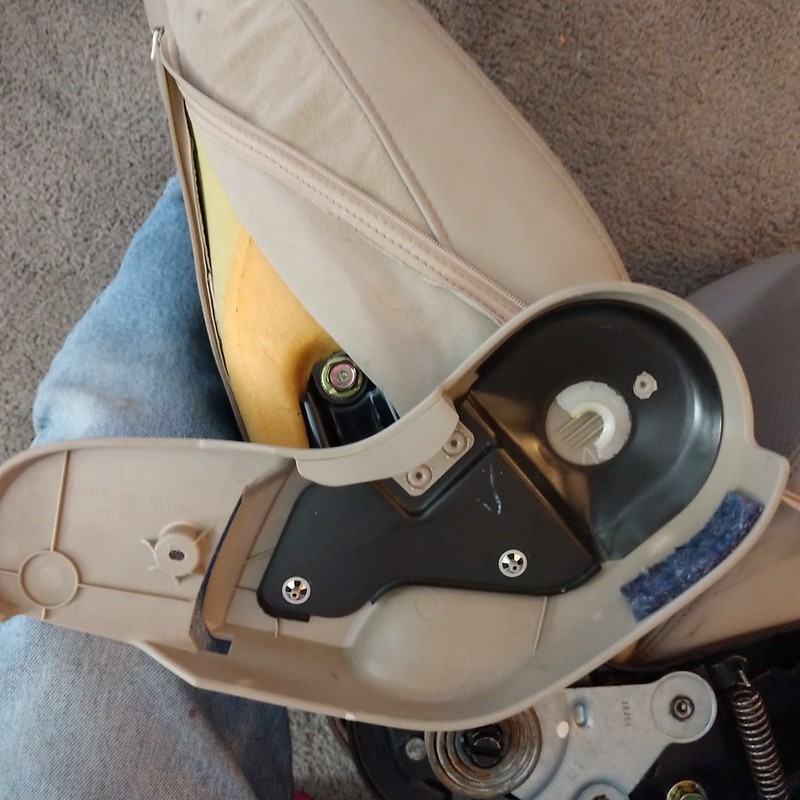
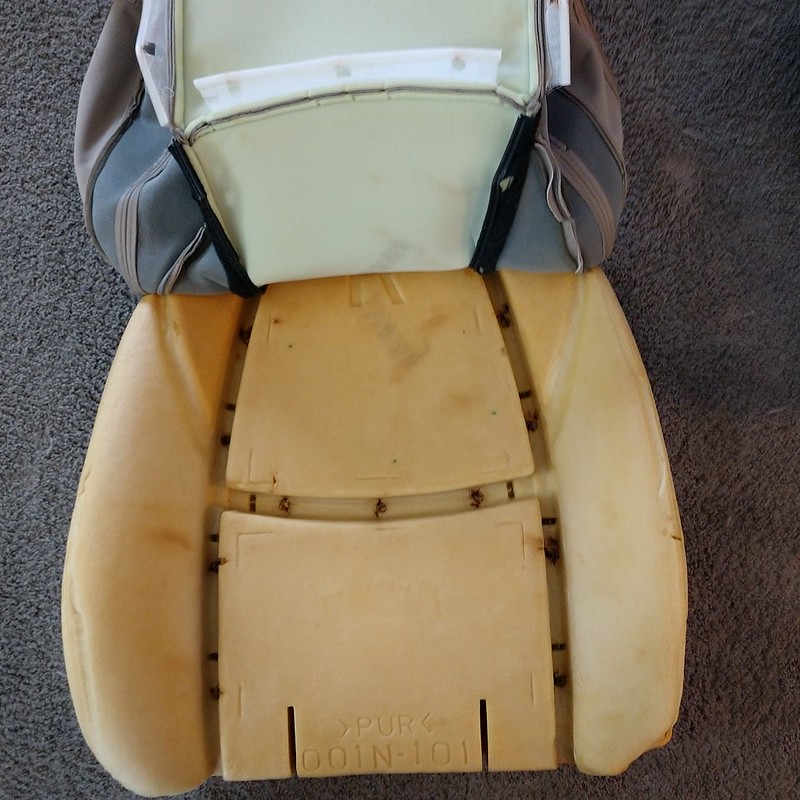
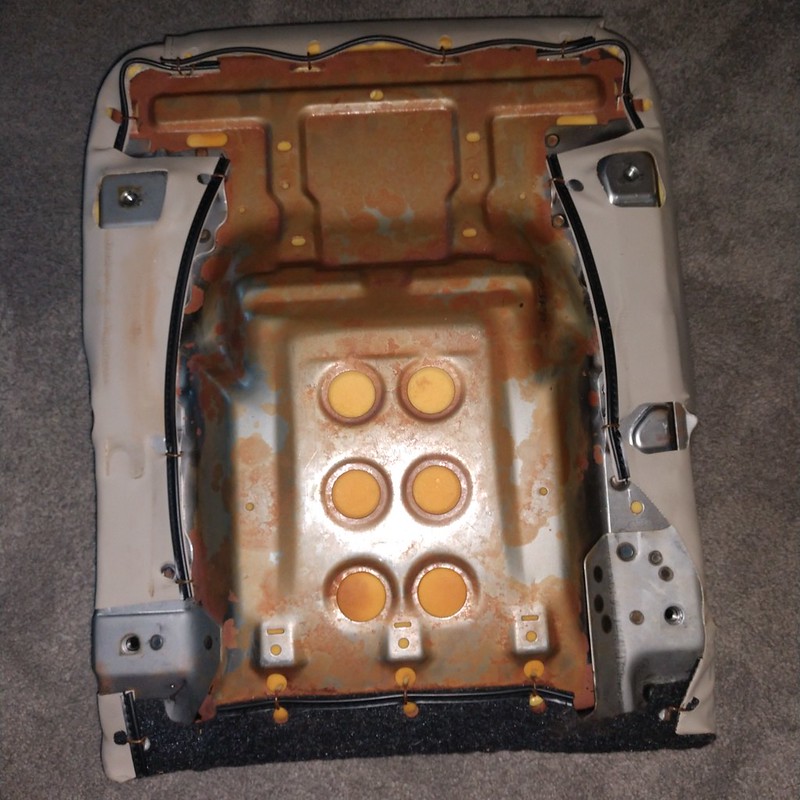
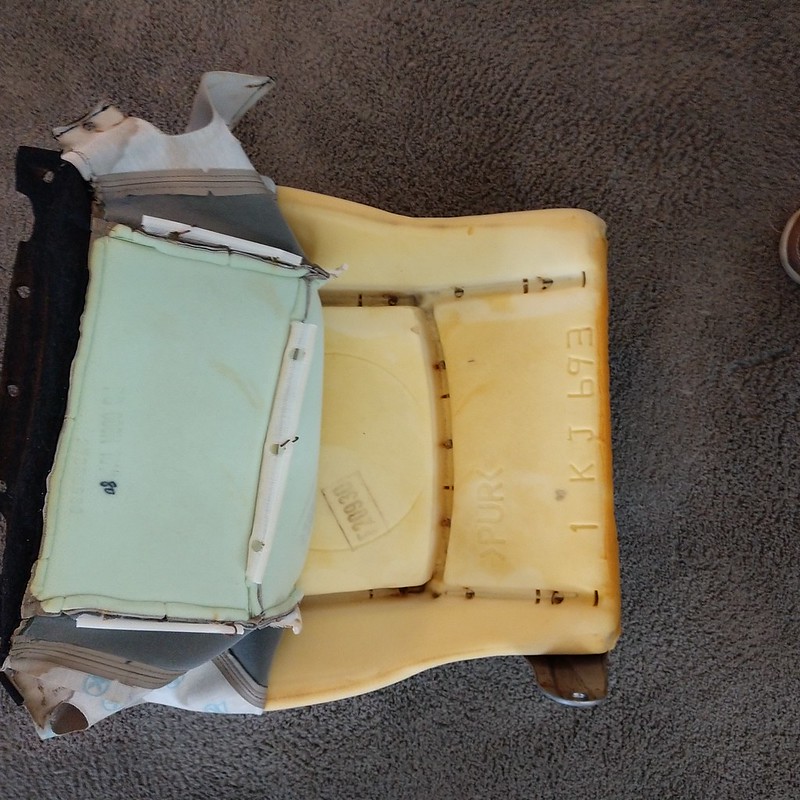
Next up is the seat bottom. You will need to remove the sliders (total of six bolts). Once that is done the bottom will look like this:
Then it’s back to removing hog rings to pull the cover back so it looks like this:
I counted 21 hog rings removed for this one. Repeat the same steps for installing the heating pad. I made the same cuts as I did for the back pad for both length and hog ring access (no picture of that as I was on a roll and wanted to get it done). Once that’s done you just reverse the disassembly steps until it’s all back together. Be sure to route the wires for both pads to the inside of the seat. It took me about 2 ½ hours to complete this work.
I’ll continue once I start doing all the wiring hook-ups. One thing I did note is that the wiring connectors for the heating pads were not all the same. Three had a red wire on one side of the connector, the fourth had the red wire on the opposite side of the connector. I don’t know who made the connectors up but someone wasn’t paying attention.
Didn’t have much going on today so decided to dive into installing the heater pads. Pulled the passenger seat and dug in. I am running NB2 seats so my disassembly relates to those. First you need to separate the back and bottom of the seat. First off you remove the recline lever by pulling it forward. It slides onto a metal lever and is only held on by a tab that provides a spring loaded function. Once that is off remove the small screw hiding behind that.
You next remove the trim piece. This is accomplished by sliding it back and upward to get it clear of the mechanism. You can see the half-moon shaped white piece that holds it on here:
Next I removed the small inside hinge bolt, and then pulled the black insert out of the trim piece before removing the trim piece:
Next you undo the two zippers at the bottom of the seat back to access the outside bolts:
Once all that is off the seat back is free. Now you start removing the hog rings. I used two needle nosed pliers and a flat blade screwdriver to pry if I had to.
After these first five you peel the cover back and remove the hog rings as you go. I counted 16 total for what I got to. Here is the seat cover pulled back:
I then laid one of the heater pads on the foam to see where I need to cut it. The pads have two areas with space between the heating coils, you cut across those areas to shorten them as needed. Take care not to cut through any of the coils. For my use I removed one of the sections. The instructions say to not have the heating coils lay across any gap in the foam (used for hog rings to secure the cover). I cut out the space between the two remaining sections of the pad. Once you have that all set you remove the backing from the double-sided tape running down either side of the pad and lay it in place.
One tip to make life easier, figure out where you need to remove the fabric of the pad for cover hog ring access before you tape the pad in place and cut it then. I used an X-Acto knife for this but for the second pad I started the cuts and then did the rest with scissors before taping the pad in place.
After that is done all you need to do is replace the hog rings so the cover is back in place. I have seen some folks say to use zip-ties instead of the hog rings, but I’m a masochist so put the hog rings back on.
Next up is the seat bottom. You will need to remove the sliders (total of six bolts). Once that is done the bottom will look like this:
Then it’s back to removing hog rings to pull the cover back so it looks like this:
I counted 21 hog rings removed for this one. Repeat the same steps for installing the heating pad. I made the same cuts as I did for the back pad for both length and hog ring access (no picture of that as I was on a roll and wanted to get it done). Once that’s done you just reverse the disassembly steps until it’s all back together. Be sure to route the wires for both pads to the inside of the seat. It took me about 2 ½ hours to complete this work.
I’ll continue once I start doing all the wiring hook-ups. One thing I did note is that the wiring connectors for the heating pads were not all the same. Three had a red wire on one side of the connector, the fourth had the red wire on the opposite side of the connector. I don’t know who made the connectors up but someone wasn’t paying attention.
Last edited:
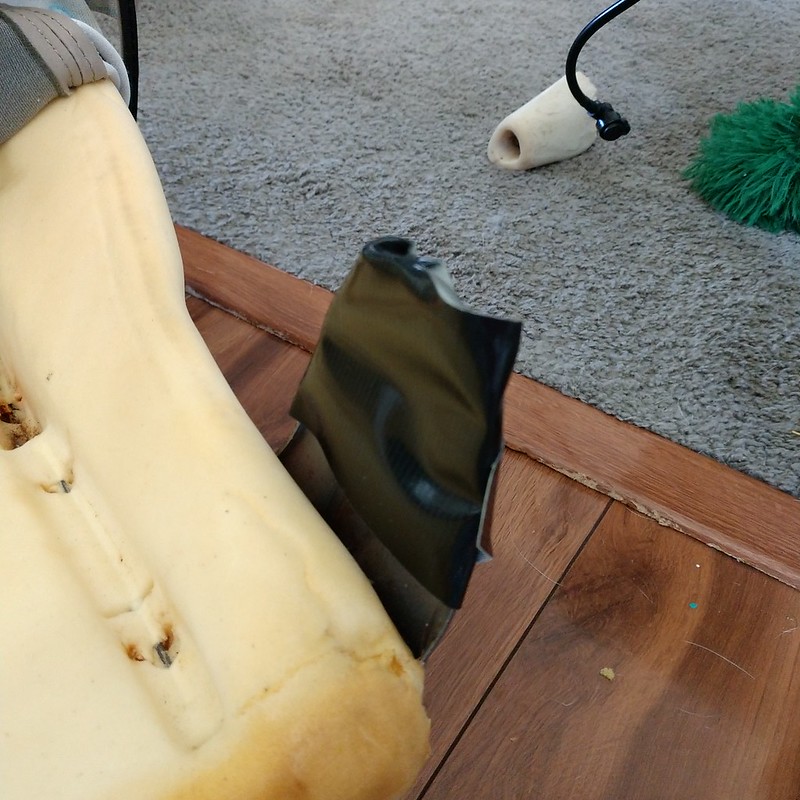
Ended up not doing what I had planned today so pulled the driver’s seat to get those heater pads installed. This one took a bit longer because I have a pneumatic lumbar support installed and I didn’t want to lose it. Followed the same procedure to separate the seat back and bottom, pulled back the back cover and took a look at what I could do. I figured it wouldn’t be a good idea to put the lumbar bladder over the heater pad. There is a foam lumbar support at the bottom of the seat, I figured I could lay the bladder behind that. I started my cut with the X-Acto knife, then used a fine (24 TPI) toothed hacksaw blade to cut up through the foam by hand. This is how that ended up:
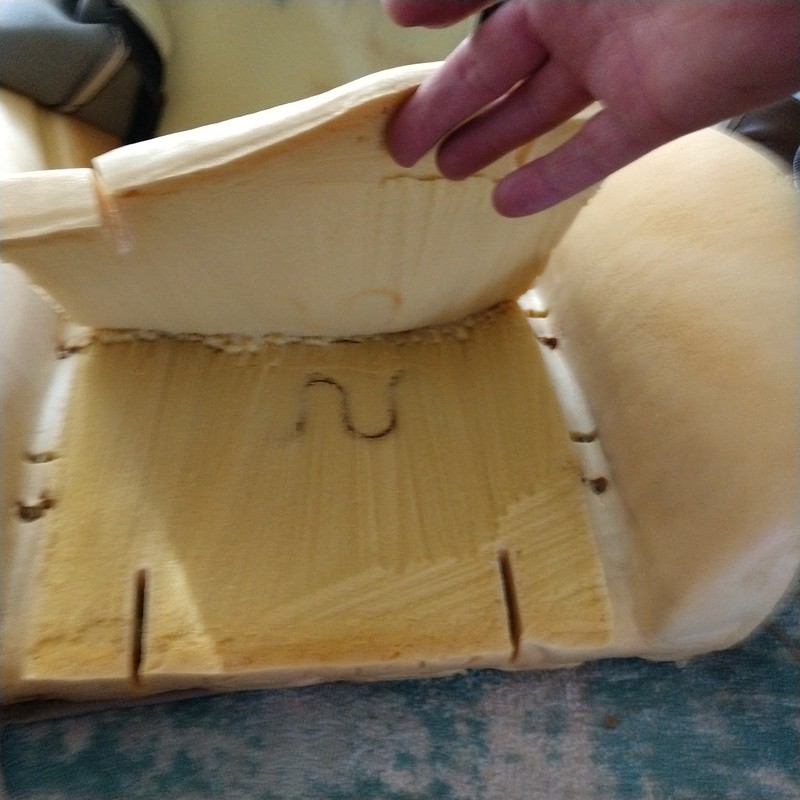
I left the foam attached along the top side to provide some stability. The lumbar bladder I have is the one Moss sells, I bought it second-hand so saved some money. After some checking I trimmed the ends of it and then put it in place like so:

Once the seat cover was laid in place the bladder was held firmly.
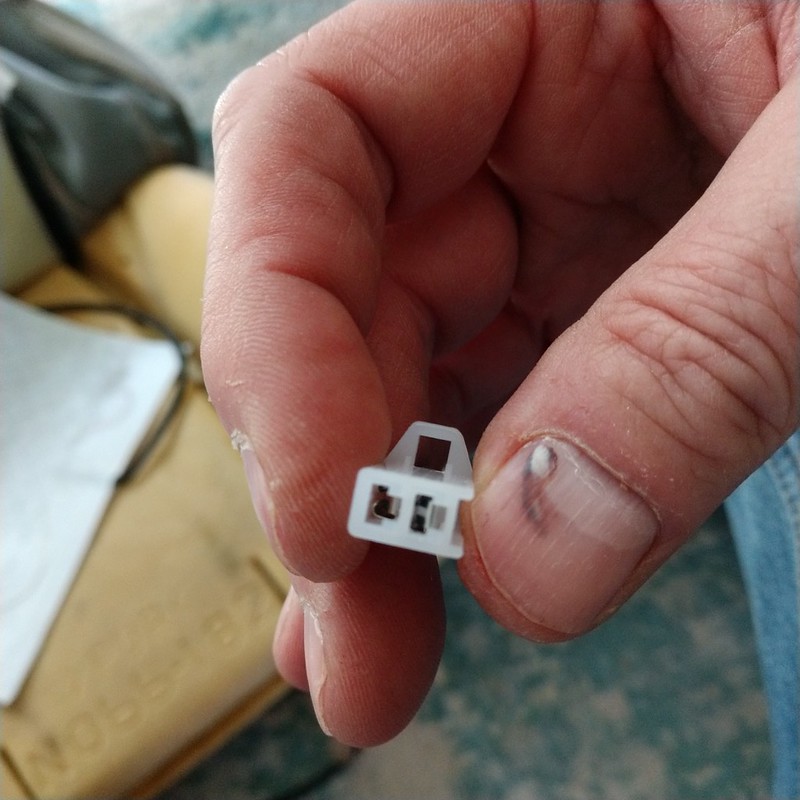
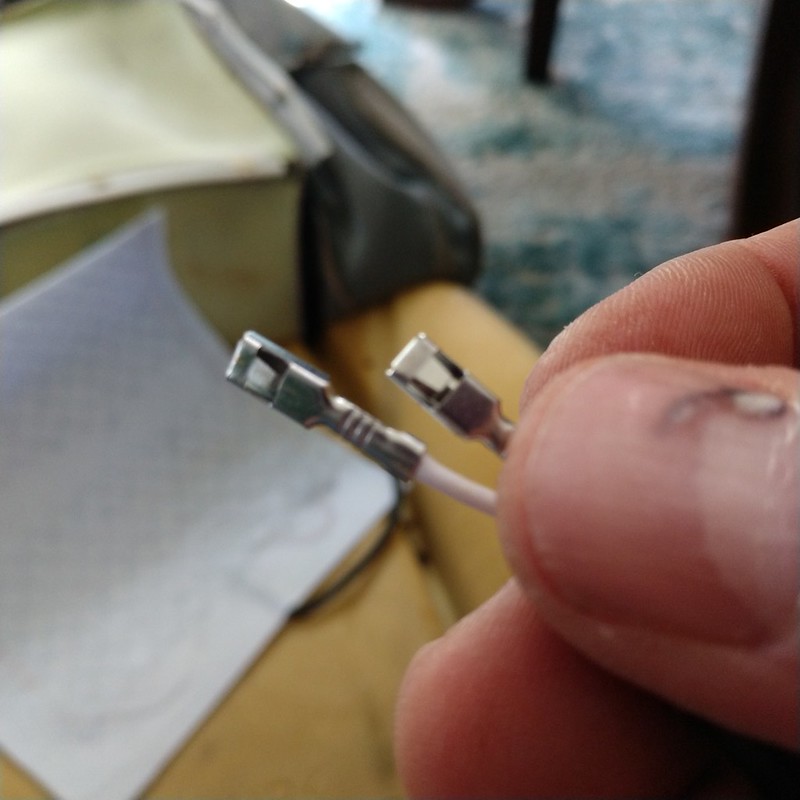
As I mentioned in my last post one of the pad connectors had the wires reversed from the others. It’s fairly easy to change this. If you look at the connector you will see two smaller rectangular openings next to the main openings. If you insert a small metal piece (I used a jeweler’s screwdriver) you can depress the lock and remove the connector end. Here is the opening, and a shot of the connector on the wire showing the small tab that locks it into the plastic part of the connector:
Got that changed over. Another helpful tip I didn’t do on the first seat, the piece that acts as the anchor for the inside hinge bolt is sheet metal with sharp edges. I managed to cut myself doing the passenger seat, didn’t feel it or even notice it until I saw some blood drops on the heater pad. In the interest of avoiding this today I put some Gorilla tape over the metal like so:
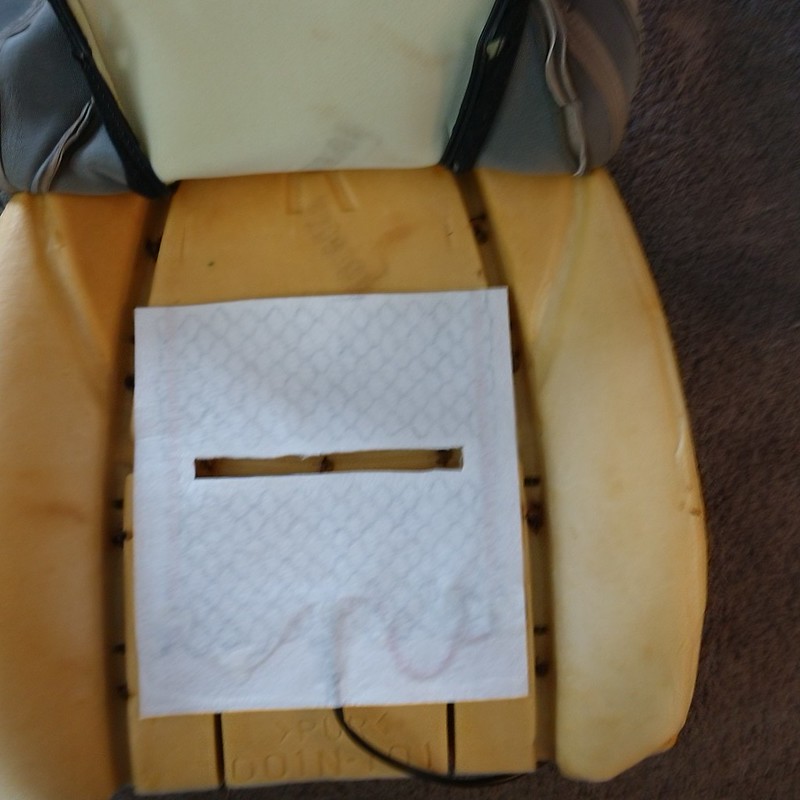
Finally, since I neglected to post a picture of the pad installed in the seat bottom yesterday here it is:
You may notice that there is some overlap of the pad at the back of the seat. This just wraps under once you put the cover back on. For some reason the driver’s seat bottom only had 18 hog rings (same number for the seat back though).
That’s both seats with the heater pads installed. Next up, the rest of the wiring.
I left the foam attached along the top side to provide some stability. The lumbar bladder I have is the one Moss sells, I bought it second-hand so saved some money. After some checking I trimmed the ends of it and then put it in place like so:
Once the seat cover was laid in place the bladder was held firmly.
As I mentioned in my last post one of the pad connectors had the wires reversed from the others. It’s fairly easy to change this. If you look at the connector you will see two smaller rectangular openings next to the main openings. If you insert a small metal piece (I used a jeweler’s screwdriver) you can depress the lock and remove the connector end. Here is the opening, and a shot of the connector on the wire showing the small tab that locks it into the plastic part of the connector:
Got that changed over. Another helpful tip I didn’t do on the first seat, the piece that acts as the anchor for the inside hinge bolt is sheet metal with sharp edges. I managed to cut myself doing the passenger seat, didn’t feel it or even notice it until I saw some blood drops on the heater pad. In the interest of avoiding this today I put some Gorilla tape over the metal like so:
Finally, since I neglected to post a picture of the pad installed in the seat bottom yesterday here it is:
You may notice that there is some overlap of the pad at the back of the seat. This just wraps under once you put the cover back on. For some reason the driver’s seat bottom only had 18 hog rings (same number for the seat back though).
That’s both seats with the heater pads installed. Next up, the rest of the wiring.
Headed back to work soon, had some training last week so I wasn’t able to proceed with the installation. Have my usual last-minute things to accomplish which keeps me from completion but today I did connect the wiring harness up to the driver’s seat pads to test them out. I used an older battery charger to provide the power, making sure I kept the positive and negative connections separated (I used the rest of a shower pan insulator sheet for that). What I found was that at the low setting I only had voltage (about 0.5v) at one of the pad connectors. Switched the control to the high setting and the relay changed over and gave me 12v at both connectors. What I will do when I get to finish the installation is to check the output and make sure to connect the connector that is powered at the low setting to the back pad. Stay tuned to this space, I’ll be back sometime in the future…
- :
- 92 & 16 Meyatas
By time you return the seat warmers will be ready for next season!
hopefully MATG will be in your future as well!
Happy sailing!
hopefully MATG will be in your future as well!
Happy sailing!
By time you return the seat warmers will be ready for next season!
hopefully MATG will be in your future as well!
Happy sailing!
Thanks guys. I'll keep everyone updated about how my schedule will be once I get to work and see what the other guy wants to do. He's screwed me up once so we'll see how that progresses.Yes, happy sailing and hope to see you at MATG!
- :
- 2016 GT ST 47A
So what you are saying is that he owes you one?Thanks guys. I'll keep everyone updated about how my schedule will be once I get to work and see what the other guy wants to do. He's screwed me up once so we'll see how that progresses.
New Posts and Comments

- Replies
- 32
- Views
- 20K
- Question
- Replies
- 1
- Views
- 227

- Replies
- 367
- Views
- 260K