trailer light wiring

:
'08 Mazda5 GT - Stormy Blue
I've seen a few threads about towing and wiring lights etc...
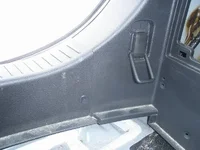
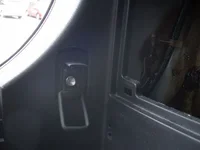
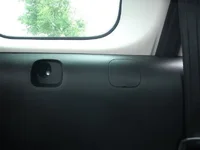
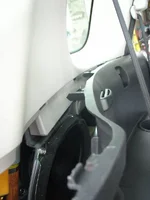
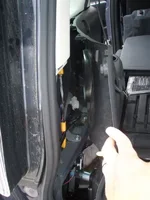
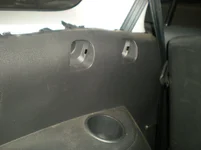
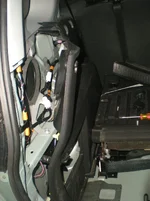
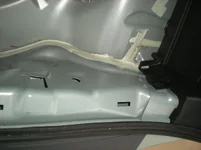
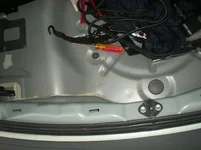
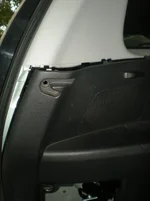
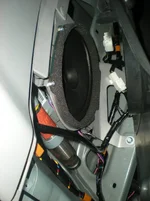
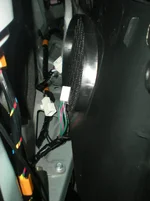
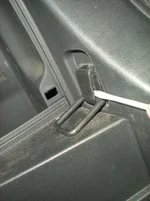
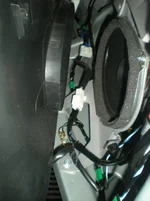
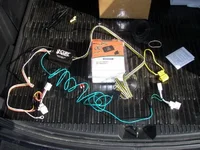
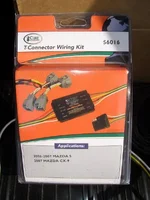
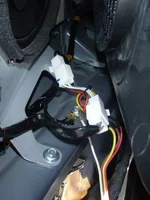
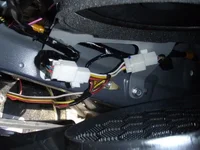
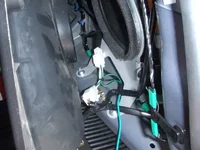
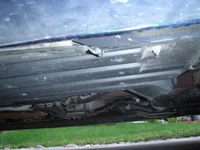
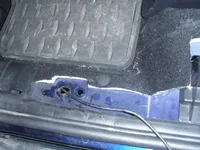
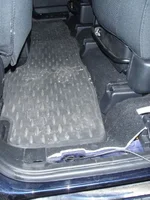
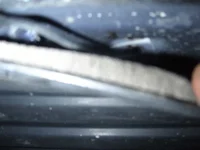
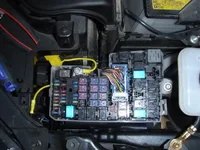
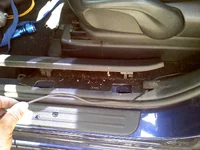
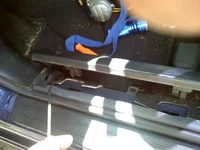
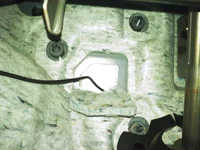
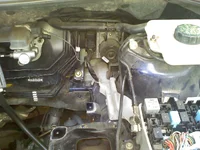
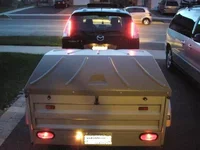
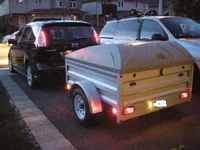
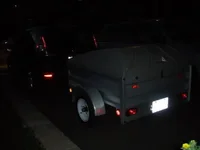
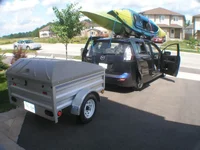
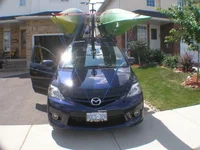
I've seen on E-Bay a plug and play wiring harness for the Mazda 5 and CX 9.http://http://cgi.ebay.ca/06-07-Mazda-5-08-09-Mazda-Cx-9-Trailer-Hitch-Wiring-Kit_W0QQitemZ250448164698QQcmdZViewItemQQptZMotors_Car_Truck_Parts_Accessories?hash=item3a4fdfb75a&_trksid=p3286.c0.m14&_trkparms=65%3A12%7C66%3A2%7C39%3A1%7C72%3A1215%7C240%3A1318%7C301%3A1%7C293%3A1%7C294%3A50 Just wondering if any one has purchased one of these or any other type of plug and play wiring harness? I'd like to tow a small 4x4 trailer when we go camping, so any help would be appreciated. Also, can anyone tell me where the light tail light connector is? The harness comes out of the light sockets goes through the body and than under the drivers side rear quater panel. I've taken most of the rear interior panels off but cannot find the connector. Any help would be appreciated.
 
OK, so not many people wanting to wire up trailer lights...Well, I've done some more searching and have found that 5 and CX9 W/O tow package are similiar. So I'll order a plug and play adapter shortly now that I've found the light connectors. Attahced are photos of the wiring connector and what panels you have to remove to get at them. First time I took off all the upper panels as the lights are mounted high but, than found some siring diagrams for a Dutch spec car and seems all 5's are wired pretty much the same.
Once I have the kit and wire it up I'll include more photos.
To get to the connector you'll need to do the following:
1) Flip the cargo tray cover all the way forward and remove the cargo tray.
2) Pic #1 Using a small flat screw driver pop the inner portion of the pushlok connector, one one each side, and remove the rear sill panel. It is tough to see in the picture but there is one on each side.
3) Pic #2 Pop open the cover on the cargo tie down and use a 10mm socket to remove the cargo tie down bolt.
4) Pic #3 Pop off the small cover plate below the 3rd row window, and use a 10mm socket to remove the bolt.
5) Pic #4 Carefully pull the lower panel away from the upper panel. It takes some force, just make sure that you pull on the lower part of the panel to help disengage the clips from the upper panel, you can see the large tangs on the lower panel in the 4th picture. While there is not a lot of room to move the panel, try to pull the bottom out while pulling the top to seperate the panels.
6) Pic #5 Once you have the panel seperated enough you can see the white connector for the tail lights located just below the speaker.

Attached is also the trailer I'll be pulling.
 

Attachments

  • 06.webp
    06.webp
    41.6 KB · Views: 1,044
  • 05.webp
    05.webp
    14.7 KB · Views: 946
  • 04.webp
    04.webp
    15.2 KB · Views: 864
  • 03.webp
    03.webp
    17.8 KB · Views: 944
  • 01.webp
    01.webp
    30.1 KB · Views: 968
Hmmm. Guess I should post some pics here. I wired in a kit from etrailer.

I had to run the green wire to the right side (passenger) connector.
 

Attachments

  • DSCN0831.webp
    DSCN0831.webp
    80.4 KB · Views: 820
  • DSCN0830.webp
    DSCN0830.webp
    118.7 KB · Views: 910
  • DSCN0832.webp
    DSCN0832.webp
    78 KB · Views: 803
  • DSCN0833.webp
    DSCN0833.webp
    80.6 KB · Views: 810
  • DSCN0834.webp
    DSCN0834.webp
    83.4 KB · Views: 912
Last edited:
More of the job...
 

Attachments

  • DSCN0836.webp
    DSCN0836.webp
    101.5 KB · Views: 615
  • DSCN0835.webp
    DSCN0835.webp
    179 KB · Views: 754
  • DSCN0837.webp
    DSCN0837.webp
    106 KB · Views: 614
  • DSCN0838.webp
    DSCN0838.webp
    73.1 KB · Views: 872
  • DSCN0839.webp
    DSCN0839.webp
    82.2 KB · Views: 681
and lastly...
 

Attachments

  • DSCN0840.webp
    DSCN0840.webp
    73.6 KB · Views: 625
  • DSCN0842.webp
    DSCN0842.webp
    38.9 KB · Views: 586
  • DSCN0846.webp
    DSCN0846.webp
    197.6 KB · Views: 607
  • DSCN0843.webp
    DSCN0843.webp
    253 KB · Views: 578
  • DSCN0847.webp
    DSCN0847.webp
    101.7 KB · Views: 673
That's great, thanks for the pics. The biggest problem with wiring up lights is finding a place to get from power from. The kit I bought was from CURT and all kits need you to get power to the convertor box so the trailer lights have enough power to light up, and your adding a load to the existing circuit. But I couldnt find a place to get the wire into the rear compartment. There just are not any easy points to bring the wire into the vehicle at the front, or the back. I didn't remove the spare as you did but I now see that there is a large rubber grommet under the spare! Now I know why the trailer harness has the large rubber grommet on it(uhm). Instead I ran the wire from the electrical distribution box, just beside the battery under the car along the drivers side till the rear door. I found a small hole to feed the wire through into the interior. to det the wire you'll have to a make a small hook from a coat hanger or something similiar, feed the wire from under the car through the hole hook it with the coat hanger and pull it up into the interior. I took some pics of this but it a little hard to see. After it inside I ran it under the trim panels to the convertor. Hook everything up and now we have trailer lights.
 

Attachments

  • P7080103.webp
    P7080103.webp
    46.3 KB · Views: 623
  • P7080104.webp
    P7080104.webp
    28 KB · Views: 624
  • P7080106.webp
    P7080106.webp
    27 KB · Views: 595
  • P7080105.webp
    P7080105.webp
    33 KB · Views: 607
  • P7080107.webp
    P7080107.webp
    27.7 KB · Views: 561
More pic's showing where I brought the wire into interior. There is a small hole under the plastic belly pan just at the front of the rear sliding door. This is where I brought the wire into the vehicle.
 

Attachments

  • P7080111.webp
    P7080111.webp
    33.3 KB · Views: 587
  • P7080112.webp
    P7080112.webp
    29.7 KB · Views: 519
  • P7080113.webp
    P7080113.webp
    42.3 KB · Views: 543
  • P7080114.webp
    P7080114.webp
    39.9 KB · Views: 523
  • P7080109.webp
    P7080109.webp
    11.8 KB · Views: 531
Lastly where I hooked up power for the convertor.
 

Attachments

  • P7080115.webp
    P7080115.webp
    41.3 KB · Views: 676
I put my hitch on last week, but the Curt quick connect was not so "connectful" friendly. I wanted to update to all of you that there IS a way to route the HOT wire, That comes with the kit, safely and quickly through the cabin and firewall.
I followed Bennett5's Routing of the cable to the Driver's Side Sliding Door (DSSD) but kept on going from there.
I started tucking the hot wire under the weather stripping at the front of that DSSD.

Even though I don't show it here, I had tucked it under the pillar also (between the DSSD and the Front drivers side door) AND under and up the kick panel, in front of the Drivers Side Front Door.
 

Attachments

  • 0712091226.webp
    0712091226.webp
    342.5 KB · Views: 653
  • 0712091226a.webp
    0712091226a.webp
    184 KB · Views: 588
5 Trailer Wiring Up Front

As you come out of the top of that kick panel, you will need to look up under the dash a little. There is a perforated somewhat squared piece of padding up under the dash. You can pull it off at the top and sides and let it hinge on the bottom perforations.

You will see piece of white plastic behind it. You will have enough room to drill a 5/16" inch hole towards the lower center right of this piece of plastic. This plastic is only about 1/8" inch thick, so don't go far. I had a big 18V cordless and was able to drill it with no problem (room wise).

Now the really fun part, but worth it in my opinion. Take the battery and it's case out. If you want more details on that, I can provide them. Here is what it looks like when the battery case is out.
You can see the back of that white plastic piece when the case is removed.

I routed the Hot wire towards the Drivers Side Quarter Panel along the firewall. I didn't show it here, but I put plenty of cable ties to other wire looms and non-metalic items to keep it from vibrating. I brought it forward enough to attach like Bennett5's.
 

Attachments

  • 0712091219a.webp
    0712091219a.webp
    252 KB · Views: 639
  • 0712091208a.webp
    0712091208a.webp
    294.2 KB · Views: 634
  • 0712091209a.webp
    0712091209a.webp
    134.4 KB · Views: 581
  • 0712091209.webp
    0712091209.webp
    320.7 KB · Views: 579
5 Trailer Wiring Up Front

This may seem a bit longer or complicated to some, but it beats exposing the wire to the undercarriage of the car and having a rock or other item tear into the wiring.

Removing the battery case and air filter cover is not as big a deal as it might seem, and makes the process go much faster.

While your there, you can empty any dirt out of the case and make sure your battery is topped off on the water too.(flash)
 
Franzy, good find on the wiring routing. I think I'll redo mine as youre 100% right on the wire being exposed underneath if only for an inch or so.
Attached are some Pics of our 5 with our new trailer attached and all lit up.
 

Attachments

  • P7160112.webp
    P7160112.webp
    32.6 KB · Views: 647
  • P7160111.webp
    P7160111.webp
    30.7 KB · Views: 581
  • P7160109.webp
    P7160109.webp
    27.4 KB · Views: 554
  • P7160108.webp
    P7160108.webp
    31.1 KB · Views: 545
  • P7160106.webp
    P7160106.webp
    7.6 KB · Views: 537
OK so we just finished a camping trip putting on just under 1000kms going to Algonquin park. The car was well loaded, but could've taken more, but I wanted to be able to see out the back window. As for gas mileage here is what we got on this trip travelling at 90 KPH for 500 Kms and 105 KPH for 500kms: July25 10.4 L/100KM or 22.8 US MPG or 27.3 Imp MPG.

FYI this trip took around 4 1/2hrs one way and is 50/50 for rural hiways and divided hiways.

I've posted my fuel mileage chart for those interested on the fuel mileage thread for whoever wants to look.

On this trip with the car loaded as it was, it definitly struggle up some of the stepper hills, and when I say struggled I mean no more than a regular minivan towing a small fold down camper, but on the open highway no problem other than crosswinds move it around a bit with the kayaks on the roof. You dont want to stay behind an 18 wheeler long as the wind buffeting make its feel like it's going to rip the rack right off the car.

One other note, in the same camp ground there where 3 other 5's. 1 with 2 kayaks on the roof, one just loaded with tents, and a third towing a fold down camper. There were also 2 more on the higway towing fold down campers and none where haveing any trouble keeping up.

And one pic of the a great look out in the park.
 

Attachments

  • P1020001-1.webp
    P1020001-1.webp
    52.8 KB · Views: 648
  • P1020003-1.webp
    P1020003-1.webp
    63.3 KB · Views: 528
  • P1020005-1.webp
    P1020005-1.webp
    76.1 KB · Views: 536
  • P1020004-1.webp
    P1020004-1.webp
    78.2 KB · Views: 519
  • lookout trail.webp
    lookout trail.webp
    17.2 KB · Views: 489
What a great thread!

I saw a bunch of 5's when I was on Vancouver Island the past 2 weeks. We left ours at home. :(
 
That's awesome Benett5

You know; most people don't understand what a major kick ass feeling it is when you feel you've accomplished something as simple as hooking up all your wiring and seeing the lights glowing on the trailer.

Thanks for the picks.

I will probably be moving here in a month or so. Yes, I will probably be pushing the tow limit, but then again I'm not pretending that I have a work duty dually that I'll be pulling the trailer with.

Yeah; you drive differently when you have something attached to these cars.
I won't have anything attached to the top either. I can see where the buffeting would be whipping at you from the big trucks and buses.

One question though. About how much do you think your trailer weighed, loaded?

Sorry it took so long to answer (job's got me doing 12 hour days).
The worst part was the kayaks acted like two sails on top.
The trailer is around 600lbs on its own, and I'd guess we had 400 lbs in it. Each kayak is around 65lbs lbs, and probably had another 250 lbs of cargo in the vehicle plus me and the two kids. In total, the trailer alone would've been 1000lbs, and everything together would be around 1700 lbs total.
 
Trailer wiring

Any PLUG & PLAY trailer wiring for an 2010 M5 ?

I have seen p&p on Ebay ,T connector type but only for 2007 will this still fit ?
 
Last edited:
Your 2010 P&P.

Call up one of the wiring dealers and ask them. The updates don't always make the websites quick enough. I've had that happen already.
 
What kind of trailer is that? Brand, model? (thinkbeer

OK so we just finished a camping trip putting on just under 1000kms going to Algonquin park. The car was well loaded, but could've taken more, but I wanted to be able to see out the back window. As for gas mileage here is what we got on this trip travelling at 90 KPH for 500 Kms and 105 KPH for 500kms: July25 10.4 L/100KM or 22.8 US MPG or 27.3 Imp MPG.

FYI this trip took around 4 1/2hrs one way and is 50/50 for rural hiways and divided hiways.

I've posted my fuel mileage chart for those interested on the fuel mileage thread for whoever wants to look.

On this trip with the car loaded as it was, it definitly struggle up some of the stepper hills, and when I say struggled I mean no more than a regular minivan towing a small fold down camper, but on the open highway no problem other than crosswinds move it around a bit with the kayaks on the roof. You dont want to stay behind an 18 wheeler long as the wind buffeting make its feel like it's going to rip the rack right off the car.

One other note, in the same camp ground there where 3 other 5's. 1 with 2 kayaks on the roof, one just loaded with tents, and a third towing a fold down camper. There were also 2 more on the higway towing fold down campers and none where haveing any trouble keeping up.

And one pic of the a great look out in the park.
 

New Threads and Articles

Back