JBR's RSBs are, by far, the best I've experienced. The JBR 125 Tru-Torsion is my 5th RSB for my Mazdas. I've had the Corksport Ver1 for my old MZ3 SA. My MS3 had CS Ver1 and Ver2, and finally the JBR 250 Tru-Torsion Bars. The JBR 125 Tru-Torsion Bar for the CX5 was an immediately noticeable improvement in the cornering. Body roll is significantly decreased. So much so, that my wife commented on it. I have it set to the stiffest setting, cause everyone likes it when it's stiff.
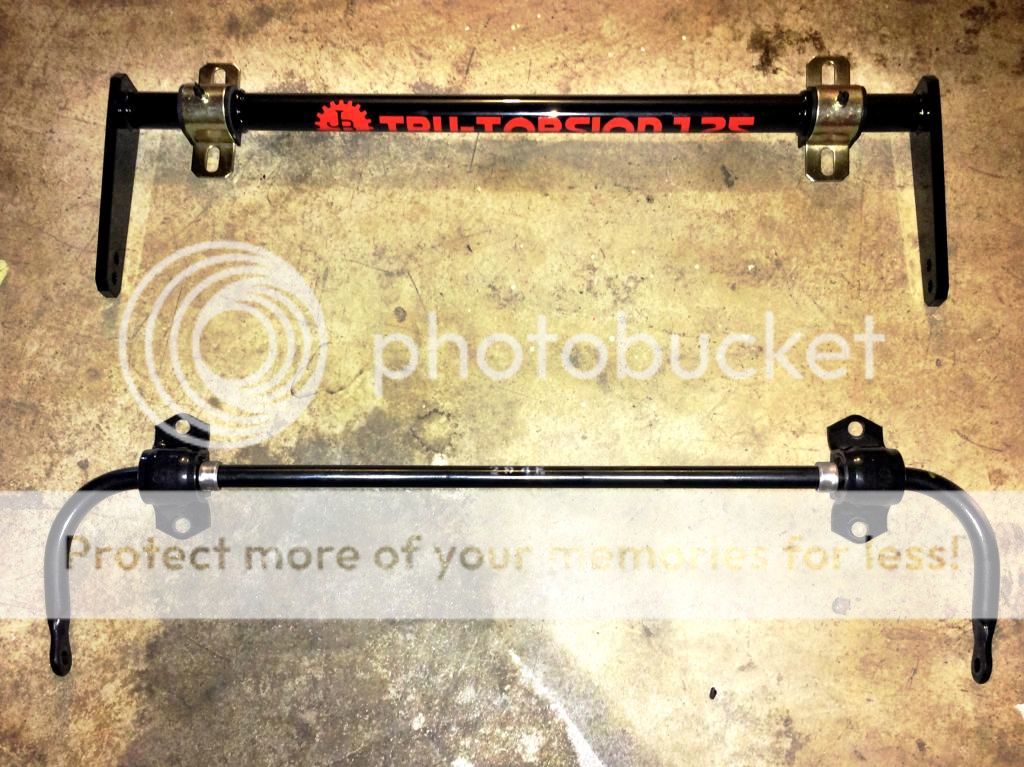
Here's a pic of the difference between the CX5 OEM RSB and a the JRB RSB:
This was a medium difficulty install, since you have to remove the rear spring and shock, and lower the sub frame. Also, there is little room to use power tools to remove the sway bar bushing nuts. It took me forever to get them off with a ratcheting box end wrench. The install can be done with one person, but a friend is good to have around to help out.
Some install tips:
A ratcheting box end wrench is your best friend. The space is tight to remove the sway bar bushing nuts and the ratcheting action was a life saver, instead of having to pull off the wrench and only being able to move it a fraction of a turn at a time.
Since my 14mm ratcheting box wrench wasn't clearly labeled, I kept fumbling with it as I was trying to take off and put on bolts. The big thing that helped me was, placing some painter's tape on it that said "ON". This saved me so much time trying to figure it out every time.
I had a pain of a time removing the top driver's side nut of the sway bar bushing. Eventually, I sprayed some PB Blaster on it and that helped it to come out.
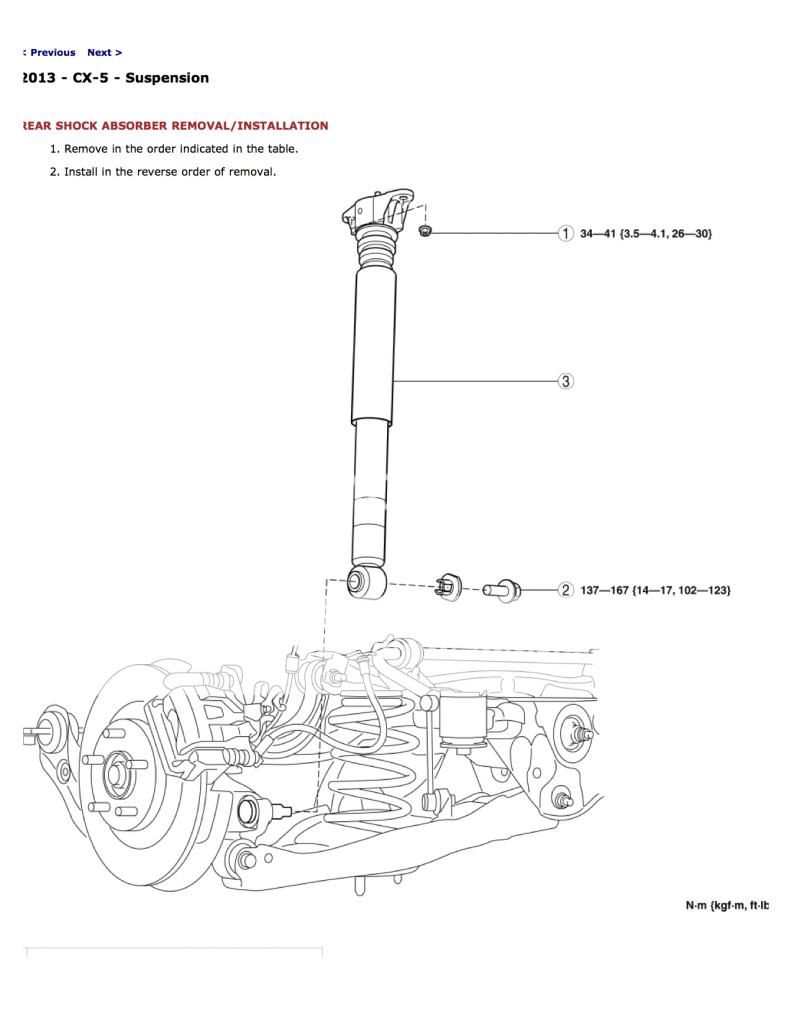
The instructions say the nut on the lower shock mount is 17mm, but for the 2015s it's a 19mm.
A 2x4 is handy to have. I used it to separate the lower the rear control arm and to help get the shock off its' bolt. I also used some PB Blaster on the shock bolt to help slide it off.
I didn't feel comfortable loosening the subframe bolts without support, so I placed the jack at the subframe lift point to hold it.
As you're putting everything back together the instruction say to secure the end links to the lower control arms. This made it difficult to get the spring back in. I left the end link on the passenger's side unattached to the lower control arm until after I had the spring and shock reassembled.
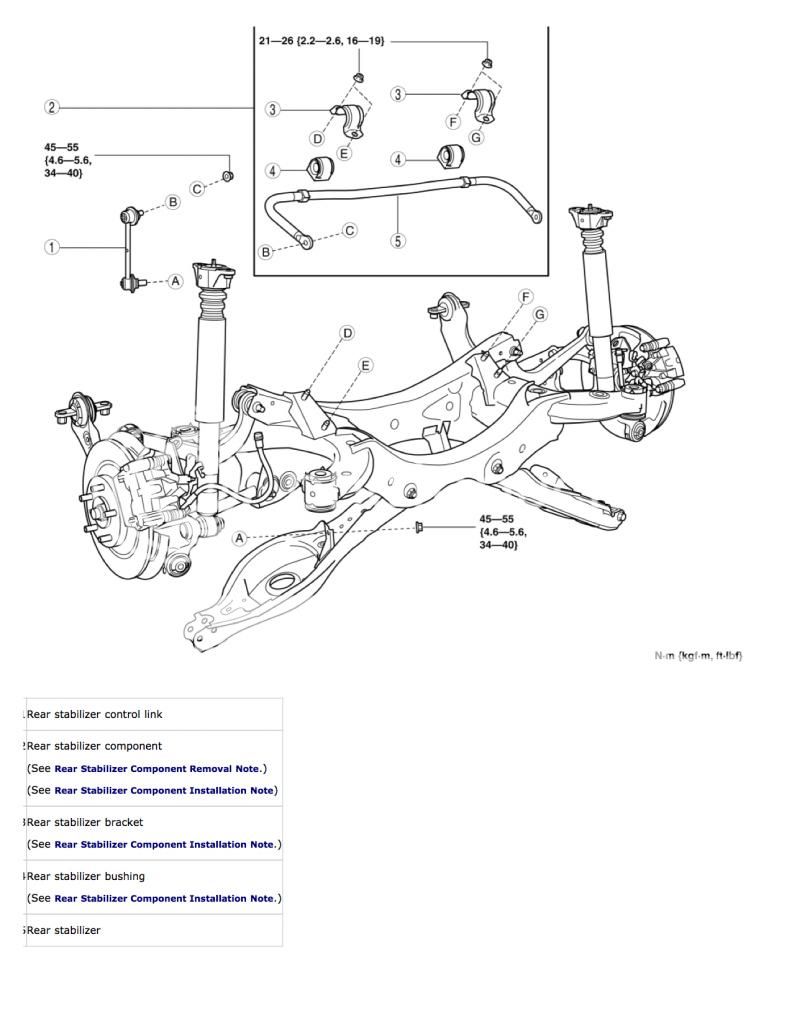
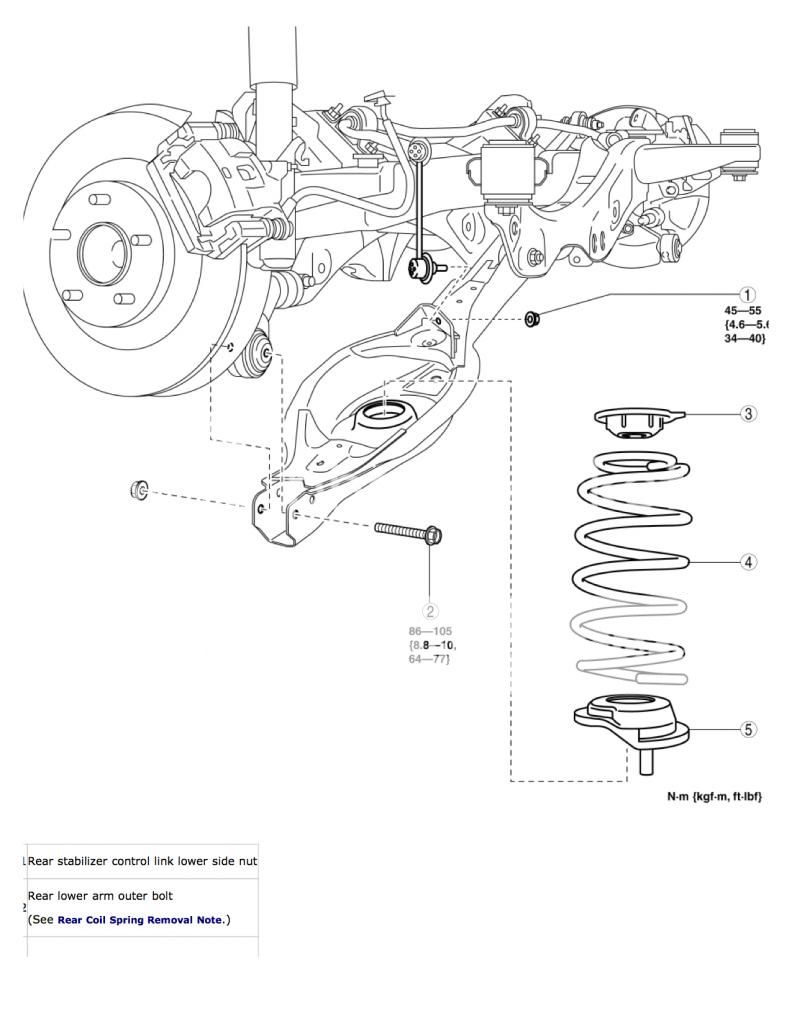
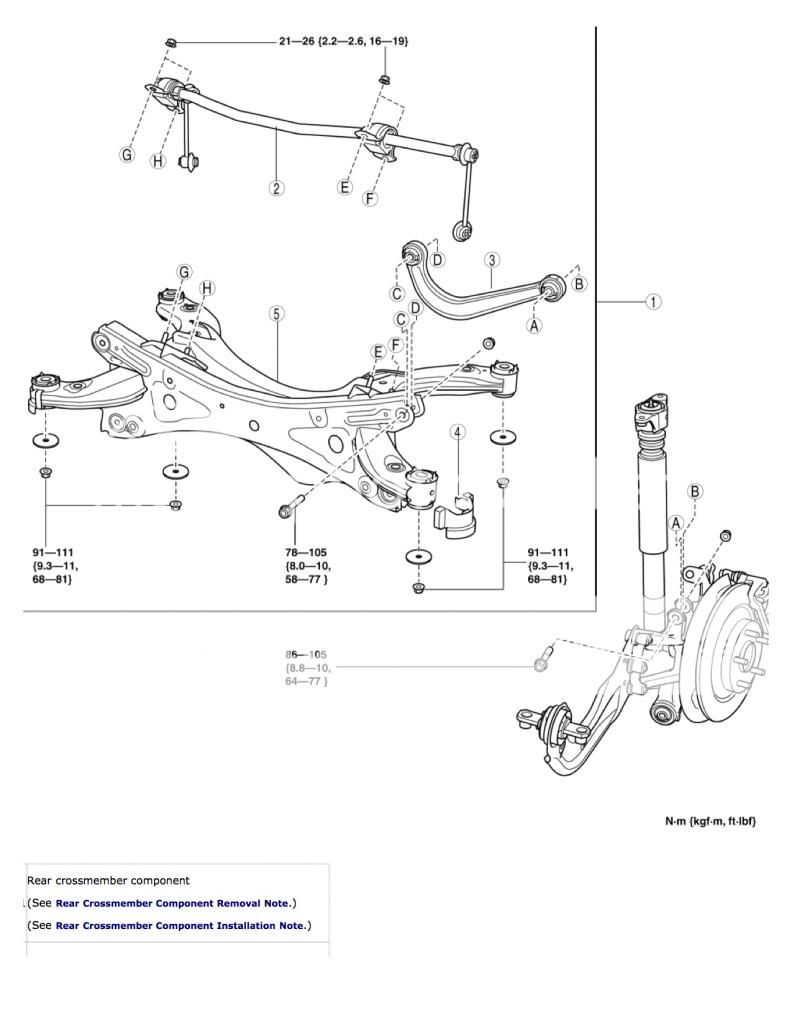
JRB instructions don't list the torque specs, so I grabbed them out of the shop manual:
Buy the bar. You know you want to.
SPEND!!!
http://www.jamesbaroneracing.com/shop/index.php?main_page=index&cPath=46_224_275
EDIT:
The JBR instructions don't mention which hole is the stiffer of the two. But from their other RSB instructions, I'm assuming the hole on the inside is the stiffest setting.