Ipodding of the 6 complete

genericuser

Member
Contributor
:
96 Miata M-Edition, 2015 Mazda 3 Hatch
It only took about an hour and a half, and this time I avoided hidden bolt destruction, but using Sylfex's AuxMod, I successfully Ipoded my 6. Sound quality is superb and it really makes the bose system in the 6 shine. I like the sound quality a lot better than the CD player!!

Easy install (with the exception of a puncture wound inflicted cutting the grid at the bottom of the center armrest with an exacto knife) and great sound quality makes me very happy with this unit.. it gets my (2thumbs)
 
seanmcsean said:
It only took about an hour and a half, and this time I avoided hidden bolt destruction, but using Sylfex's AuxMod, I successfully Ipoded my 6. Sound quality is superb and it really makes the bose system in the 6 shine. I like the sound quality a lot better than the CD player!!

Easy install (with the exception of a puncture wound inflicted cutting the grid at the bottom of the center armrest with an exacto knife) and great sound quality makes me very happy with this unit.. it gets my (2thumbs)

no pics?

I think the MS6 has an input for an ipod built in
 
eE jeremy said:
no pics?

I think the MS6 has an input for an ipod built in

hmmm, pretty sure my ms6 doesn't... but if it does, then my salesman said nothing of it

otherwise, congrats to seanmcsean for a successful install (thumb)
 
The Speed6 has no built-in aux input, but at least you can add aux input with aftermarket adapters (as proven above).
 
I didn't take any pics just because I was the only one performing the install. When I get home, I can take pics of the 1/8 audio cable I fed through the center armrest and what the adapter looks like when fully functional.

its hard to take pictures when you have your entire center stack sitting in your lap lol.
 
I would like to see a How-to, and pics..Because my next area of interest project is MP3 integration..^_^

Good Job man (thumb)
 
its actually pretty easy to do.

Unscrew the shift knob, pop off the plastic trim piece and shift boot, disconnect the cig lighter, pop off the cupholder, unscrew 4 screws from under the unit (right where you removed the cupholder), go into your glove box and there is a single support bolt (10mm socket) that you undo. remove the temp control knobs if you have manual controls and unscrew two screws under the right and left knob.. and then you yank out the entire thing.. under the unit if you don't have a tape player, there is an expansion bay where you plug the chip into. pop the chip board in, lead a 1/8' audio wire back to the device, and put everything back!
 
How-To Remove the Center Console

By Sigma


[font=verdana,arial,helvetica,sans-serif]Reason: The center console houses the head unit of the Mazda 6, along with the climate control system. Repairing or replacing any of these components first requires removal of the console. Removing the console is also required to replace the top compartment space with an aftermarket part, such as a triple gauge pod.[/font]

[font=verdana,arial,helvetica,sans-serif]Note: This article combines both a video and photographic How-To. Make sure to view the videos before attempting particular sections. (Right click the hyperlink and save as to your desktop)[/font]

[font=verdana,arial,helvetica,sans-serif]Required Tools:[/font]

[font=verdana,arial,helvetica,sans-serif]Phillips Screwdriver
10 mm Socket
Rachet Wrench with 6-inch Extension
Needle Nose Pliers[/font]

[font=verdana,arial,helvetica,sans-serif]
c1.jpg
[/font]

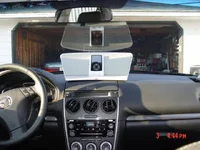
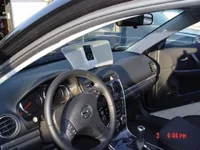
[font=verdana,arial,helvetica,sans-serif]We begin with everything in place, looking like this. If you have an automatic the removal of the center console should be very similar. If you have seat heaters, make sure they're in the off position. Also, you're parking brake must be fully set. [/font]

[font=verdana,arial,helvetica,sans-serif]
c2.jpg
[/font]

[font=verdana,arial,helvetica,sans-serif]Start by removing the shift knob. Simply twist it off counter-clockwise. Now comes the part that can be a little difficult the first time you do this. We need to remove the cupholder so we can remove the area around the shifter.

Sit in the passenger seat and grasp the side of the cupholder with both hands (I've never been able to do it with just one) by inserting your fingers behind the door. Your thumbs should be on the outside of the cupholder but still on the part that we're removing. Push in with your thumbs and lift up on the inside with your fingers. [/font]

[font=verdana,arial,helvetica,sans-serif]Video: [/font][font=verdana,arial,helvetica,sans-serif]Removing the Cupholder[/font]

[font=verdana,arial,helvetica,sans-serif]The passenger side of the cupholder should be free. The clips on the driver side should just lift free, but you might need to do the same maneuver on that side.

The cup holder is attached to the shift-gate area by two clips. They may or may not come free when you remove the cupholder. If they do not, the part of the clip you need to press to free it, is the side facing towards the engine. Pressing with one hand while lifting the cupholder will allow it to come free. [/font]

[font=verdana,arial,helvetica,sans-serif]Here's another video of the entire removal of the cupholder. As you can see from the video, my cupholder always sticks to the shifter piece on the passenger side.[/font]

[font=verdana,arial,helvetica,sans-serif]Video: [/font][font=verdana,arial,helvetica,sans-serif]Removing the Cupholder Part II[/font]

[font=verdana,arial,helvetica,sans-serif]
c3.jpg
[/font]

[font=verdana,arial,helvetica,sans-serif]The piece around the shifter lifts off fairly easily. There are two wires connected to the back of the ashtray/lighter. The one leading to a small bulb can be removed with a pair of pliers. It will take a bit of force to remove. The other is the usualy automotive plug that is held into place with a difficult to press clip. [/font]

[font=verdana,arial,helvetica,sans-serif]
c4.jpg
[/font]

[font=verdana,arial,helvetica,sans-serif]Immediately behind where the ashtray was there are 2 screws holding the console into place. Remove those. Now we need to move on to the glove box. It needs to be removed because there's a single screw behind the console that we need to remove. [/font]

[font=verdana,arial,helvetica,sans-serif]
c5.jpg
[/font]

[font=verdana,arial,helvetica,sans-serif]Open the Glove Box and remove the contents. On the left side there is a piece of string connected to a clip. Simply remove the string from the clip. Press in the sides of the glove box and it should fall down. It will hang low, which is good enough for our purposes. If you look inside the glove box and to the left, you will see the radio components. A single brass screw should be very obvious. [/font]

[font=verdana,arial,helvetica,sans-serif]
c6.jpg
[/font]

[font=verdana,arial,helvetica,sans-serif]The screw is 10mm and you'll need a ratchet with a 6-inch extension on it similar to this one.

[font=verdana,arial,helvetica,sans-serif]Once you get that removed we get to move on to the fun part -- removing the entire Radio/HVAC assembly. This is very easy, but probably not for the faint of heart. Just to forewarn you, it will take some force and make some loud popping sounds when you do it. But I can't think of any way you could possibly break anything, so there's no need to worry.

Before you move on, cover the bare shifter rod. I'd recommend something relatively thick and soft. An old towel is ideal. Be forewarned, that the linkages are covered in a lubricant and it may get on your towel, so don't use one of your wife's good ones.

Alright, after covering the shifter, grasp the area right beneath the 2 screws you removed earlier. Give a good pull on that, directing as much force out, rather than up, as possible. It should give about 1/4 inch, which then allows you to slip your fingers under it and get a much better grip. Another pull or two and the bottom two clips should pop free. A little pull down and out should pop the top 2 clips free.


-courtesy of 6tech
[/font][/font]
 
I copied and pasted the article.. its still onsite, I just attributed it to the correct source :)
 
I just completed the installation of the RPM iPod audiolink in my MS6.

Following the instructions on how to remove the center console, it took me about 45 minutes to install. It was really quite easy. Removing the cupholder is probably the hardest part because it's clipped on so tightly. The thin trim on the parking-brake side can be bent/broken easily so you really have to be delicate with it.

The other "gotcha" was that 10mm bolt that you remove after pulling the glovebox off. I forgot about that one, and couldn't figure out why the HU wouldn't pull out.

I routed the AudioLink cable from behind the HU, down the left side of it and out the bottom center before sliding the HU assembly back into place. Then, the audiolink box itself is stuffed on the right side of the console where the cupholder sits. There's insufficient clearance below the cupholder to lay the audiolink box flat.

Finally, I cut a few of the grates off of the vent on the floor of the center armrest console, and cut a 1.25" long slice in the felt liner to route the audiolink cable up inside the console.

Finished it all up by routing the iPod connector up through the top tray of the armrest, where the iPod is nicely stowed.

It works great!
 
Last edited:
xrayracer said:
Do have any pixs of the Ipod in the car

thanks


Here's my iPod in the top armrest tray:
ipod_toptray.jpg


Here's how the wires route through the bottom bin:
ipod_bottomtray.jpg


Note the removed slats from the plastic grate at the bottom of the console:
ipod_cutgrate.jpg


Here's where the iPod Audio Link is hidden:
ipod_audiolink.jpg
 
masskaos said:
Do all the controls work like the link says? Because thats a deal maker/breaker for me.

I assume you're referring to the iPod audio link, not the sylfex auxmod.

Yes, the iPod audio link works as stated on their site.

The HU and steering-wheel buttons perform the following functions on the iPod:
Track up/down (press the buttons)
Fast-forward and rewind (press and hold the buttons)

You must still manually select playlists on the iPod, however. Sort of a bummer. It would be cool if there were a product that works a lot like this one. Getting the radio-preset buttons to switch playlists would be an awesome feature.
 
XPLORx4 said:
I assume you're referring to the iPod audio link, not the sylfex auxmod.

Yes, the iPod audio link works as stated on their site.

The HU and steering-wheel buttons perform the following functions on the iPod:
Track up/down (press the buttons)
Fast-forward and rewind (press and hold the buttons)

You must still manually select playlists on the iPod, however. Sort of a bummer. It would be cool if there were a product that works a lot like this one. Getting the radio-preset buttons to switch playlists would be an awesome feature.


I found this one for ipods that will work with head unit and play the first 5 playlists but you will lose your cd changer only 1 or the other not both.

http://www.dension.com/icelink.htm
 
Last edited:
I only have the auxmod myself. The steering wheel controls won't work on it, but I'm happy with it. It cost me $50 and the sound quality is superb. Does the audio link work in a similar fashion that it plugs into the spot where the tape player would go?
 
seanmcsean said:
Does the audio link work in a similar fashion that it plugs into the spot where the tape player would go?

No, the audio link plugs into the connector at the back of the HU, near the antenna plug. So, you can use the auxmod and audio link simultaneously.
 
just ipoded my ms6 with the icelink plus it plays the first 5 play list and the steering wheels controller works. My mazda dealer did for free in the parking lot took about all of 12 minutes from start to finsh. will post picks later


xray
 
xrayracer said:
just ipoded my ms6 with the icelink plus it plays the first 5 play list and the steering wheels controller works. My mazda dealer did for free in the parking lot took about all of 12 minutes from start to finsh. will post picks later


xray

Here are the pixs of my ipod in my MS6
 

Attachments

  • DSC01514.webp
    DSC01514.webp
    30.1 KB · Views: 400
  • DSC01515.webp
    DSC01515.webp
    35.5 KB · Views: 359
  • DSC01516.webp
    DSC01516.webp
    34.8 KB · Views: 369
Back