
So I searched around and did not find a post with a definitive answer and details on the install so I am putting this one up. Enjoy!
I have replaced the fog lights with the stockers several times and finally got sick of paying $140 each for the junk stock lights. I was in Wal-Mart and saw a set for $39 and thought I had to try it out as my fogs were badly cracked yet again. What I found was Navigator 5 1/2" truck lights with a removable chromed plastic cover. I knew the harness would be an issue and pleasantly found a way to do the install with no electrical tape or solder at all. These lights provide stock like fitment and are significantly brighter than the stockers. All in all doing this myself saved me about $240 in parts + labor. I hope this is helpful! The images are each about 40kb but there are a lot of them.
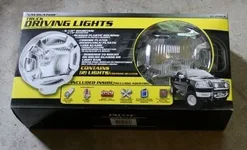
1.) The Box at Wal-Mart looks like this it was $39 for two lights

2.) I am sure everyone has seen one of these but this is what the broken light looked like.

3.) You must remove three screws on the bottom front of the car to access the fog light and harness. Two are depicted here, one with a white arrow and one my wrench is on.

4.) The last of the three is on the bottom of the front bumper and requires a phillips head screw driver.

5.) Now you can lower the shield and access the fog from below

6.) Its a really bad photo but you can put a wrench on the nut on the back of the fog and remove it

7.) Once this is complete the fog lamp will be very loose. Pop the harness off the back side by pulling toward the back of the car and then pull the lamp out and unplug the harness by squeezing down on the tab and pulling hard.

8.) Now that the old fog is disconnected out it face down on the ground and remove one of the two phillips screws holding it together.

9.) Now remove the other

10.) Flip it over carefully and use a flat head screw driver to coax the glass pat of teh light out of the case. You may want to use gloves here the glass may break more and is very sharp.

11.) Now unplug the stock harness from the bulb

12.) Once this is complete use a flat head screw driver to push the rubber grommet and harness out from the back of the fog light. BE CAREFUL not to stab yourself

13.) This is what the stock harness looks like when you got it out. This first part of the procedure took me less than five minutes, my 10 year old son snapped photos while I did it. He is a pretty good photog don't ya think?

14.) Now grab the new light and lets start to take it apart so we can hook up the stock harness and replace the one it came with. Pry off the chrome plastic cover. You can choose to leave this part off, I left it on and have not yet decided if it will stay on. Either way it is easy to remove later.

15.) Remove the keeping screw from the bottom of the light.

16.) Pry the light out carefully, it comes off bottom first and then onhooks from the top.

17.) Disconnect the new harness, we will be throwing this one away

18.) Don't forget to remove the ground also!

19.) Pry the harness out of the case to remove it completely.

20.) Now we feed the stock harness black plastic lead or red wire first

21.) Now follow with the ground wire.

22.) Now use a screw driver to push the stock grommet into the new case backing for a weather tight seal. This took a few minutes, but be patient it will go in. I found it helpful to work around it in a circular motion.

23.) Connect the power lead

24.) Connect the ground

25.) Reassemble the fog

26.) Tighten the mounting bracket at a similar angle to the stock.

27.) Reconnect the new light with the stock harness, no tape solder or cutting wohooo!

28.) Tighten everything back up and align the light to your satisfaction and tada!!! You are done!

29.) Now crack em' on and enjoy your handy work. The entire job took less than 20 minutes for both sides. The lights fit tight like stock and do not stick out. The chromed bezel does stick out a little bit but I think I like it. But if you remove the bezel it looks just like stock.

Well I hope this is helpful to every one. Enjoy!
I have replaced the fog lights with the stockers several times and finally got sick of paying $140 each for the junk stock lights. I was in Wal-Mart and saw a set for $39 and thought I had to try it out as my fogs were badly cracked yet again. What I found was Navigator 5 1/2" truck lights with a removable chromed plastic cover. I knew the harness would be an issue and pleasantly found a way to do the install with no electrical tape or solder at all. These lights provide stock like fitment and are significantly brighter than the stockers. All in all doing this myself saved me about $240 in parts + labor. I hope this is helpful! The images are each about 40kb but there are a lot of them.
1.) The Box at Wal-Mart looks like this it was $39 for two lights
2.) I am sure everyone has seen one of these but this is what the broken light looked like.
3.) You must remove three screws on the bottom front of the car to access the fog light and harness. Two are depicted here, one with a white arrow and one my wrench is on.
4.) The last of the three is on the bottom of the front bumper and requires a phillips head screw driver.
5.) Now you can lower the shield and access the fog from below
6.) Its a really bad photo but you can put a wrench on the nut on the back of the fog and remove it
7.) Once this is complete the fog lamp will be very loose. Pop the harness off the back side by pulling toward the back of the car and then pull the lamp out and unplug the harness by squeezing down on the tab and pulling hard.
8.) Now that the old fog is disconnected out it face down on the ground and remove one of the two phillips screws holding it together.
9.) Now remove the other
10.) Flip it over carefully and use a flat head screw driver to coax the glass pat of teh light out of the case. You may want to use gloves here the glass may break more and is very sharp.
11.) Now unplug the stock harness from the bulb
12.) Once this is complete use a flat head screw driver to push the rubber grommet and harness out from the back of the fog light. BE CAREFUL not to stab yourself
13.) This is what the stock harness looks like when you got it out. This first part of the procedure took me less than five minutes, my 10 year old son snapped photos while I did it. He is a pretty good photog don't ya think?
14.) Now grab the new light and lets start to take it apart so we can hook up the stock harness and replace the one it came with. Pry off the chrome plastic cover. You can choose to leave this part off, I left it on and have not yet decided if it will stay on. Either way it is easy to remove later.
15.) Remove the keeping screw from the bottom of the light.
16.) Pry the light out carefully, it comes off bottom first and then onhooks from the top.
17.) Disconnect the new harness, we will be throwing this one away
18.) Don't forget to remove the ground also!
19.) Pry the harness out of the case to remove it completely.
20.) Now we feed the stock harness black plastic lead or red wire first
21.) Now follow with the ground wire.
22.) Now use a screw driver to push the stock grommet into the new case backing for a weather tight seal. This took a few minutes, but be patient it will go in. I found it helpful to work around it in a circular motion.
23.) Connect the power lead
24.) Connect the ground
25.) Reassemble the fog
26.) Tighten the mounting bracket at a similar angle to the stock.
27.) Reconnect the new light with the stock harness, no tape solder or cutting wohooo!
28.) Tighten everything back up and align the light to your satisfaction and tada!!! You are done!
29.) Now crack em' on and enjoy your handy work. The entire job took less than 20 minutes for both sides. The lights fit tight like stock and do not stick out. The chromed bezel does stick out a little bit but I think I like it. But if you remove the bezel it looks just like stock.
Well I hope this is helpful to every one. Enjoy!
")


