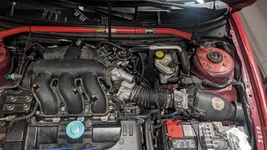
Off Topic: 3L Swappin' Contour

A little update for this season so far, since ive not been on track in this since Gingerman.

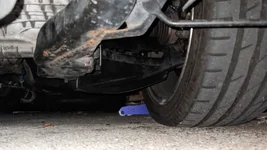
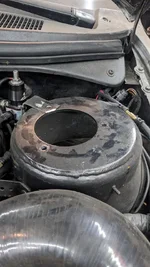
As a result of putting the passenger side brake duct in, I had to axe the windshield washer fluid bottle. I don't mind not having a bottle, but on occasion it's been a bit frustrating due to bugs or road filth.

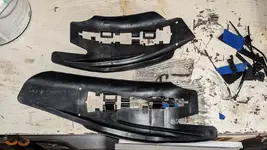
I was originally going to chop the OEM bottle up and attach a new bottom onto it, but I found out (through online research) that polyethylene is a bear to join together.

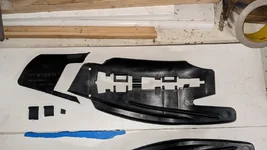
I used some cardboard to mockup a potential replacement container, but the opening was offset and the container too deep. That would have been the "best" path forward because it was a drop-in solution with a pump and nice looking lid.

PVC pipe with a cap and bracket is the easiest path forward and I'm delighted to say, at least so far, I haven't noticed any leaking

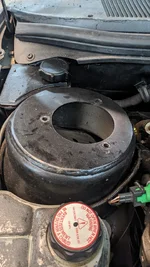
The sace I'm working with. There's a boxed section under the tape which protruded inwards towards the engine bay, so space behind here isn't as large as I'd have liked it to be. I'm limited in length. Could go wide towards the front of the vehicle, but that's added "junk" and complexity, I think.
PXL_20230811_020415741.jpg


Chopped old bottle would have been nice to use.
PXL_20230811_020450472.jpg


PVC bottle. Holds enough fluid to likely get me through a months' worth of normal driving.
PXL_20230811_033944042.jpg


Here's the fill lid in the bay. I'm trying to decide if I want to have the threaded cap be the removable portion, or I just remove the clean out entirely. Both work, and I think I'll need a funnel in either case. But, it's an improvement over the nothing that was previously there.
PXL_20230811_034352190.jpg
 
After some more tinkering this morning, I had the bracket bent up. I should have had the strap piece shifter further back, but I managed to get this to work through some trickery.
PXL_20230811_143708018.jpg


I ended up having to bend the bracket slightly to clear the opening into the engine bay. The 2"-1.5" adapter was fouling on the body more than I wanted it to, and there's a ziptie that was being crushed too.
PXL_20230811_145221017.jpg


The PVC cap as it sat in the engine bay was low and removing it meant torquing the bracket a bit more than I'd wanted to. So I got to thinking if the OEM filler neck would fit. It did, but only after I opened up the adapter a bit with a Dremel tool. Now I have far easier access, and apply far less torque to the bracket!
PXL_20230811_151903290.jpg


Here is the near-final product. I'm letting the cement dry and once that's done, I'll leak test the setup. I'm really happy with how it's turned out.
PXL_20230811_152019097.jpg

PXL_20230811_152013967.jpg
 
An update from this past weekend's autocross at Grattan, with a few updates from happenings prior to that. I was hoping to make a HPDE at Waterford Hills on the 15th, but unfortunately the brakes on the Contour weren't up to snuff, so I took my GTI instead. That was a mistake, as the brake pads and fluid weren't really suited for a track day. I got through one session and the pedal was soft, and the steering wheel was very shaky under heavy breaking. So I decided to cut the day short and helped a guy whose C5 Vette gave him ice mode and sent him off course (no accident, just copious pounds of gravel trap gravel in the nooks and crannies).

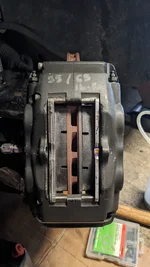
I had a hand bleeding the brakes on the Contour weeks prior to the track day at Waterford, but I had an inlking that I should check the pad wear, since the pistons were sticking out somewhat far. This can be remedied by placing spacers or shims between the backing plate of the pads and the brake pistons, which I had in a box but thought nothing of using them. So I set about installing a more square set of pads, but they were a different compound. As much as I tried to bed them in, I wasn't able to get good pedal feel, so I decided the safer route was to take another car to the event.

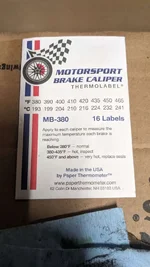
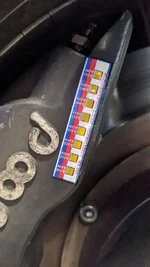
So what did I do to fix the pedal feel? Replaced the brake pads with the same type of pads, just new in box. Glad I did as the pedal had feel immediately, so I was very happy to take the car out to Grattan this past weekend. I threw some caliper temperature stickers on too, to see whether I was really cooking the calipers or not. The positioning wasn't great, and my results went against another measure I had access to unintentionally. The brake caliper indicators had a temp range of 380-465F and the Sil-Glyde lubricant I used on the backing plates of the pads is good for up to 425F, and I think I saw smoke from the Sil-Glyde specifically, but I've not removed the pads to inspect just yet.

PXL_20231020_204604526.jpg PXL_20231020_191500376.jpg

Getting exhausted with the exhaust
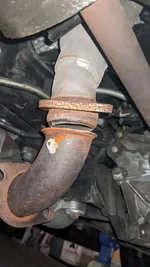
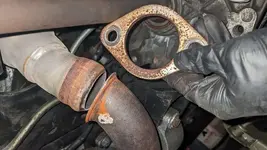
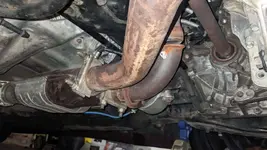
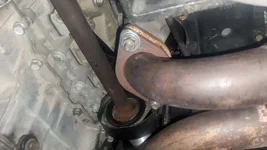
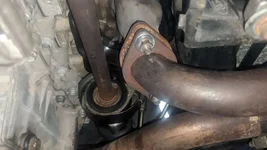
Another frustration I had was the rear header flange pulling off of the header. At the last AutoX back in September event that I did with the car, it got louder as the day went on and I thought maybe the midpipe was leaking, but I torqued the header flange bolts down some more as they felt loose when I had the car up in the air. Of course I didn't think much of it at the time, but I got home and found out that I pulled the flange over the "bulb" on the header... There's a local muffler shop to me that fixed the flanges up easily enough. I gave them a few options - increasing the bulb diameter, welding the bulb to increase the size of the bulb, or welding the flange to the bulb. The "easiest" option was taken - welding the flange to the bulb, and I'm pretty happy with the results to be fair. I do notice the engine rocking around a fair amount still, which I think flexes these flanges more than is ideal.

PXL_20230925_005440179.jpg PXL_20230925_005513181.jpg PXL_20230925_005724765.jpg PXL_20231001_002326926.jpg PXL_20231001_002331267.jpg

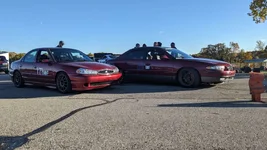
Grattan was a blast because there are tons of elevation changes, and you have to really commit to the turns. So I was apprehensive initially about going off course, but there was much more grip than I thought there would be. My friend and I co-drove the car, and he managed to beat me. Just desserts for me beating him in his Miata at an AutoX previously. We were up against a ZZPerformance Sonic RS that was well prepped, but he thinks he threw a rocker after his first run. So it was us versus a turbocharged Buick Regal and an Acura RSX. All of us were on 200 treadwear tires and so we were all on a level playing field. The Buick makes roughly 350 HP and the Acura was on 255 section width tires, so I think the Contour did well to be within two seconds being newbies on that course. I hope that next year we can give them more grief and keep them as honest as they've been.

PXL_20231022_111956038.jpg PXL_20231022_132234932.jpg

PXL_20231022_211926416.jpg PXL_20231022_211933840.jpg

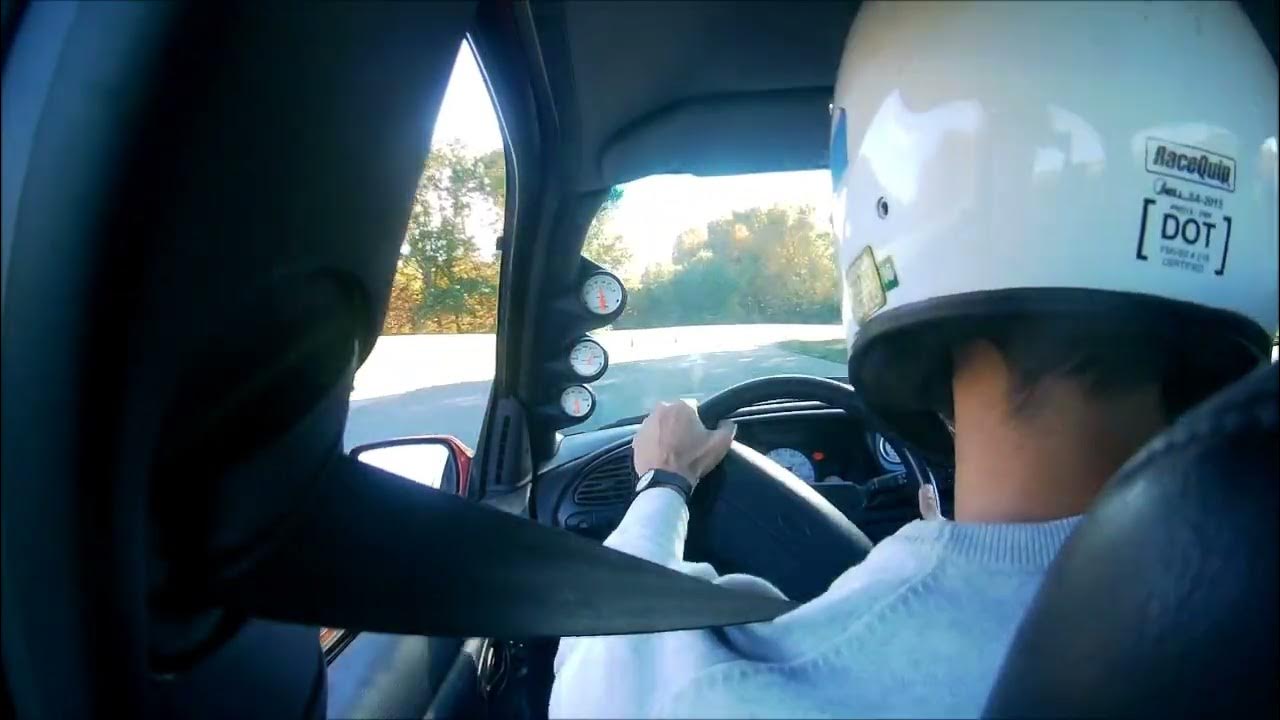
Video with poor lighting of my runs, my friend's runs are also on my channel:

To do for the winter:
- heater core (it was brisk driving to the track yesterday morning)
- pull engine and transmission in order to
- inspect diferential
- lightweight flywheel
- driver's seat change to something more bolstered
- add back in the street link to the front motor mount, inspect poly-filled rear mount for longevity
- poly fill pass motor mount?

Edited to add pic of how toasty the brake pads got. This is Sil-Glyde on the backside of the pads. Adding "apply rotor temperature paint" to the to-do list this winter...

PXL_20231024_230127244.jpg PXL_20231024_230132845.jpg
 
Last edited:
Well, winter came and went, and so too did most of the summer. I ended up in TN for work from Jan-Jul this year, so work on the car was at a minimum. Racing was also, but I got the car out to two track days at Waterford Hills. 1:20ish my first trip out there as a fastest lap, but that was with a suspect GPS (using phone only) and second time out there was a more confident 1:20.75, not bad considering the state of the tires after the event...

Did I accomplish anything from the list shown above? I added in the Streetlink, but think that may have caused more harm than good, and so I will probably (not) work on modifying the rear mount further to add more stiffness.

I had the local exhaust shop tack the loose flanges to the bulbs at the bottom of the headers in an attempt to get the exhaust to STOP LEAKING but there is still a leak where the U-clamp holds the front bank into the cat, which is easy enough to address.

Exciting things happened over the past few months though. Pictures and captions below to highlight the big ticket items:

PXL_20240721_132546590.webpPXL_20240721_133708713.webp
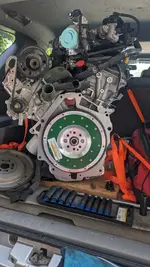
My first weekend back home I went with two friends to the west side of the state to buy this unused 3L engine - $300 was all it cost, and bought the lightweight flywheel shortly afterward. This opens up a can of worms regarding the fuel system, since the 3L never came with a return-style setup...

PXL_20240721_205553965.webp
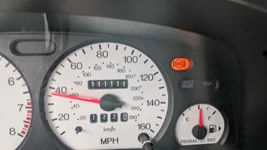
Contour unofficially rolled 111,111 miles, I say that because the speedo cable was inop when I bought the car, so really that mileage is unknown!

PXL_20240825_172656677.webp
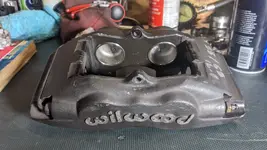
I finally have a full set of 10mm spacers so I could run the ST200 wheels and clear the Wilwood brakes up front.

PXL_20240923_192230704.webpPXL_20240923_191545683~2.webp
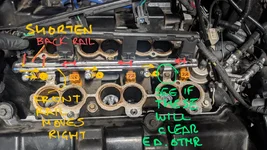
Rough (very rough) mockup of the 3L intake and a markup of the fuel rail changes which would have to be made in order to accommodate the oval port setup. I'd like to take the 3L I have in the car out, and want to experience what the oval port 3L powerband is like, so this is something that will need to be addressed in order to most sensibly run a fueling setup that works. I need to find someone who can braze in the DetMet area but that's a winter project.

PXL_20240926_161120898.webp
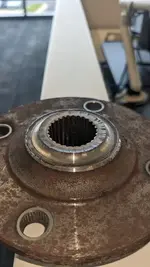
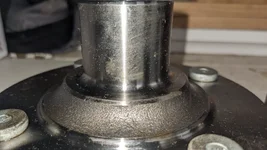
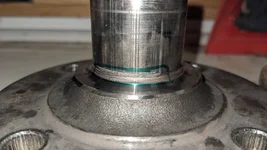
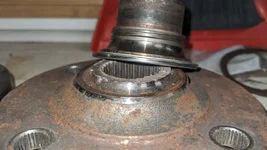
Lastly my show-and-tell. I finished my last HPDE at Waterford and drove back home, the car making a sad noise when the wheel was held at a certain angle. I thought it was the differential, or the brakes, but apparently it wasn't those. I check the wheels for play at 12/6 and 9/3 whenever I have the car in the air and did not notice anything suspect, but I ruled out a brake issue by rolling the car up and down the driveway with the brake pistons pressed into the caliper all the way and the sound persisted. I removed the axle nut and felt the front hub moving with the rotor (rotor was stuck to the hub) and when I removed the caliper, the rotor hat (and hub) were EXCEEDINGLY easy to remove!!! I put red loctite on the threads and flange of the axle nut, and am inclined to believe that the reason this didn't end up any more poorly is because I had loctited them...

So this offseason will consist of:

- pull dash, replace heater core
- rear motor mount insert/stronger polyurethane
- replace both front hubs (a consumable at this point in time)
- change front brake pads out for a track-suited setup (Wilwood BP-30 going in, PolyMatrix E coming out)
- POSSIBLE oval port 3L swap

Sad this season was so "short" but happy that 1) no accidents happened and 2) it was fun for what was experienced.
 
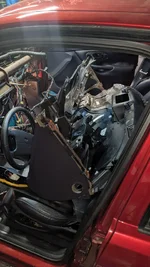
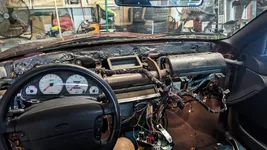
Annnnnd boredom struck in the form of pulling the dash ahead of the weather getting too cold. All in all it took maybe 2 hours, having never done this before. One dastardly hidden Philips head held the driver's upper HVAC vent to a wiring loom, and that to the dash, so I may opt to ignore putting that back in once the dash goes back together.
PXL_20240930_012805580.webpPXL_20240930_012216276.webp
I swear it's not abandoned!

PXL_20240930_203432480.webp
As it sits now. "DON'T GO FULL RACE CAR" me, to me. I have to drive it to a local shop to have the remaining AC refrigerant vacced out, then I can pull the heater core and AC evap core, to replace the heater core. I MAY opt to throw a new evap core in just to be safe. While I'm in here that's really the ideal time. Otherwise I put everything back together sans dash and have it recharged/check for leaks right away. Might be the smart thought!
 
In typical fashion, I didn't take photos of the heater core replacement progress, but I had a fun learning moment when I realised the heater core I had ordered wasn't right on account of it being from a '96 model where apparently the line sizing was smaller. So another eBay order later and I had the right one on hand, and installed shortly thereafter. And then I realised further that the sodding dash pad doesn't need to come out in order to access the heater core, so that's fun. But while I was in there, I took the time to modify the blend door actuator mount which constantly popped off, which I wouldn't have had access to if I'd left the dash pad on - silver linings I suppose.

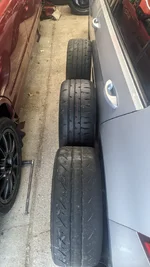
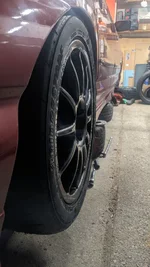
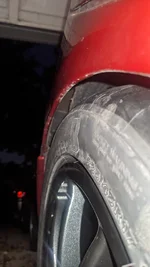
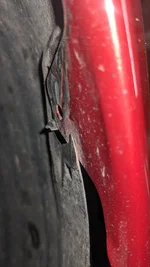
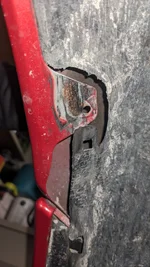
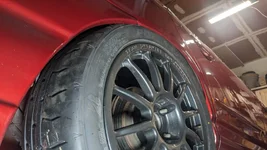
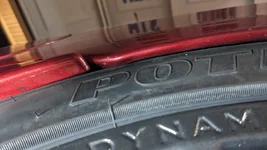
I also ordered a set of tires that I may regret having ordered, but we'll have to see what shakes out next season. As it sits, the RT660s were a pretty tight fit, and I think the RE71RSes may be an even tighter fit, so I'm not looking forward to having to pull the fenders even more, if I have to...

Stackup of the Indy500 (far), RE71RS (center), and RT660 (near)
The RE71RS is a 235 section width, where the RT660 was a 225. The real difference for my application is just how much more squared off the shoulder of the RE71RS is, but again, I'll do another "proper" test of the articulation, etc. when I have the other odds and ends buttoned up this winter.
PXL_20241001_215001336.webp
Rear should clear without too many issues:
PXL_20241001_235214858.webpPXL_20241001_235229739.webp

Front is another story. Wear marks from the RT660 suggests it was tight enough already:
PXL_20241003_000545724.webpPXL_20241003_001320824.webpPXL_20241003_001357163.webp

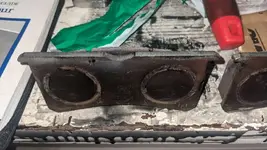
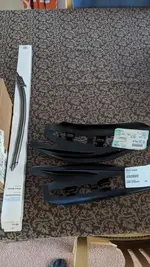
I also took the time to tinker with some extraordinarily cheap Porsche parts in the forms of GT3 brake ducts. I want to find a way to test these to see if they truly work, but any amount of air diverted into and through the hub/center of the brake rotor should be a win in my book:
PXL_20241009_221749792.webpPXL_20241010_001308114.webpPXL_20241010_002716442.webpPXL_20241010_013632876.webp

Lastly for this update is front strut tower modification by Dunn's Welding in Southfield MI. These guys have been road racing at Waterford Hills among other places for many years, and my friend had his strut towers done by them 6+ years ago. I don't have pictures of mine on my laptop, but have pictures I took of his for reference. There was (is) a guy who made these top plates able to accept a Nissan S13 camber plate eons ago, and he still had a set on the shelf. This allows me to FINALLY adjust camber, though caster is still unfortunately stuck as "whatever you get." One more step down the path of no return for this car. I have to have the spring tops machined down as it turns out that KW use metric springs with a 62mm ID and so the 2.5" ID spring tops provided with this kit don't work well currently:
PXL_20241102_235204408.webpPXL_20241102_235210265.webp

Still to do from above:
- higher duro RMM - this was confirmed to be the cause of the cracking I experienced with the old RMM by the gent who made the strut tops
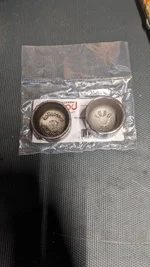
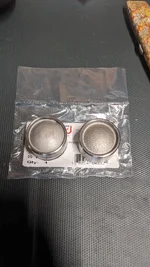
- brake caliper rebuild - pistons are on their way; seals are on hand
- brake pad mat'l change - BP-30 pads acquired; will change these and bed them in come springtime
- hubs replaced; spare uprights have been rebuilt too so I have a set on me when I go to any events
 

New Posts

Back