RedBaron
2014 & 2019 CX-5 Touring(s), 2023 CX-50 TPP
In the ongoing series of adding an Aftermarket Head Unit while retaining as many of the factory accessories as possible, this is what I did for the Bluetooth microphone part...
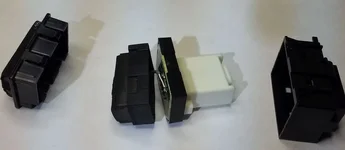
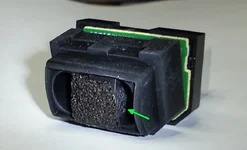
I really wanted to reuse the stock microphone, but after perusing the schematics I saw there were 5 wires to the mic, implying that it was an active device - and that doesn't play well with aftermarket head units. Still I took the mic out from the car and took it apart to see if there was a way to make it work (see photos later). There wasn't. ... Plus, it's only a cheap condenser mic unit, so I decide it was better TO replace it anyway.
Therefore, I decided that the next best thing would be to replace the factory mic, in the stock position, with the head unit's mic; but at least reuse the factory wiring instead of having to route a long-assed microphone wire to Egypt and back (i.e. from the radio to the headliner).
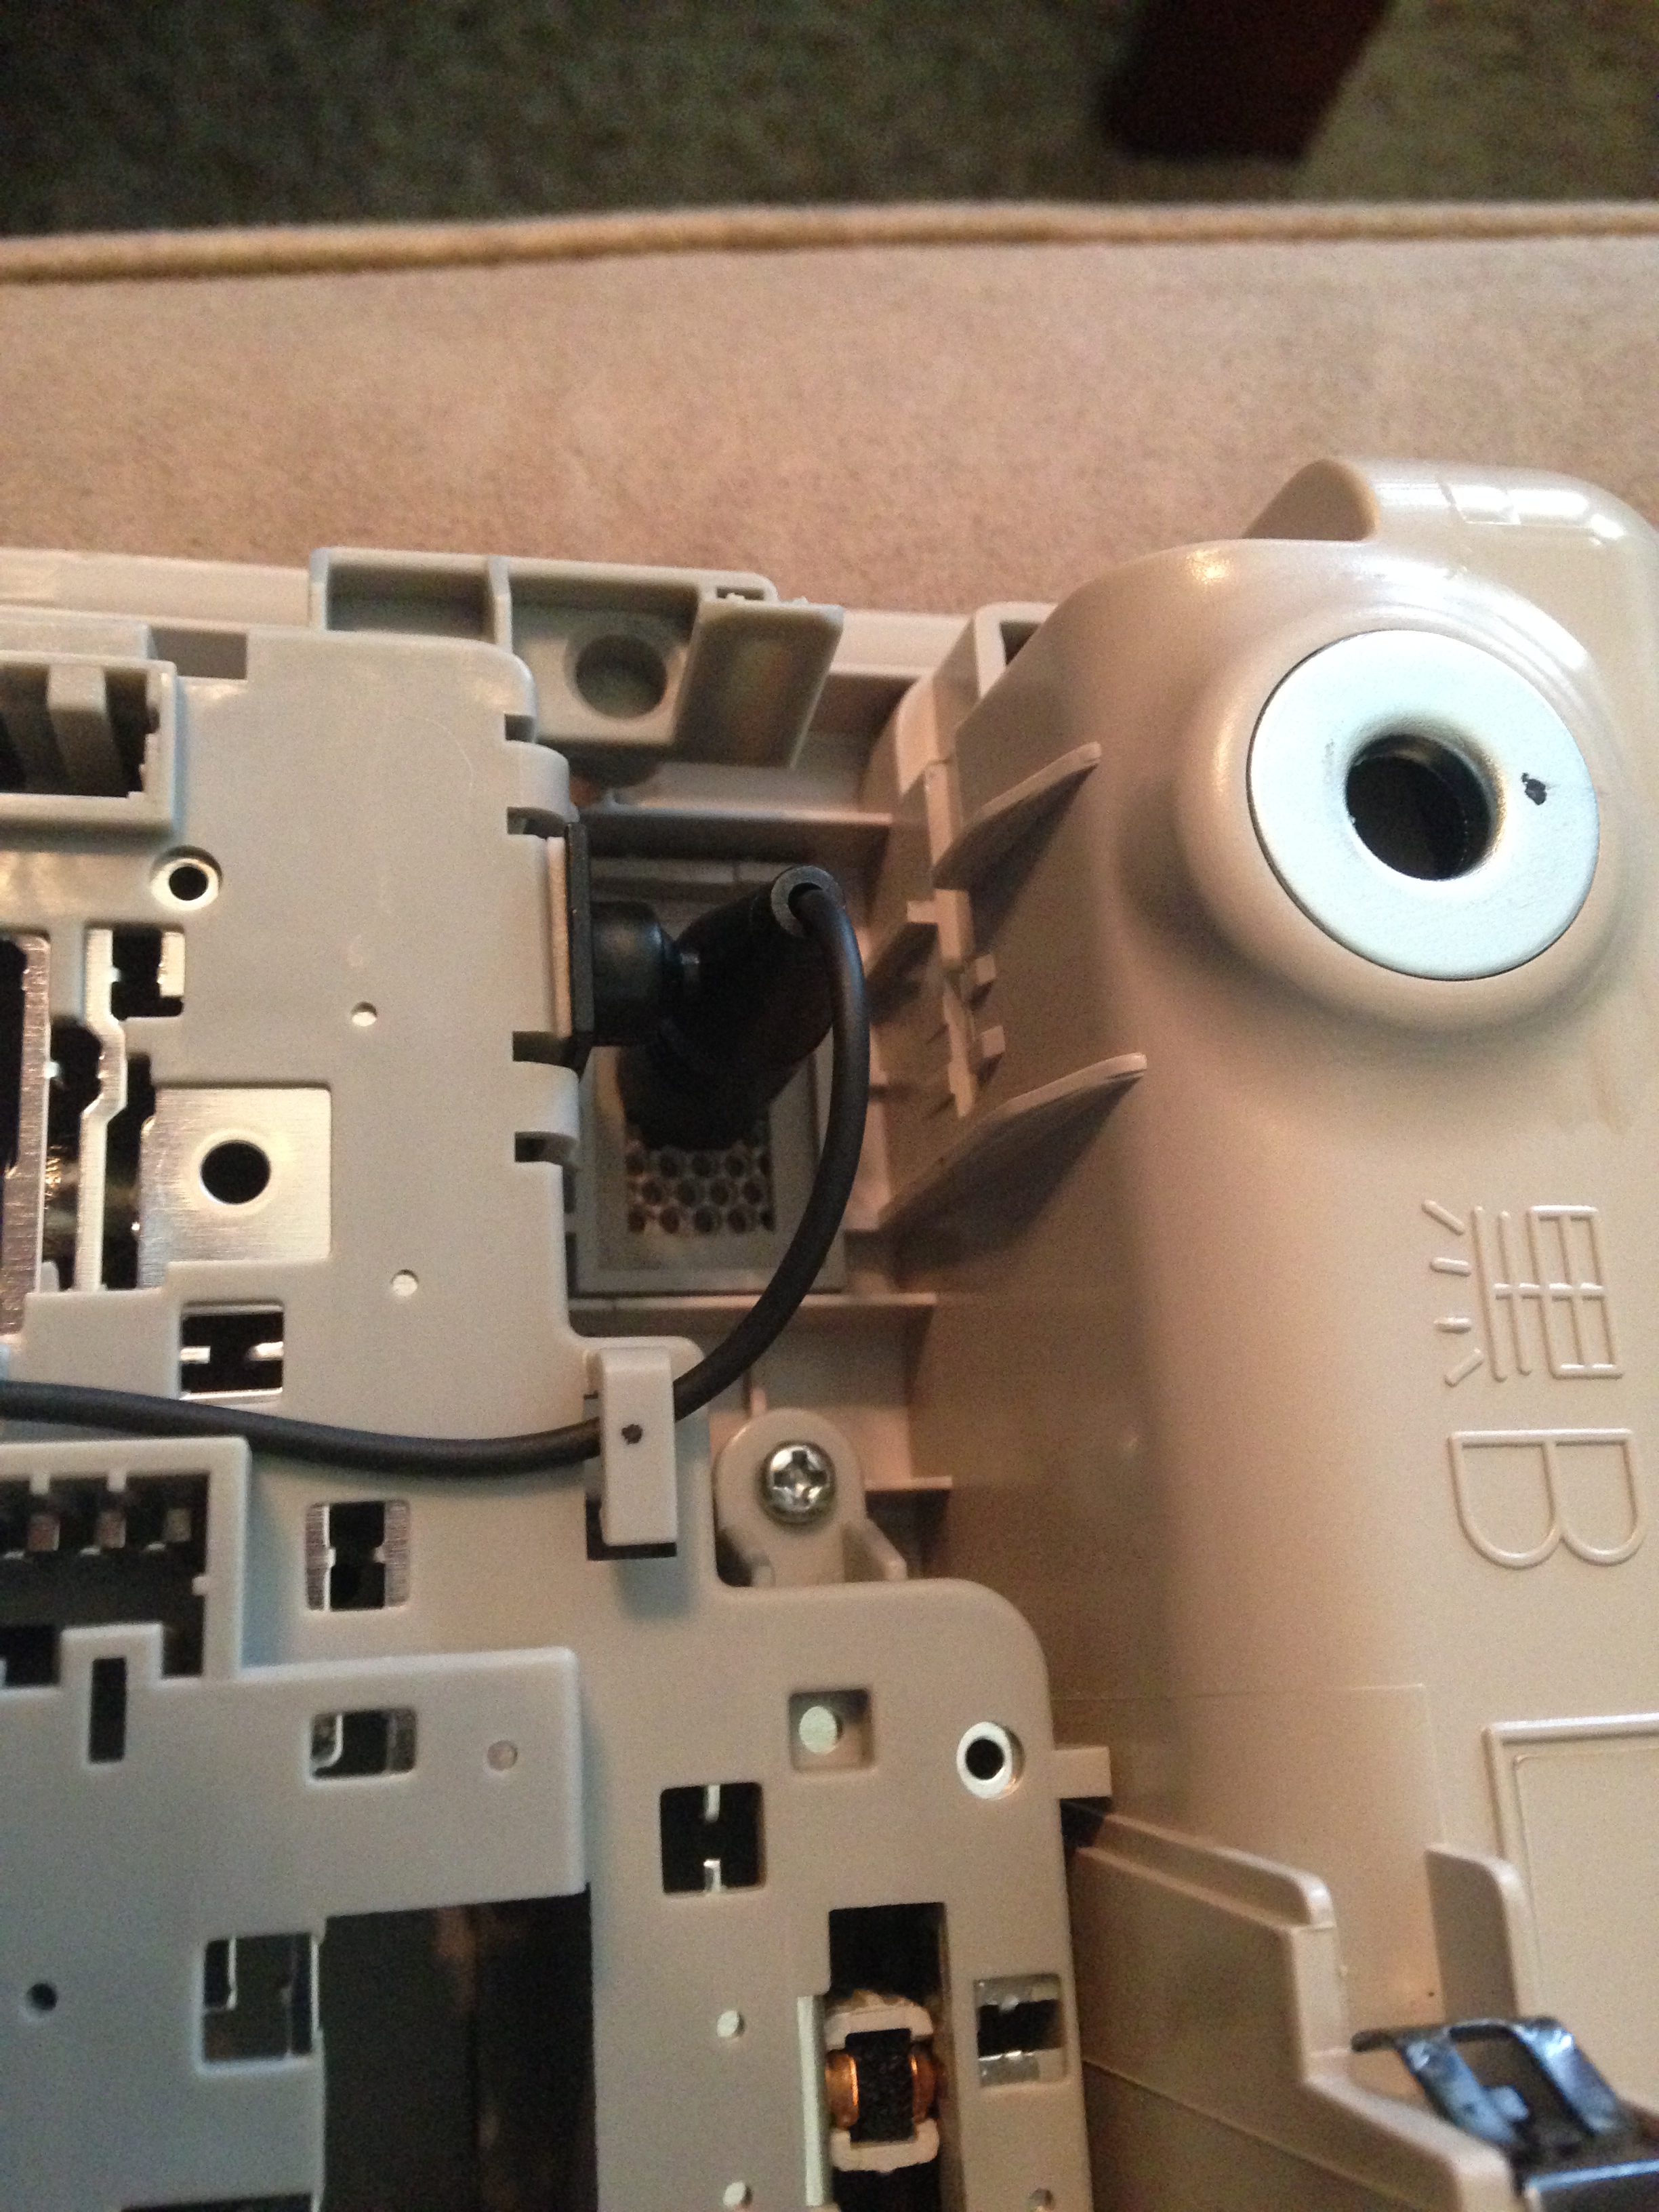
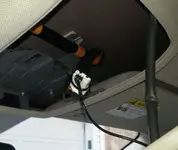
So, first step is to remove the overhead light cluster unit from the headliner. This is very easy, just open the sunglass holder and undo the two phillips screws inside. Then, there's just one clip holding the front of the unit in, so pull down *carefully* on the sunglass holder to pull out the clip (see pic), then pull the unit forward to slide it out from the headliner. DO NOT YANK the unit down! For one thing there are two loose spacer washers on the top of the unit that will fly away and get lost (yes, one of mine fell out), plus there are two wire plugs (lights and mic) that you don't want to break. Once the unit is out from the headliner, unplug those two cables/connectors.
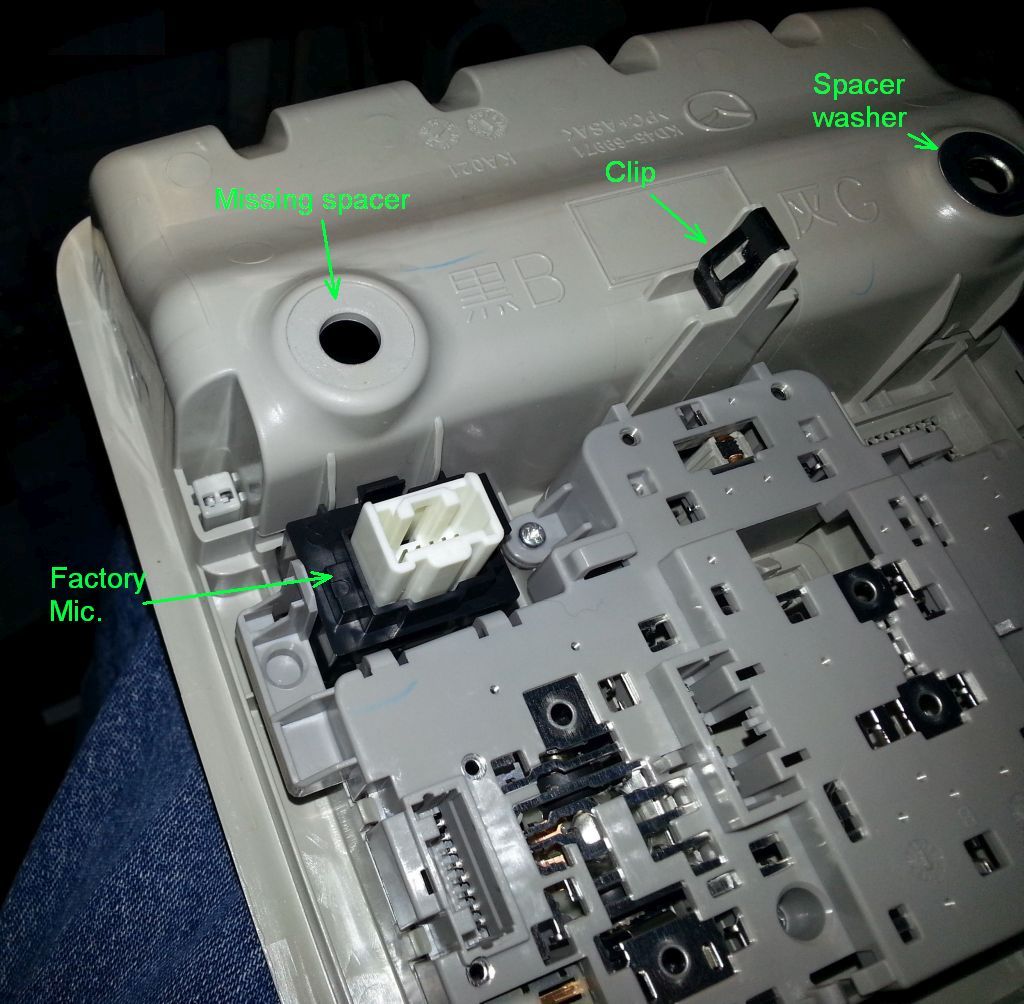
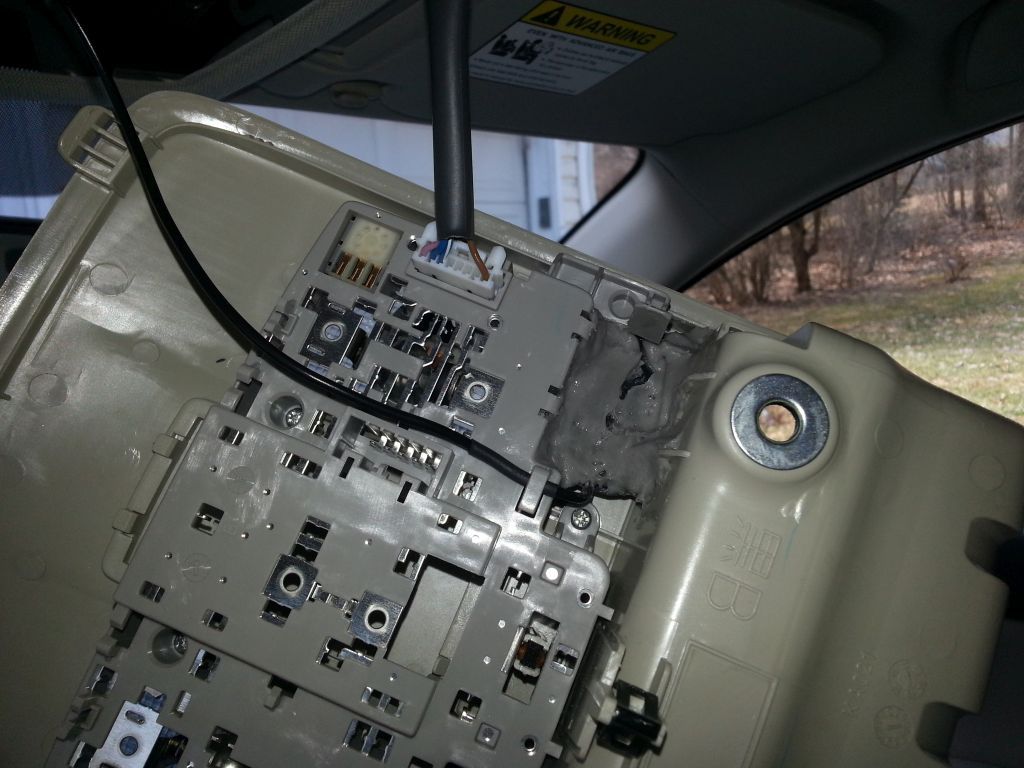
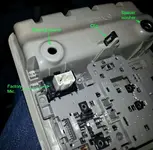
This picture is the overhead unit from the top, showing the clip and spacer washers, and factory mic unit clipped in place - there's one black clip in front and two grey clips at the back - easy to remove. Oh, and as a tip, once I found the dropped spacer washer, I put a dab of superglue on each of them, and fixed those sucka's back into place so they wouldn't fall out again")
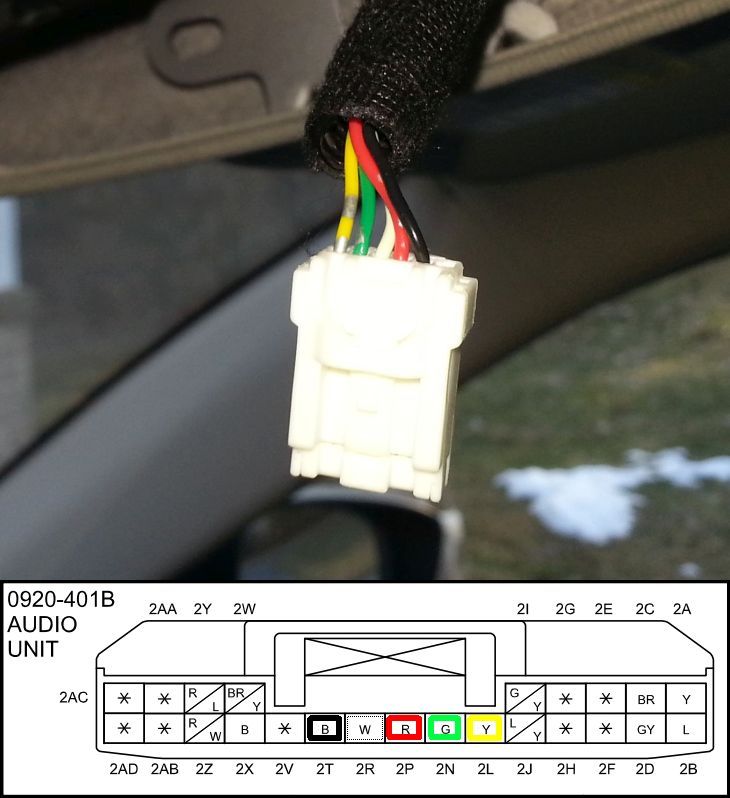
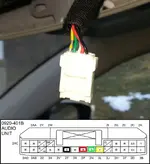
... and here's the headliner mic connector, showing the five color-coded wires that run to the back of the factory radio. You can choose to use any of these for your mic. I used the red and green, but it doesn't really matter - just remember WHAT you used so you get the same wires at each end. At the bottom of the pic is the diagram of the plug at the back of the radio, where those 5 wires end up. NOTE: all 5 are grouped together, but NOT in the same order as they are in the headliner plug, so be careful!
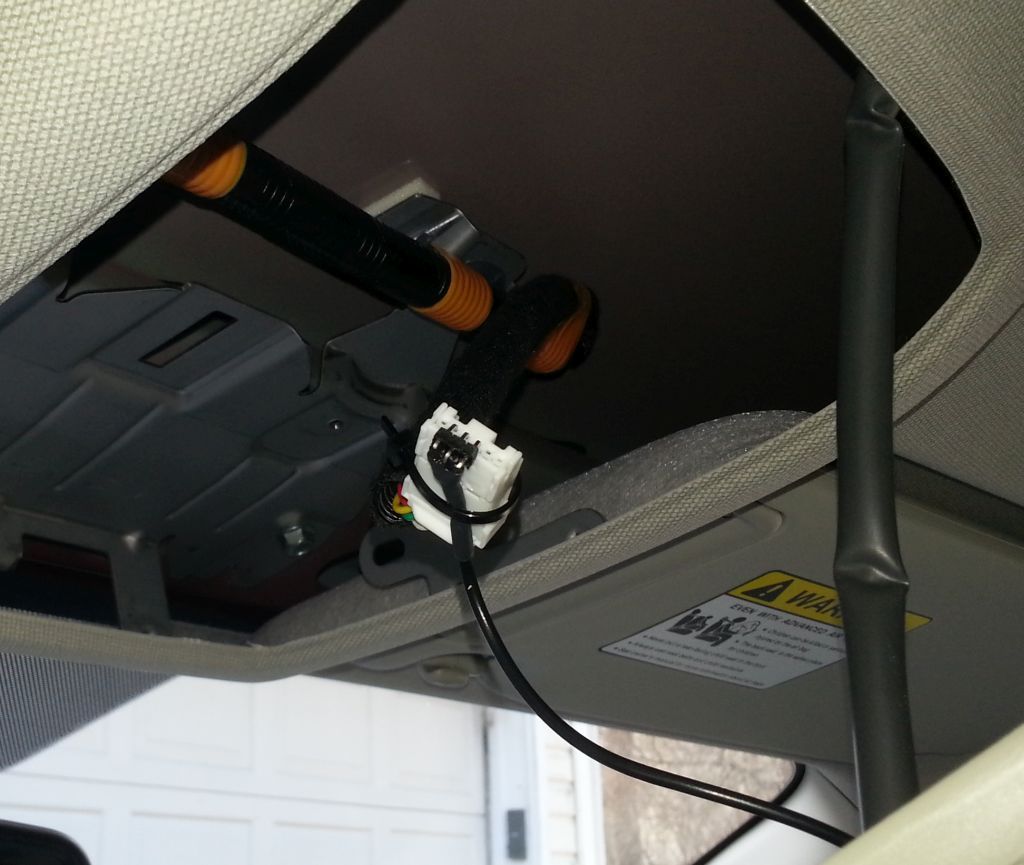
Now, after unclipping the factory mic from the overhead light console, I 'gummied' the replacement mic in place. For this I used the 'fake-Sugru' trick (see: Oogoo) of mixing cheap silicone caulk with cornstarch (cornflour). Stuff sets within minutes and although it glues well, it's not nearly as difficult to remove as unadulterated silicone - meaning I can remove it if I want to go back to stock. This shows the replacement mic gummied in, and you can see the handy strain-relief clip for the wire that Mazda thoughtfully supplies, but doesn't use. Ugly I know, but no-one will ever see it in the car. If you do the same, obviously make sure that none of the 'goo' gets into, or covers, the microphone holes - including the noise cancelling holes! Or, is visible in the console grill holes. (UPDATE: see also, alternative, possibly easier, mic attachment idea in next post.)
Then I terminated the mic wire and shield onto a single row PC header strip (or you can just solder the wires to two pieces of single-core copper wire - or any other metal pins that will fit) and pushed them into the roofliner plug. (Note: the plug's pin spacing is a little less than 0.1", so I had to bend the pins together a bit to fit.) I only used the two outer pins here, the middle's a dummy, just for extra plugin friction:
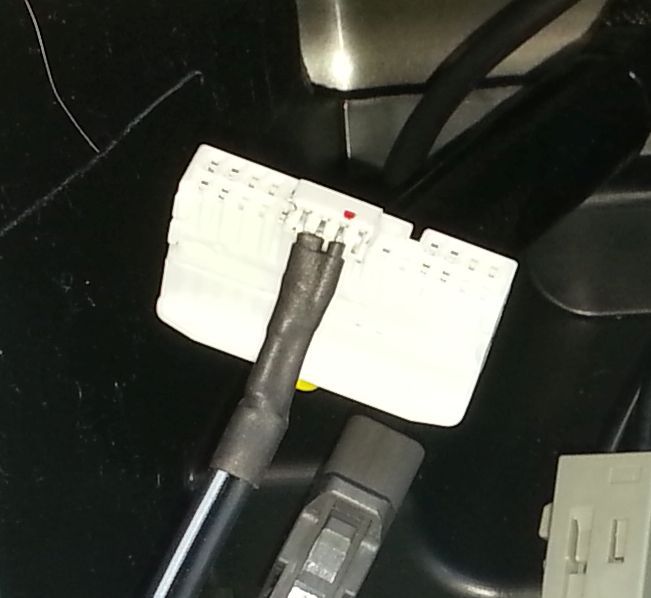
... and finally, this is at the other end, plugged into the old radio plug (just FYI). In this case only the two middle pins are used (for the red and green wires).
... and that's all she wrote. The mic works perfectly, and callers on the other end cannot tell the difference between the my Galaxy S3 handheld, and via BT and the roof mic (at least while parked). So all's good.
I should point out here, that even though you may be replacing the factory radio, the factory Bluetooth unit remains powered on, and will attempt to connect to your phone. So you should UNPAIR all devices and disable Bluetooth(?) using the factory radio BEFORE you remove and replace it.
Good luck!
I really wanted to reuse the stock microphone, but after perusing the schematics I saw there were 5 wires to the mic, implying that it was an active device - and that doesn't play well with aftermarket head units. Still I took the mic out from the car and took it apart to see if there was a way to make it work (see photos later). There wasn't.
... Plus, it's only a cheap condenser mic unit, so I decide it was better TO replace it anyway.Therefore, I decided that the next best thing would be to replace the factory mic, in the stock position, with the head unit's mic; but at least reuse the factory wiring instead of having to route a long-assed microphone wire to Egypt and back (i.e. from the radio to the headliner).
So, first step is to remove the overhead light cluster unit from the headliner. This is very easy, just open the sunglass holder and undo the two phillips screws inside. Then, there's just one clip holding the front of the unit in, so pull down *carefully* on the sunglass holder to pull out the clip (see pic), then pull the unit forward to slide it out from the headliner. DO NOT YANK the unit down! For one thing there are two loose spacer washers on the top of the unit that will fly away and get lost (yes, one of mine fell out), plus there are two wire plugs (lights and mic) that you don't want to break. Once the unit is out from the headliner, unplug those two cables/connectors.
This picture is the overhead unit from the top, showing the clip and spacer washers, and factory mic unit clipped in place - there's one black clip in front and two grey clips at the back - easy to remove. Oh, and as a tip, once I found the dropped spacer washer, I put a dab of superglue on each of them, and fixed those sucka's back into place so they wouldn't fall out again
... and here's the headliner mic connector, showing the five color-coded wires that run to the back of the factory radio. You can choose to use any of these for your mic. I used the red and green, but it doesn't really matter - just remember WHAT you used so you get the same wires at each end
. At the bottom of the pic is the diagram of the plug at the back of the radio, where those 5 wires end up. NOTE: all 5 are grouped together, but NOT in the same order as they are in the headliner plug, so be careful!Now, after unclipping the factory mic from the overhead light console, I 'gummied' the replacement mic in place. For this I used the 'fake-Sugru' trick (see: Oogoo) of mixing cheap silicone caulk with cornstarch (cornflour). Stuff sets within minutes and although it glues well, it's not nearly as difficult to remove as unadulterated silicone - meaning I can remove it if I want to go back to stock. This shows the replacement mic gummied in, and you can see the handy strain-relief clip for the wire that Mazda thoughtfully supplies, but doesn't use. Ugly I know, but no-one will ever see it in the car. If you do the same, obviously make sure that none of the 'goo' gets into, or covers, the microphone holes - including the noise cancelling holes! Or, is visible in the console grill holes. (UPDATE: see also, alternative, possibly easier, mic attachment idea in next post.)
Then I terminated the mic wire and shield onto a single row PC header strip (or you can just solder the wires to two pieces of single-core copper wire - or any other metal pins that will fit) and pushed them into the roofliner plug. (Note: the plug's pin spacing is a little less than 0.1", so I had to bend the pins together a bit to fit.) I only used the two outer pins here, the middle's a dummy, just for extra plugin friction:
... and finally, this is at the other end, plugged into the old radio plug (just FYI). In this case only the two middle pins are used (for the red and green wires).
... and that's all she wrote. The mic works perfectly, and callers on the other end cannot tell the difference between the my Galaxy S3 handheld, and via BT and the roof mic (at least while parked). So all's good.
I should point out here, that even though you may be replacing the factory radio, the factory Bluetooth unit remains powered on, and will attempt to connect to your phone. So you should UNPAIR all devices and disable Bluetooth(?) using the factory radio BEFORE you remove and replace it.
Good luck!
Attachments


Last edited: