freebird_78
Member
- :
- Mazdaspeed 3
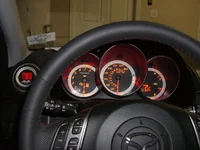
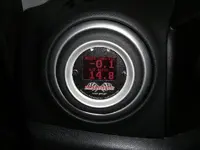
So far I think I'm the first one to mount the new (for us) Aeroforce OBDII gauge into the vent. Here are some pics. For the record, I have the silver bezel, black face, and red readout. The silver is not too closely matched to the silver of the vent, but it is a universal application, afterall. I used VoiceKoil's desk grommet method for the 52mm gauge. Picked up the 2 3/8" (60mm) one from Staples for about $4.
So far, I like the ease of use. The data rate seems to be good, not a lot of lag on things like boost. One thing I really like is the ability to input altitude to correct boost readout. For those of you near sea level, it may not matter, but I'm at 4000 ft up, and tired of seeing my gauges (this one and my last boost gauge) read -3 inHg. Setting the altitude at 4000ft and the gauge toggles between 0.1 and -0.1 inHg while off. Can't get too much closer than that.
The one thing I think I don't like, however, is the MPG readouts. Seems VERY optimistic to me (45 mpg at 65mph). I'm sure I read somewhere that there is some correction value you can input, but I haven't yet. Hopefully this will dial this in.
The display could be a little brighter, but then again, it was set to 2 out of 3, and I haven't yet seen it in broad daylight now that it's at 3.
So, as of right now, I'd rate it 8/10.