yup.
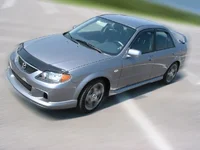
1) I copy the car and put it on its own layer.
2) Then I blur the background using motion-blur (how much depends on the background and the size of the image).
3) I copy the section of the windows which shows the background, place it on its own layer. Select the layer transparency and do a motion blur.
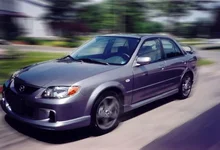
3) Then I copy the the rims, place them on their own layer and do a radial blur on them.
4) Sometimes I then duplicate the rim layer and do a motion blur on it and slide it over a few pixels. Then set the opacity to 40-50%
5) Depending on the picture and how large the tires will be, I fuzz over the tread. The one above wasn't going to be noticable so I didn't do it.
6) Finishing touches for desktop backgrounds include more copy-to-new-layer/motion blur on different parts of the car that should show movement. I then set the opacity to less than 50%.
Also, depending on the shot, if the car is at an angle, I will do the background motion blur in triangle shaped slices to give the illusion of depth by creating a vanishing point. (hard to explain but it works great, see attachment)


")