- :
- Canada
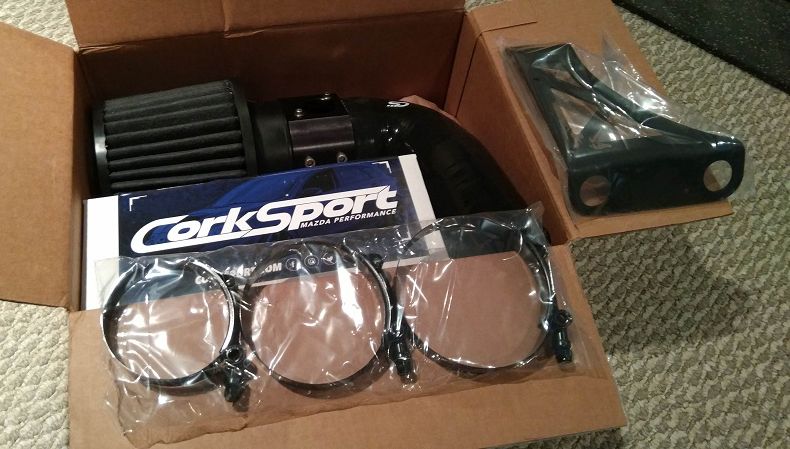
These are just some notes I made regarding the instructions that come with the CorkSport air intake for the Mazda6 2.5T and the 2016+ CX-9. While the instructions are generally ok, as a technical writer I found myself making some notes that I thought others might benefit from.
These pictures were taken using my crappy cellphone camera and my 2018 Mazda CX-9 Signature as the "demo" vehicle. This info is provided as a learning aid and reference guide. I assume no responsibility for any warranties this process may void, or damages you may inflict on yourself or your vehicle.
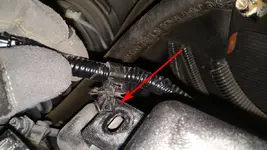
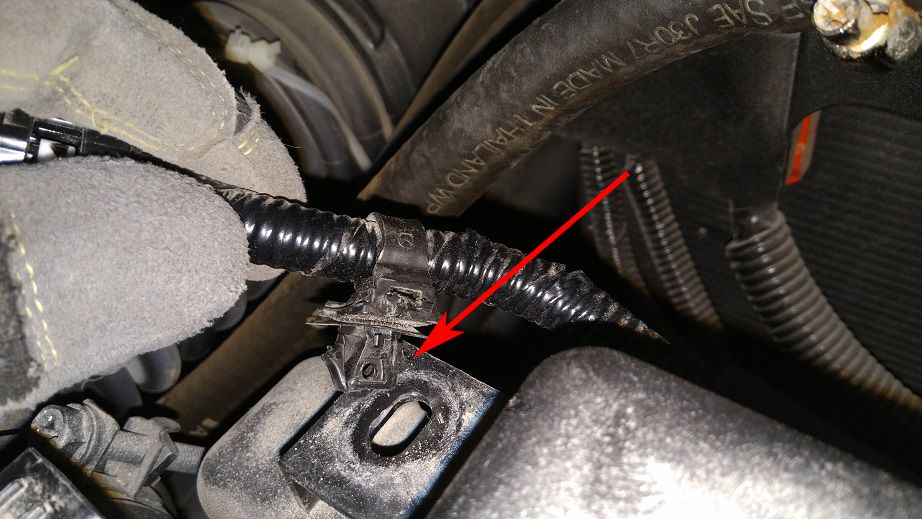
Regarding the MAF sensor wiring clip
The instructions state that in order to remove this clip, you have to pinch the underside of the clip and release it. This is accurate, but I just thought I'd post a pic of the actual clip so you know what you have to pinch. Also, for the record, this clip is not reused in the installation of the CS intake, so if you wanted to, you could just cut this clip off of the wiring harness to avoid having to try to pinch the underside of the clip. This part was pretty frustrating for me because I couldn't really see what I was pinching, and my fingers were too fat to fit in some areas. I ended up muscling it out with a flat head screwdriver, lol.
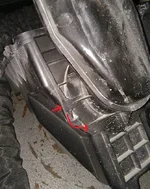
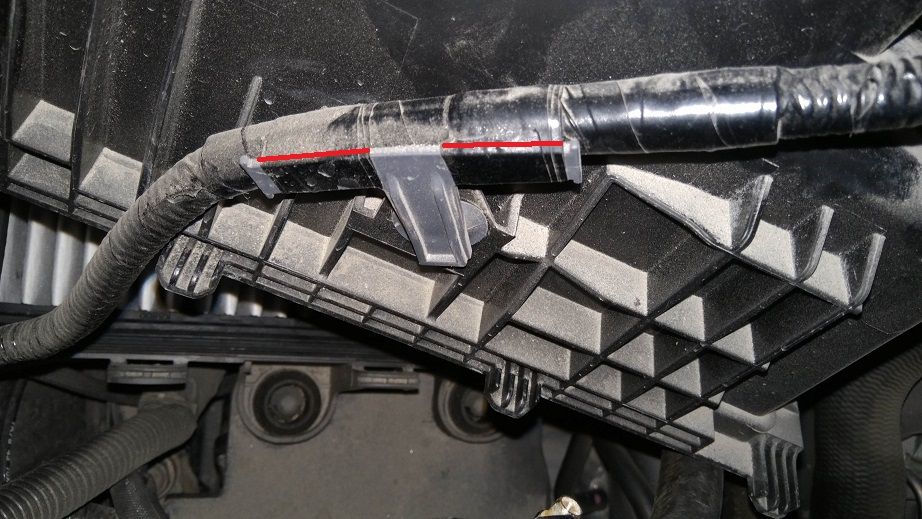
Hidden MAF sensor wiring clip
I'm not sure why this wasn't detailed in the instructions, but on my car, the wiring harness was also attached to this clip on the back of the OEM airbox. Rather than removing the clip from the airbox, I just cut the electrical tape.
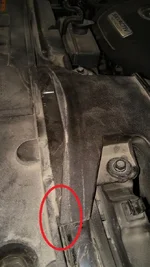
Keeping the "snorkel"
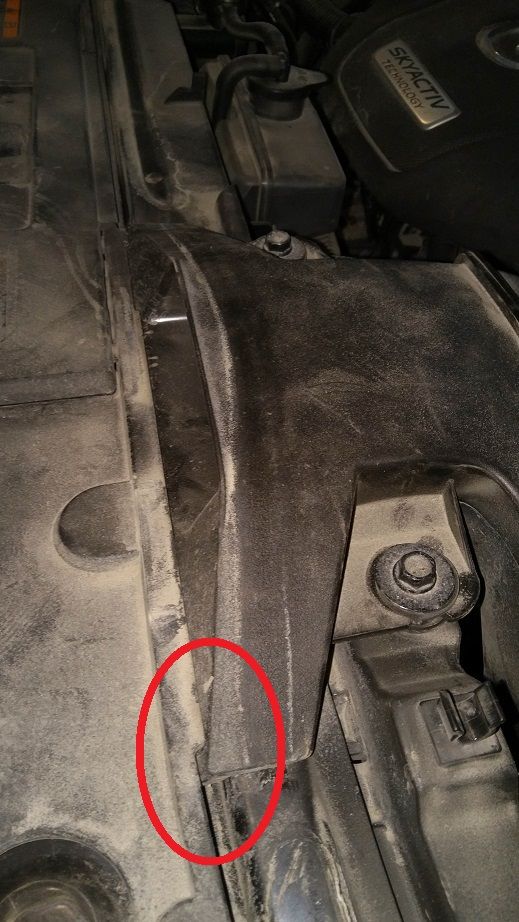
The instructions call for removing the whole OEM airbox. If you want to keep the "snorkel" for whatever reason, you can. Initially, I wanted to keep both the snorkel and the lower half of the OEM airbox. However, the mounting bracket for the CS intake reuses the mounts that the lower box attaches to, so I had to get rid of the lower box. To retain the snorkel, lift this tab on the "front" side of the airbox, then twist the snorkel counterclockwise to free it.
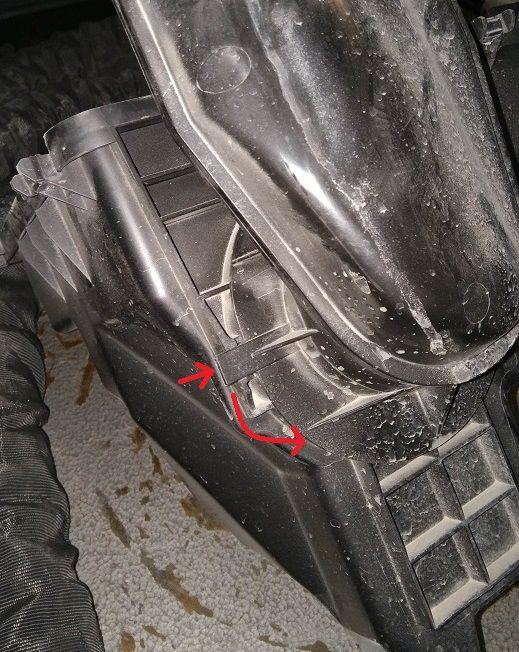
Reinstall the snorkel with the two 10mm bolts, but be sure to install the bottom lip of the snorkel underneath the plastic panel shown here. You kind of have to jam it in there a little bit. If you don't do this, the bottom part of the snorkel is loose and can vibrate against the other parts, which could cause unwanted noise.
That's all the notes I had. Everything else was pretty much spot on, and I'm really enjoying the added sound the intake provides.")
These pictures were taken using my crappy cellphone camera and my 2018 Mazda CX-9 Signature as the "demo" vehicle. This info is provided as a learning aid and reference guide. I assume no responsibility for any warranties this process may void, or damages you may inflict on yourself or your vehicle.
Regarding the MAF sensor wiring clip
The instructions state that in order to remove this clip, you have to pinch the underside of the clip and release it. This is accurate, but I just thought I'd post a pic of the actual clip so you know what you have to pinch. Also, for the record, this clip is not reused in the installation of the CS intake, so if you wanted to, you could just cut this clip off of the wiring harness to avoid having to try to pinch the underside of the clip. This part was pretty frustrating for me because I couldn't really see what I was pinching, and my fingers were too fat to fit in some areas. I ended up muscling it out with a flat head screwdriver, lol.
Hidden MAF sensor wiring clip
I'm not sure why this wasn't detailed in the instructions, but on my car, the wiring harness was also attached to this clip on the back of the OEM airbox. Rather than removing the clip from the airbox, I just cut the electrical tape.
Keeping the "snorkel"
The instructions call for removing the whole OEM airbox. If you want to keep the "snorkel" for whatever reason, you can. Initially, I wanted to keep both the snorkel and the lower half of the OEM airbox. However, the mounting bracket for the CS intake reuses the mounts that the lower box attaches to, so I had to get rid of the lower box. To retain the snorkel, lift this tab on the "front" side of the airbox, then twist the snorkel counterclockwise to free it.
Reinstall the snorkel with the two 10mm bolts, but be sure to install the bottom lip of the snorkel underneath the plastic panel shown here. You kind of have to jam it in there a little bit. If you don't do this, the bottom part of the snorkel is loose and can vibrate against the other parts, which could cause unwanted noise.
That's all the notes I had. Everything else was pretty much spot on, and I'm really enjoying the added sound the intake provides.