
You are using an out of date browser. It may not display this or other websites correctly.
You should upgrade or use an alternative browser.
You should upgrade or use an alternative browser.
What have you done to your CX-50 today?
- Thread starter Antoine
- Start date

speed3chris1
2021 Signature CX-9
I live in CA and have water restrictions but I can wash my car in San Luis Obispo County. I have friends that live in Santa Barbara, LA and San Bernardino county and they can wash their cars. What counties have restrictions?
MetroMike
2023 Mazda CX 50 Premium Plus Polymetal Gray
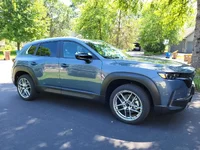
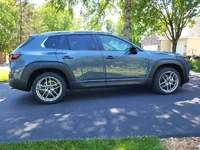
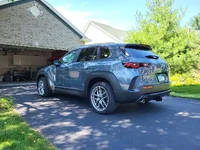
Looking sharp! Are the rubber floormats better than the supplied carpet ones?Geeked out on accessories today! Installed illuminated sill plates, sport pedal kit, side rocker garnish and Mazda license plate frame. Got the rubber mats and cargo cover too.
View attachment 311432View attachment 311433View attachment 311434
- :
- USA
- :
- 2023 CX-50 PPT
Geeked out on accessories today! Installed illuminated sill plates, sport pedal kit, side rocker garnish and Mazda license plate frame. Got the rubber mats and cargo cover too.
View attachment 311433
Wait a minute--the cargo cover stores in that spot?!?! How did I miss that!
Not sure, but I will be tracking dirt in from job sites so the carpet are a bad idea for me.Looking sharp! Are the rubber floormats better than the supplied carpet ones?
My wifes X3 has a spot for it in the same place so I went looking for it. I don't like that it just sits in the styrofoam with no liner/finish. Seems the foam is going to get beat up eventually.Wait a minute--the cargo cover stores in that spot?!?! How did I miss that!
Not a put down but it seems like all the manufacturers are trying to see how much plastic to put around the wheel wells in order to make them look more off-road capable? Anyway, what will you all be using to keep that black plastic looking black over the years? Is 303 the way to go?

@CX50 Toad I'm interested in those illuminated sill plates as well. Aren't they wired? Did you have to drill?Geeked out on accessories today! Installed illuminated sill plates, sport pedal kit, side rocker garnish and Mazda license plate frame. Got the rubber mats and cargo cover too.
View attachment 311432View attachment 311433View attachment 311434
- :
- NS, Canada
The OEM ones take batteries so no drilling (or wires) required.@CX50 Toad I'm interested in those illuminated sill plates as well. Aren't they wired? Did you have to drill?
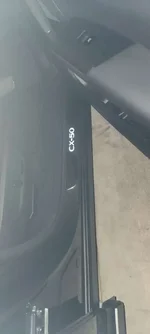
I installed mine today. My dealer was busy and wasn't going to have time to install them and the rocker garnish so i decided to try my hand at it after reading the instructions. Pretty easy DIY if you want to save a few dealer install bucks. Not sure how long those batteries are going to last. I hope long because they're taped down amd would be a pain in the a** to get themnoff without damage to replace batteries. Pretty lame that they skimped out on only the front ones lighting up. I would have gladly paid extra for the lit rears too.The OEM ones take batteries so no drilling (or wires) required.
Attachments
Herexs the rocker garnish installed. Not terribly difficult either. A couple of TTPs for those who will be doing a DIY too.
1) I placed clear tape around the corners and "tabs" of the templates before cutting them. Made alignment on the vehicle much easier than trying to wrangle a a thin piece of paper with no hard edge (lesson learned from installing the sill plates).
2) The front templates lined up the trim perfectly with the door cladding edge. My rears DID NOT! I "punch marked" the holes with a nail and then "dry" aligned the trim with the yellow clips in place. They aligned the trim about 2mm above the bottom edge and look higher than the front ones if I would have drilled the holes there. I re-marked the holes about 2mm lower and dry aligned again and they aligned perfectly now. I drilled the holes there and installed. Perfect alignment with the front ones. Not sure if it was just my templates but worth double checking yours.
Attachments

- :
- NS, Canada
Looks like there is a trick to it.I installed mine today. My dealer was busy and wasn't going to have time to install them and the rocker garnish so i decided to try my hand at it after reading the instructions. Pretty easy DIY if you want to save a few dealer install bucks. Not sure how long those batteries are going to last. I hope long because they're taped down amd would be a pain in the a** to get themnoff without damage to replace batteries. Pretty lame that they skimped out on only the front ones lighting up. I would have gladly paid extra for the lit rears too.
Hmmm...so the taped on part stays attached?
- :
- NS, Canada
Seems to. You may want to get the dealer to email you the battery replacement instructions for your specific accessory just to be 100% sure. The one I found is for a CX5 one but I suspect it's the same but you never know!Hmmm...so the taped on part stays attached?
New Posts and Comments
- Replies
- 14
- Views
- 18K
- Replies
- 92
- Views
- 10K
- Replies
- 28
- Views
- 1K
- Replies
- 5
- Views
- 380