- :
- Canada
This is a DIY installation guide for the Sprint Booster on the 2016+ CX-9 (P/N SBMA1033S). I decided to document this process to complement the instructions that come with the Sprint Booster because I encountered a couple of things that the included instructions do not mention.
This process was documented/photographed by myself, using my crappy cellphone camera and my 2018 Mazda CX-9 Signature as the "demo" vehicle. This DIY is provided as a learning aid and reference guide. I assume no responsibility for any warranties this process may void, or damages you may inflict on yourself or your vehicle.
What you'll need:
- A flat head screwdriver
- 10mm socket or wrench
- Box cutter
1. Unlock the driver's side door and open it, then put the key fob down somewhere far away from the car. I think as long as the fob is outside of the proximity sensor range, you should be fine. The instructions state that this is done to let the diagnostic system cycle, and prevents a CEL from being triggered. It says the system takes up to 10 minutes to cycle, but you can continue with the install process instead of waiting.
2. Examine the Sprint Booster control unit (LCD display). On the side, there is a small switch for toggling between A/T (automatic transmission) and M/T (manual transmission). Ensure that the switch is in the A/T position.
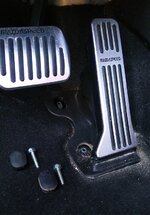
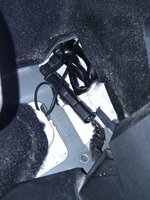
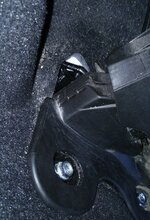
3. Remove the floor mat. Using a flat head screwdriver, pop the screw covers on the pedal assembly off. Loosen and remove the screws with the 10mm socket or wrench.

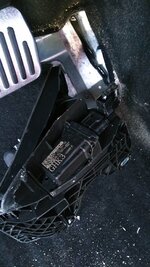
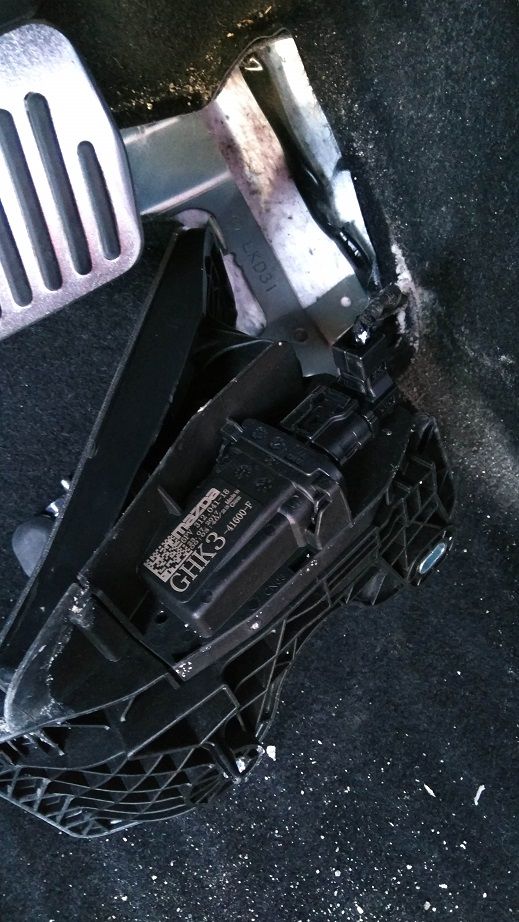
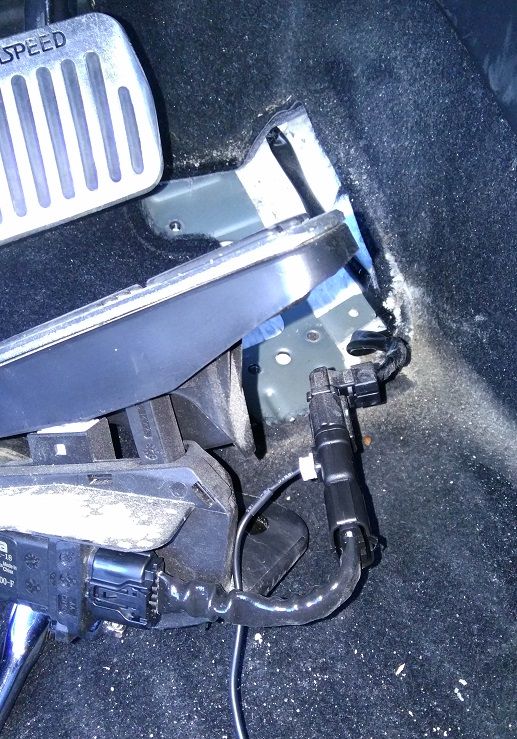
4. The pedal assembly can now be pulled out a bit so you can see the harness connector.
5. Ensure that at least 10 minutes has passed since Step 1. If so, press down on the tab and slide the connector off of the pedal assembly.
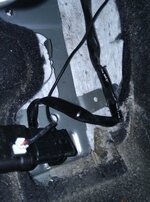
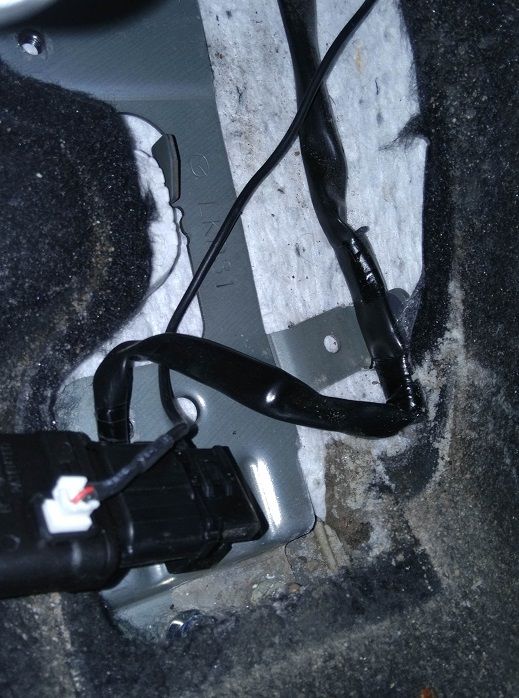
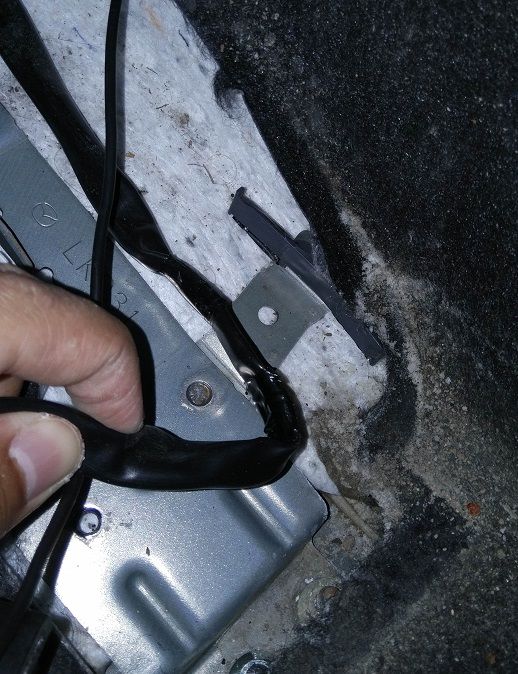
6. At this point, you'll notice that the connector is taped to a clip that is anchored in a metal plate. I found that I wasn't able to reinstall the pedal assembly with the Sprint Booster because I was limited by the taped connector, so I used a box cutter to carefully remove the tape.
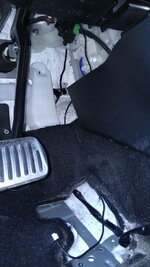
7. Install the Sprint Booster module between the pedal assembly and the connector removed in the previous step.
This process was documented/photographed by myself, using my crappy cellphone camera and my 2018 Mazda CX-9 Signature as the "demo" vehicle. This DIY is provided as a learning aid and reference guide. I assume no responsibility for any warranties this process may void, or damages you may inflict on yourself or your vehicle.
What you'll need:
- A flat head screwdriver
- 10mm socket or wrench
- Box cutter
1. Unlock the driver's side door and open it, then put the key fob down somewhere far away from the car. I think as long as the fob is outside of the proximity sensor range, you should be fine. The instructions state that this is done to let the diagnostic system cycle, and prevents a CEL from being triggered. It says the system takes up to 10 minutes to cycle, but you can continue with the install process instead of waiting.
2. Examine the Sprint Booster control unit (LCD display). On the side, there is a small switch for toggling between A/T (automatic transmission) and M/T (manual transmission). Ensure that the switch is in the A/T position.
3. Remove the floor mat. Using a flat head screwdriver, pop the screw covers on the pedal assembly off. Loosen and remove the screws with the 10mm socket or wrench.
4. The pedal assembly can now be pulled out a bit so you can see the harness connector.
5. Ensure that at least 10 minutes has passed since Step 1. If so, press down on the tab and slide the connector off of the pedal assembly.
6. At this point, you'll notice that the connector is taped to a clip that is anchored in a metal plate. I found that I wasn't able to reinstall the pedal assembly with the Sprint Booster because I was limited by the taped connector, so I used a box cutter to carefully remove the tape.
7. Install the Sprint Booster module between the pedal assembly and the connector removed in the previous step.