HELP! Any pics of pass. side HVAC greatly appreciated

Matthew

Member
Contributor
:
CX9, CX5, i8
just like the title says...ANY pics you guys/gals can take on this boring sunday - i will be forever in debt. ive been working so much if i hit monday without fixing it, its liable to be next weekend before i hae time to mess with it again, because its almost dark when i get home...

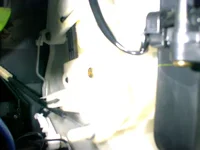
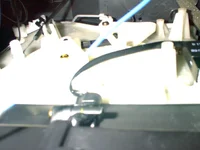
i need to know how EXACTLY the clip goes into the left rotating thing, and if you are REALLY bored, which path you ran the right wire through...at the worst case i need to know what setting you need to have the right control on to allow heat...i have the left hooked up and it blows air but it would only blow cold air, so im assuming that the right side must be engaged or whatever to allow hot air.

thanks in advance :)
 
matthew, with the glove box out, you can see the "rotating thing"... push it all the way in towards the radio, then you'll need to line up the radio surround just right, and feed the line under the steel brace, and down to the right...then hook the metal clip onto the plastic, and just slide the circle at the end of the "line" onto the "rotating piece"...

make any sense?
 
sort of but which way towards the radio, up or down? how does the metal fit into the plastic?
 
Heres a link to the pics I took back the other day when we were talking about this:

http://www.vividyellow.com/Matthew2/

The second pic is the pass. side, click to enlarge.

It doesnt matter too much what setting it is in when connectiong it. It will basically correct itself. I cant take my bezel out roght now since it takes forever with that LCD there.

Good luck!
 
i dont have that much wire coming out of the sleeve? or does that happen once its hooked up?
 
I took two pics, but honestly elemental's pics look much better. The lighting in mine suck...but here they are from the glovebox angle looking behind the dash (sorry for the blurryness and lighting...

-DaViper
 

Attachments

  • IMAGE036.webp
    IMAGE036.webp
    36.9 KB · Views: 138
  • IMAGE038.webp
    IMAGE038.webp
    39.2 KB · Views: 121
It all depends on the setting your on. The ammount moves with the setting. Basically move the setting to where the wire is the longest out of the sleeve and you can rotate that white plastic piece to the correct size.

That particulat "wire" is run through the *left* side of the center dividing par when looking at the radio hole. Did that make sence? left side then back and to the right.
 
i appreciate the effort but i cant really see what i need to see with those pics.
 
ELEmental59437 said:
It all depends on the setting your on. The ammount moves with the setting. Basically move the setting to where the wire is the longest out of the sleeve and you can rotate that white plastic piece to the correct size.

That particulat "wire" is run through the *left* side of the center dividing par when looking at the radio hole. Did that make sence? left side then back and to the right.

it might be ****** up then because im moved the controls and the wire didnt get any longer :(
 
Matthew said:
anyone have close ups of how the tab goes in

There is a white notch sticking out with a littke grove in the middle of it. Just stick the metal clip onto that groove and push in.
 
Matthew said:
it might be ****** up then because im moved the controls and the wire didnt get any longer :(


No biggie, it is probably just disconnected at the actual A/C controls. Pull the bezel out again and check it. BUT!! before you do that, the left control (cold/hot) goes to the pass. side and the right control (vent selection) goes to the drivers side. Make sure you are turning the correct control.
 
i got it! thanks ele! the problem was i didnt know the tab you hook the metal clip onto existed cause it was dark when i was messing with it! (yipee)
 
All part of my master plan, too bad you had to go and fix it..

Now I am going to request pics from YOU of the radio installed.
 
Back