
Hi all,
Below are attached pictures of what needs to be done in order to remove the bumper from the CX 9 Touring 2019 - my understanding is that from 16 to 20 all are the same ( Azami, GT, Touring & Sport) models.
Below are the required steps (apologies if anything is left out however all should be there):
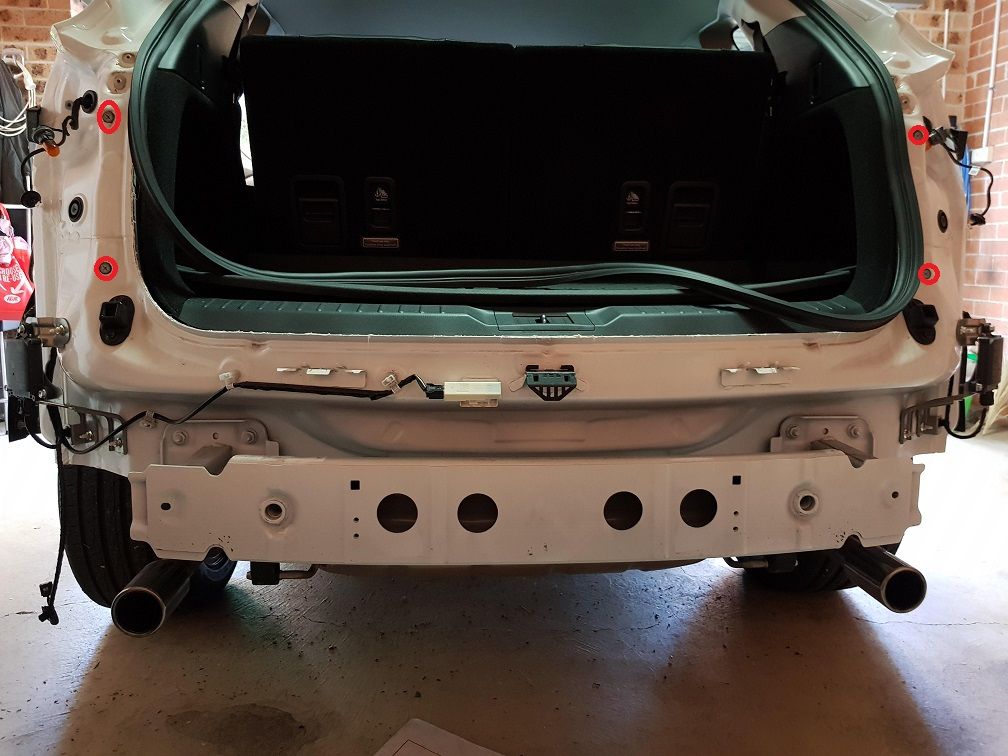
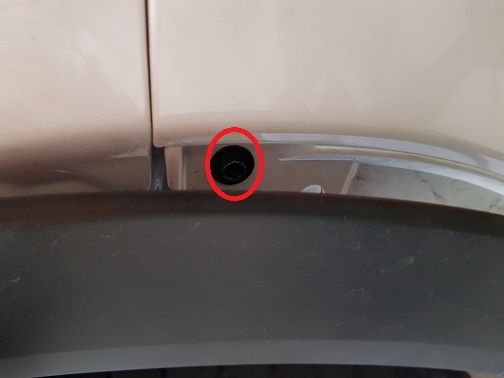
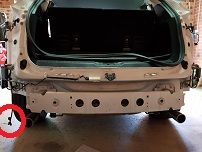
1. Open tailgate and remove the 2 x car coloured round caps from each side (near the rubber seal) - once removed unscrew the screws - 4 in total (circled in the image below). Note: i had removed the rear lights however i don''t think that they need to be removed?.
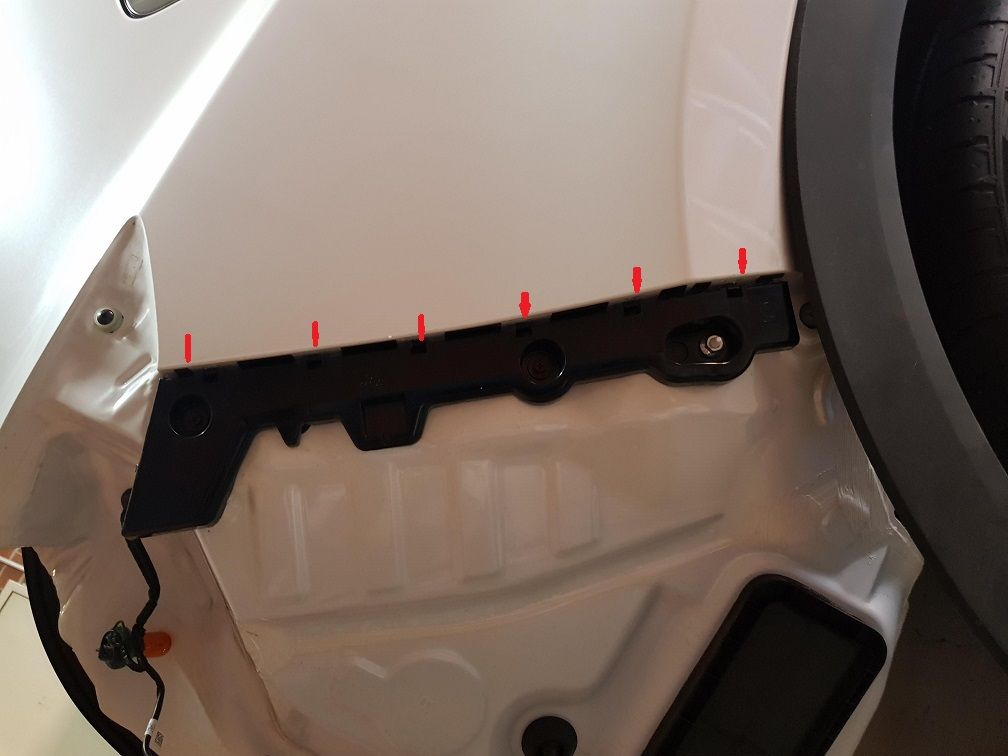
2. Remove rubber seal along the bottom part of door "case"(or top part of bumper) - caution as the seal has some sort of white sealant which is quite sticky and you don't want this to spread around.
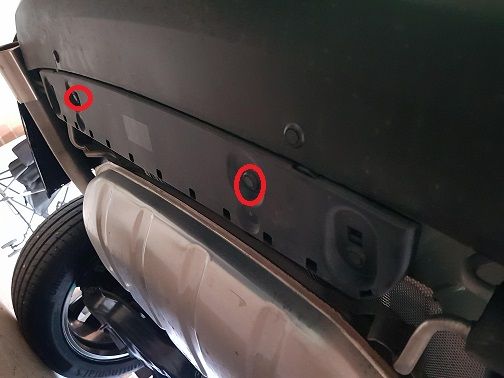
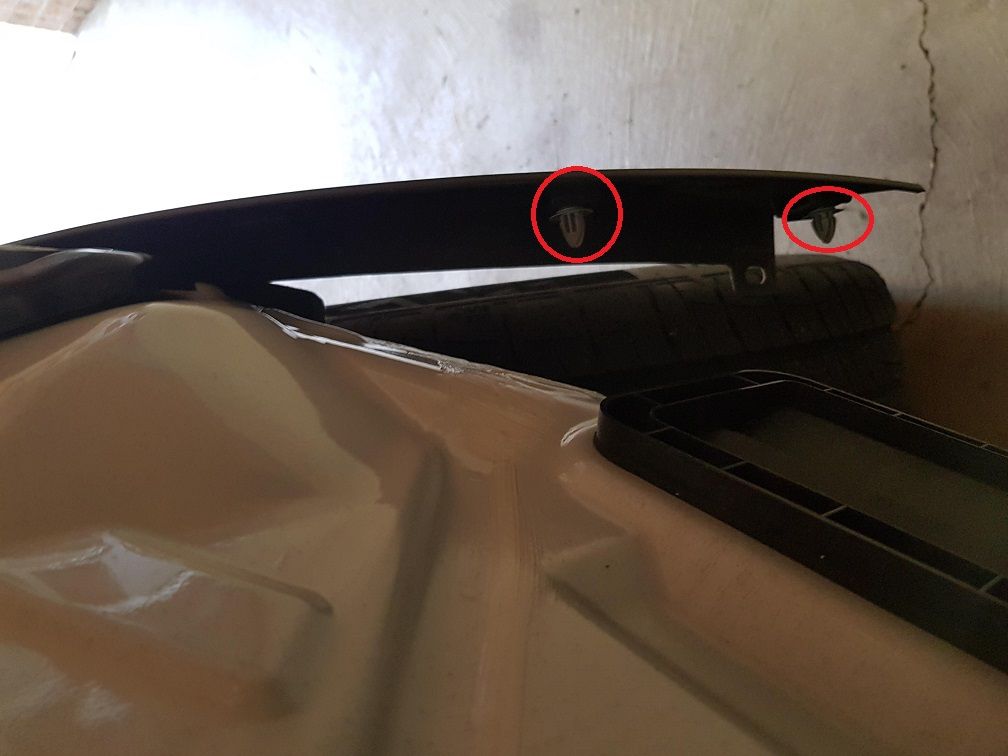
3. Drop under the bumper and with a prying tool remove 2 x push pins that hold the underside of the bumper to the vehicle undercarriage.
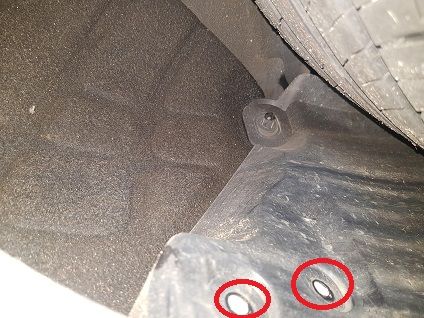
4. Move to towards the rear part of the wheel arch where each side has 2 x screws and coupe of push pins, remove these and continue under the bumper (corner) and remove from each side 2 x push pins and 1 x screws - i ended up removing the plastic cover which attaches on the bumper (corner) and on lower part of the wheel arch.
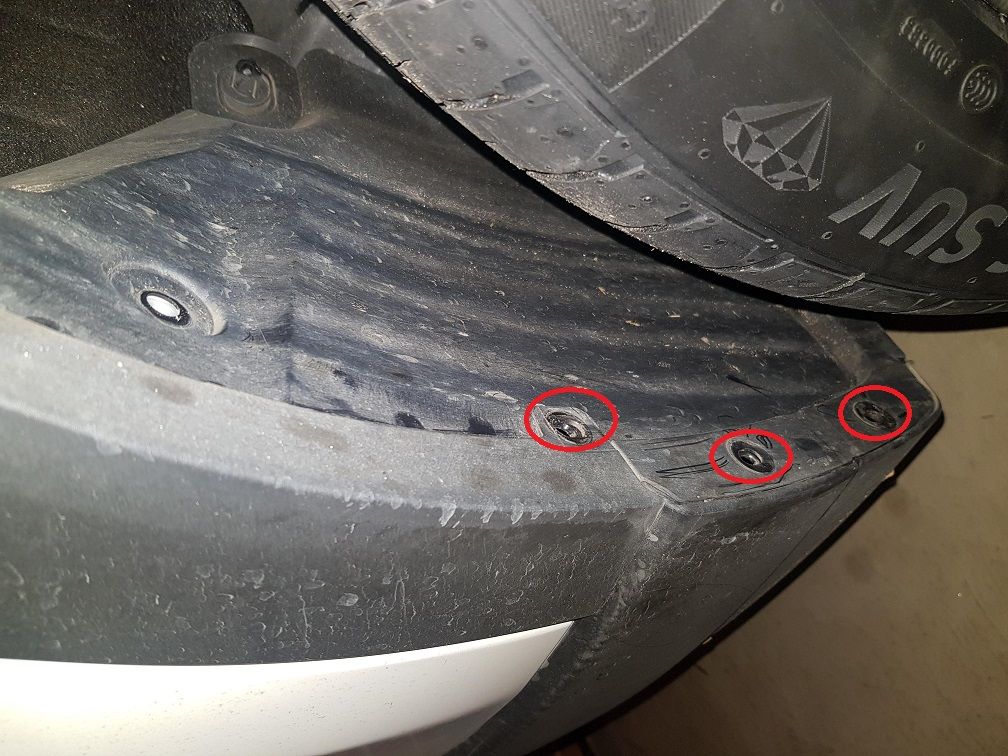
5. Pry open the wheel arch decor (black plastic trim) - start from the bottom with your hand and once the first clip has freed then use a prying tool to assist and avoid over twisting the plastic trim and pry open 2 x more pins and you will see a 6 mm screw which holds the bumper to the wheel arch - unscrew the screws on both sides.
6. Once you have removed the screws then place your fingers where the screw was and nice and softly start pushing outwards with your fingertips the bumper and you will it been unplugged clip by clip - just exert enough pressure (only outwards - remember its plastic clip on plastic) and one by one it will come off - repeat at other side.

7. On the left side of the rear bumper, carefully disconnect the wiring harness for the parking sensors (if applicable).
8. Remove bumper - when ready repeat steps backwards.
I saw a post from a fellow owner saying how scary easy was to remove the front bumper - this is even easier as the bumper is not that huge and has less screws & push pins to remove (i needed help to avoid scratches etc to reinstall the front bumper however i was alone with the rear and no issues.
Hope the attached photos will make sense as all was done in a rush and always happy to assist if anyone has any doubts or questions.
Michial


Below are attached pictures of what needs to be done in order to remove the bumper from the CX 9 Touring 2019 - my understanding is that from 16 to 20 all are the same ( Azami, GT, Touring & Sport) models.
Below are the required steps (apologies if anything is left out however all should be there):
1. Open tailgate and remove the 2 x car coloured round caps from each side (near the rubber seal) - once removed unscrew the screws - 4 in total (circled in the image below). Note: i had removed the rear lights however i don''t think that they need to be removed?.
2. Remove rubber seal along the bottom part of door "case"(or top part of bumper) - caution as the seal has some sort of white sealant which is quite sticky and you don't want this to spread around.
3. Drop under the bumper and with a prying tool remove 2 x push pins that hold the underside of the bumper to the vehicle undercarriage.
4. Move to towards the rear part of the wheel arch where each side has 2 x screws and coupe of push pins, remove these and continue under the bumper (corner) and remove from each side 2 x push pins and 1 x screws - i ended up removing the plastic cover which attaches on the bumper (corner) and on lower part of the wheel arch.
5. Pry open the wheel arch decor (black plastic trim) - start from the bottom with your hand and once the first clip has freed then use a prying tool to assist and avoid over twisting the plastic trim and pry open 2 x more pins and you will see a 6 mm screw which holds the bumper to the wheel arch - unscrew the screws on both sides.
6. Once you have removed the screws then place your fingers where the screw was and nice and softly start pushing outwards with your fingertips the bumper and you will it been unplugged clip by clip - just exert enough pressure (only outwards - remember its plastic clip on plastic) and one by one it will come off - repeat at other side.
7. On the left side of the rear bumper, carefully disconnect the wiring harness for the parking sensors (if applicable).
8. Remove bumper - when ready repeat steps backwards.
I saw a post from a fellow owner saying how scary easy was to remove the front bumper - this is even easier as the bumper is not that huge and has less screws & push pins to remove (i needed help to avoid scratches etc to reinstall the front bumper however i was alone with the rear and no issues.
Hope the attached photos will make sense as all was done in a rush and always happy to assist if anyone has any doubts or questions.
Michial
Last edited by a moderator:
") ...I posted a link to this thread in our Resources section.
...I posted a link to this thread in our Resources section.