NB MX-5 Hey, it's Minnie!

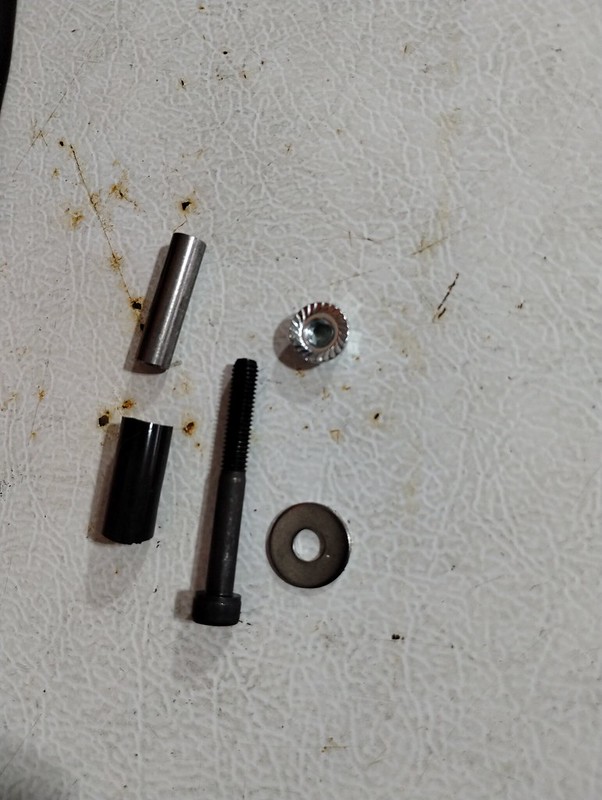
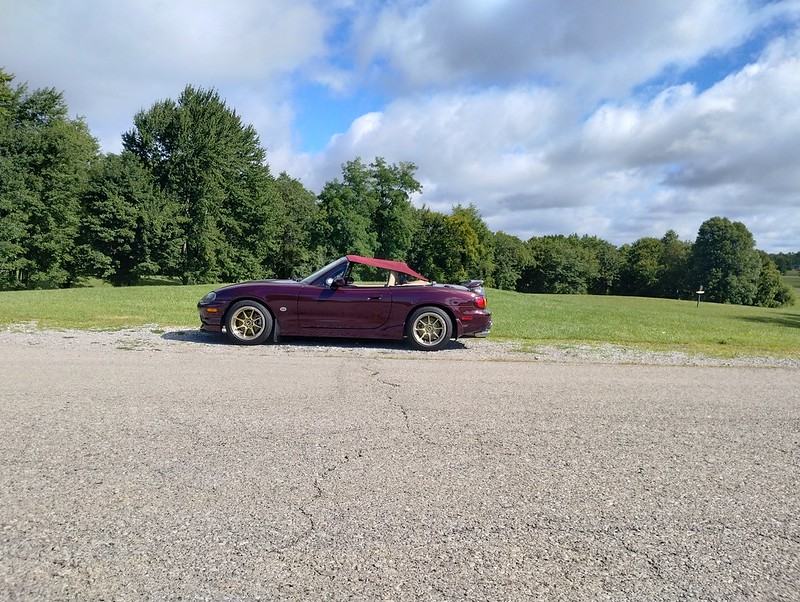
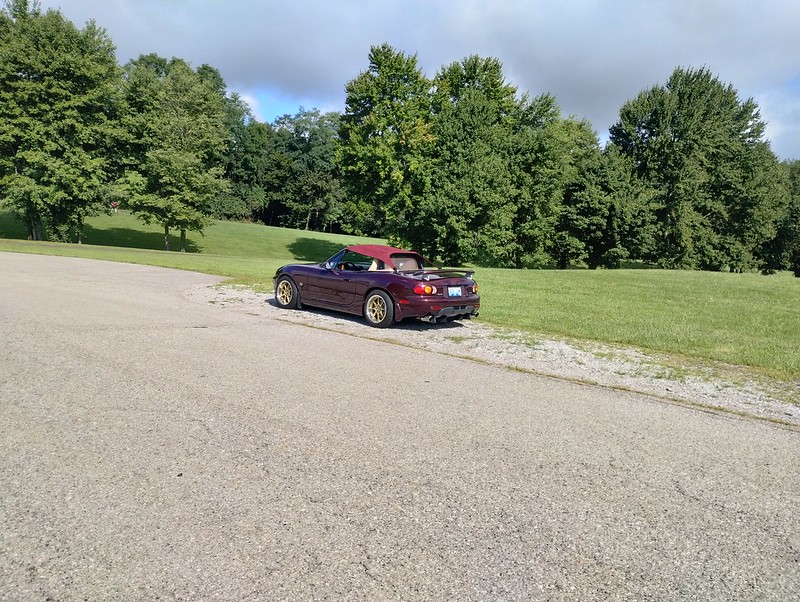
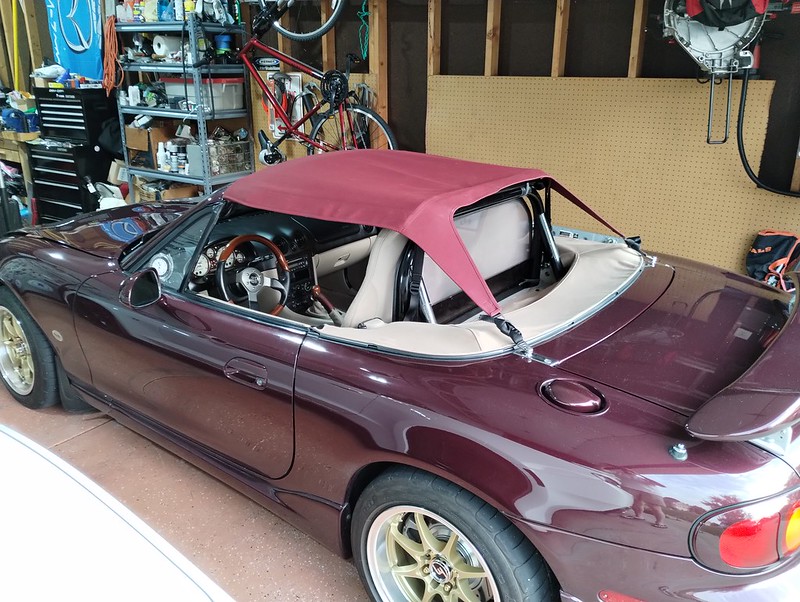
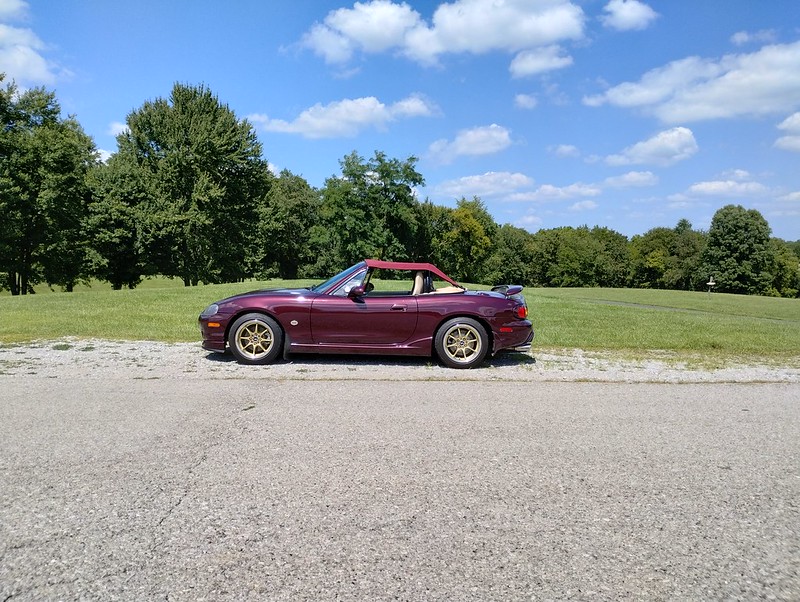
Went to Ace last night and picked up some bolts. They are M10 X 1.25, I got 30mm in length. No flanged bolts so I got a couple of large washers in SAE size that fit nicely. I installed the mat brackets this morning, everything looks great. Worked on getting the rust stains out of the mats I bought, made some headway but more cleaning is required.

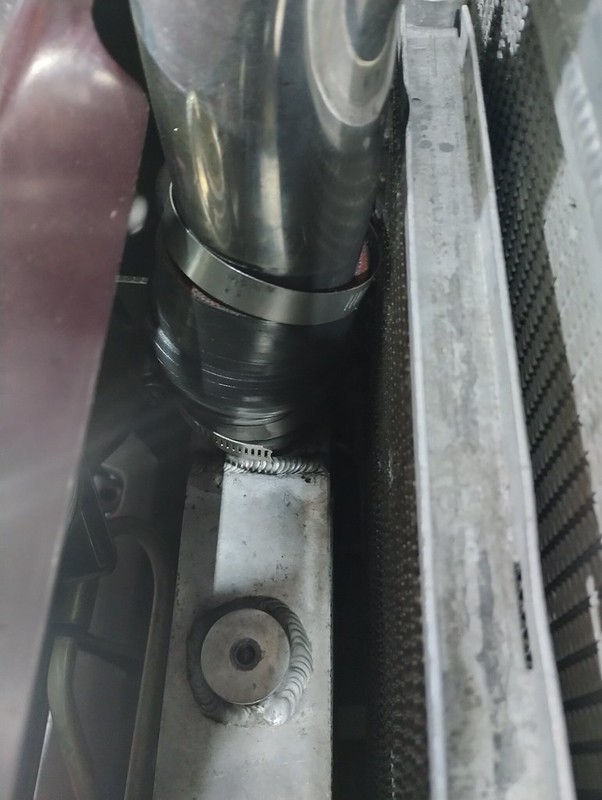
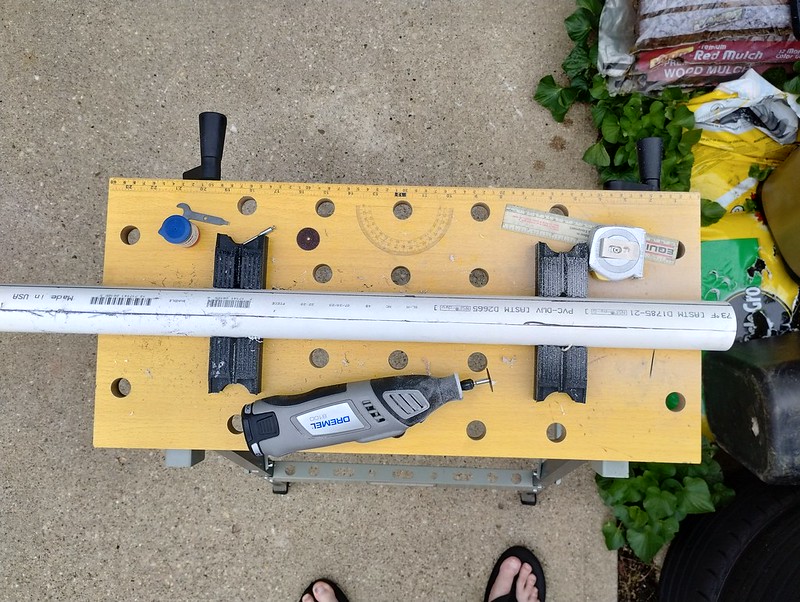
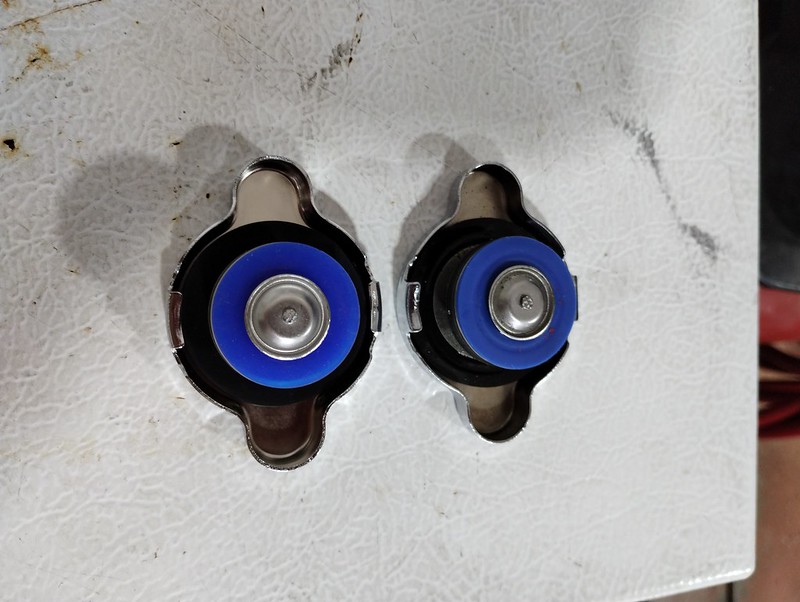
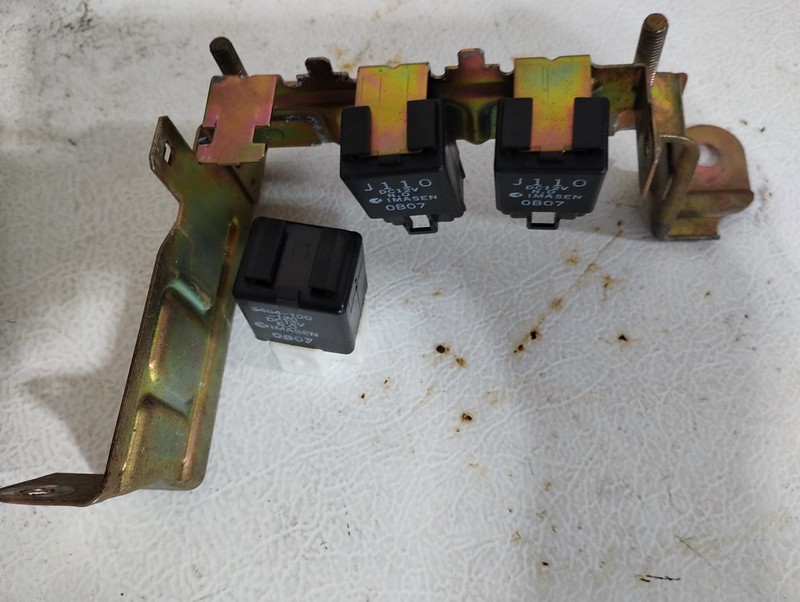
Received my new bypass actuator so swapped that in. I tested it next to the old one with my MityVac, what I found is the old one was leaking by. When I pulled a vacuum on it and held it, after about 3 seconds it would slowly start to extend. By contrast the new actuator held fully pulled in. One thing to note (mentioned on the Track Dog Racing site) is the vacuum nipple on the new actuator is situated at a different angle from the old one like so:

53111886809_b5f1862075_c.jpg


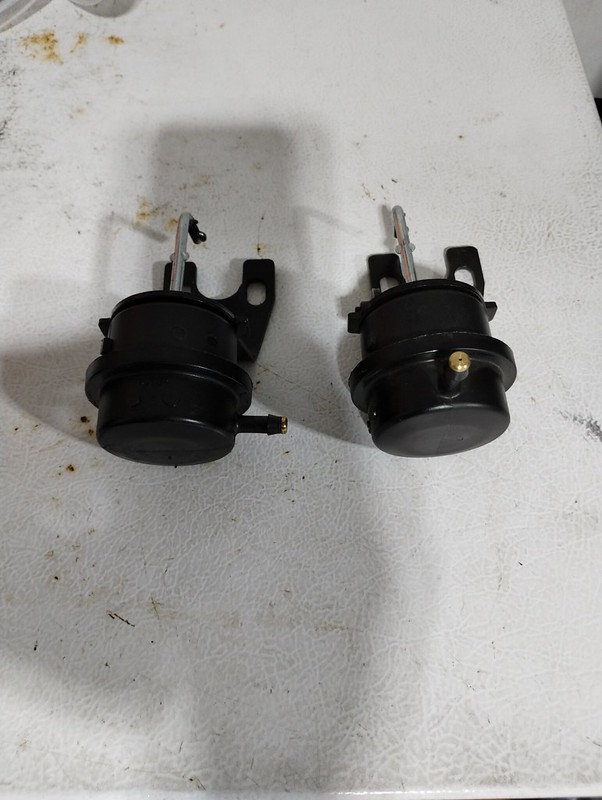
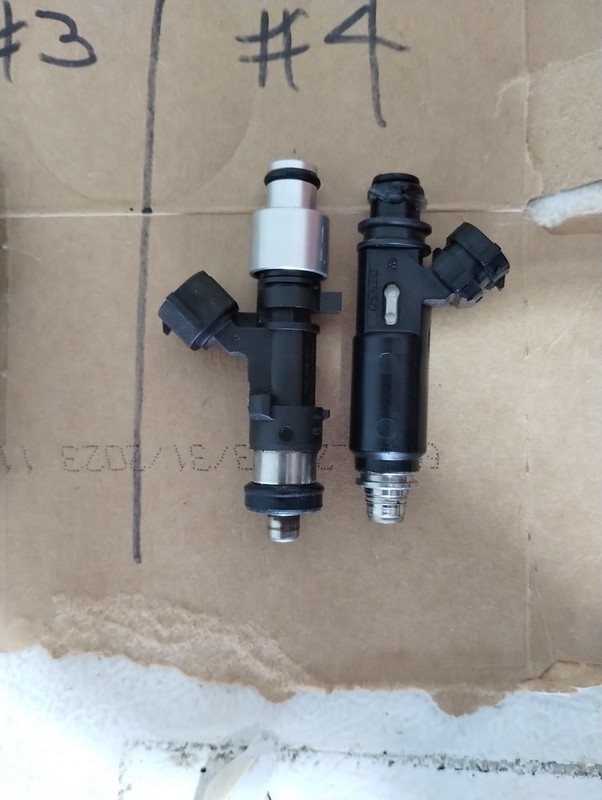
New one is on the right. This meant I had to use a longer piece of hose and the routing doesn’t look as nice as the old one. I had to wait for a test drive due to rain, but finally got out to do that. Unfortunately, while it did need to be replaced the bypass actuator wasn’t the cause of my low boost. I’ll be changing out injectors in the next few days so will take a hard look at the rest of the intake system to see if I can find the culprit.
 
Received what I was waiting for to install my mystery purchase from MATG. SNS Parts had a Project-G bikini top in maroon for sale that he posted in his pre-MATG teaser. I dithered about it but once I saw it on the first day for vendors I said screw it and bought it. As it turned out I was actually lucky that it fits. If you have never looked into one of these, you have to measure the distance from your windshield header to the back of your rollbar and provide that to Project-G so they can make your top the correct size. I should have done some research prior to purchasing it but it worked out.

The latches on the bow were well used (both had the screw fix for broken locks), I went ahead and ordered new factory ones off eBay. Those won’t be here for another week or so. The part I was waiting on was a 3-D printed adjusting piece that fits on the front of the center brace for the top. Project-G used to make one in metal but that is NLA. I was reading one of my friend’s build thread and saw where he had found the 3-D printed one so I ordered it up. Here is the product link: https://vernie.shop/products/center-brace-handle-mount-miata-bikini-top It’s well made and functions as advertised.

The installation of these tops is pretty well documented (see RevLimiter’s blog) so I won’t go into the whole thing. I cut the center brace to length for the adjuster. It was a little fiddly getting the top bow to stay in place while getting the center brace tight. I then put on the rear straps to the Frankenstein bolts. The straps are very short once tightened, probably due to my Harddog Ace rollbar being installed more to the rear and being shorter compared to other bars. It also isn’t as wide which creates a curved effect at the rear. I was missing the screws to attach the side straps to so looked at what I would need and made a trip to Ace. Ended up with Allen head screws in M6 X 1.0 that were 50mm in length, along with a couple of flange nuts, fender washers and metal spacers. After thinking about it, I decided to first try using some silicone hose pieces as spacers since that is what Project-G does. Here are all those parts:

53117204253_6d2f68e430_c.jpg


I used the nut as I attach my windblocker to the car and it gives me a good stop to hold that in place. Here is a picture of the screw installed:

https://live.staticflickr.com/65535/53117204303_3ea8deaa27_c.jpg[/im

Pulling those side straps tight served to pull the back sides of the top around the rollbar accentuating the curvature due to the HD Ace bar.

Here’s how the finished product looks:

[img]https://live.staticflickr.com/65535/53117204298_a8f3d0fdae_c.jpg

53117204308_fa6cbc0fce_c.jpg


You can see how the rollbar drives the shape of the top. I can see out of the sides with no problem, my head does lightly touch the top though. I’ll get some distance shots from outside when the rain stops.
 
Found my boost leak! Started removing stuff this morning to change the injectors, found this on the outlet of the intercooler:

53118730915_042908666a_c.jpg


When I removed it, I saw what appeared to be damage to the intercooler spigot from the boost pipe hitting it. I sanded off the roughness so the boost tube wouldn’t get cut.

Swapped out my FiveO Motorsports 550cc EV14s for Deatschwerks 700cc injectors. Side by side comparison of the two (DW on the right):

53118808833_17b96693f5_c.jpg


The DWs appear to be slightly shorter which I feel will provide a better fit. While I had everything off I removed one of the isolators for the fuel rail to make sure I didn’t have them in backwards. Measured the extension on both sides of the center part, both were the same dimension. DW thoughtfully included some lube for the O-rings which helps them go together without issue. Buttoned everything back up, taking extra care to get all the boost tubes nice and tight. While pulling around I noticed the passenger side intercooler mounting bolt was a little loose so I tightened that up (thank heaven for pivoting ratcheting wrenches or I would have had to pull a bunch of stuff out).

Test drive afterwards showed good drivability and no discernable fuel smell. Based on past experience I will withholding calling it good until I get more miles on her, but for now I’m happy. She’s back to screaming under full boost.

While out I took some more pictures of the bikini top:

53118730900_ffac7f9f26_c.jpg


53118730905_6f645a9b6a_c.jpg


53118519389_c188887e16_c.jpg
 
Happy to hear that you found that boost issue and got it fixed! Hoping that you got that fuel issue fixed as well and looking forward to a future report.

Top looks even better out in the wild. How is it while driving, any buffeting, etc.?
 
Happy to hear that you found that boost issue and got it fixed! Hoping that you got that fuel issue fixed as well and looking forward to a future report.

Top looks even better out in the wild. How is it while driving, any buffeting, etc.?
Thanks. My head brushes the top, but while driving it lifts just enough that I can't feel it. The long edges move a little in the breeze but no apparent buffeting. It seems like there is more wind coming in from the sides, makes for a pleasant drive.
 
I put some cogitation into how I could raise the rear of the bikini top. Paid a visit to Home Depot and bought a piece of 1 ½” PVC pipe and a couple of 45 degree ells. First step was to decide how much of a strip to cut out. First try was 1”, after seeing how that would set on top of the rollbar I decided to cut an additional ¼” off. I did this using my Dremel with a cut-off wheel:

53126107508_6409a068e4_c.jpg


Next step was to cut to length and glue the 45s on. That ended up looking like this:

53126107518_d03a752901_c.jpg


Finally I needed some slits so I could use the Velcro strips I have (used for things like extension cords and the like). I tried a couple of ways but ended up using a small drill bit to punch holes, then use the bit to connect them all. That looks like this:

53125623921_0fecfb356e_c.jpg


It’s been tested and works well. I’ve got some semi-gloss paint on it, once that dries and I install it for the final fitment I’ll post a picture of that.

When I was picking up grandkids from school yesterday, she was getting hot. I kept that in check but noticed there was a lot of heat coming into the cockpit despite the temperature being full cold. All signs suggest that the thermostat is bad so I ordered a new one of those.

At some point I’ll get through all these little niggling problems.

Finally, today I received the new top latches I purchased off eBay to replace the ones on the bikini top. Those are installed and work wonderfully well. I need to check into the screw sizes for those as one of the ones on the driver’s side was shorted than the rest.
 
Here is how the PVC pipe looks in place:

53130813100_bf59b9b076_c.jpg


You can see the two Velcro strips I used to hold in in place. They aren’t tight enough on their own, but once the top fabric is laid across and cinched down everything stays in place. Here is a close-up shot of the finished product:

53130608074_bf8862d1ff_c.jpg


I’ll get an outside shot of that once my new thermostat shows up and is installed so I don’t have to worry about overheating things.
 
Great to hear it was user friendly as-was but your new and improved set-up is much better. Looks good and way to think outside of the box!
 
Thanks Jeff. I have to thank my work, after spending most of my time on older ships if you don't learn to think beyond what's in front of you, you don't get far.
 
Didn’t get an early start in the thermostat replacement today due to rain. Finally dove into it this afternoon. Here is the thermostat I bought from Supermiata:

53139234836_9af9b608db_c.jpg


Their site states that you can use a Motorad/Stant 45849 (for 195 degrees) but as you can see I was sent a Gates. Not sure if they changed this or what. Had I seen that information (towards the bottom of the parts list for the reroute) I would have bought one locally. In any case I now have a couple of numbers to use for the next one.

Here is the sealant they use, I got this from AutoZone:

53139437049_b52e060ea8_c.jpg


I removed the thermostat housing after gaining access by removing my shock tower brace. Cleaned the old sealant off using a putty knife, brass wire brush and some alcohol. Getting the snap ring that holds the thermostat in place out/back in was just as much of a PITA as I remembered. The old one didn’t appear to be stuck but I can’t say that it wasn’t when it was hot. Got the new thermostat in place, gooped up the sealing surfaces and assembled the housing. That’s all done now and waiting 24 hours for curing so I can fill the coolant.
 
Put the hose back onto the thermostat housing and filled her up using my Lisle spill-free funnel (if you don’t have one, it’s a great tool). Started her up to bleed the system, once that was done I shut her down and removed the funnel. Had a little coolant spill from that. Put the radiator cap back on and started her up again as I wanted to make sure the cooling fan was coming on. While waiting for that to happen I noticed some vapor coming off the radiator in back. At first I thought it was from the spillage, but a closer inspection showed the radiator cap was leaking. That explains a lot. New cap has been ordered so just have to wait for that to arrive.

While I had everything removed I went ahead and pulled all the plugs to inspect the cylinders and make sure I didn’t have any coolant inside. Gapped the plugs to 0.035 before installing. There was some corrosion in the plug wells from water ingress so I used a round brass wire brush to clean that up, then blew out the wells with compressed air. Wiped down the outside casing of the COPs before putting them back in too.
 
Whew, lot of work you had to do. Looks good Mike
Thanks Bruce. I made sure to pace myself. :cool:

I've done all this work enough before that it isn't a big deal. Well, the bikini top mod was interesting. Hardest part has been having to wait on parts.
 
FedEx showed up earlier than normal today. I had already filled everything with coolant and bled what I could. Here’s a comparison of the old and new radiator caps, old one on the right:

53148782150_4d0d3324a9_c.jpg


You can see the groove in the blue gasket, if you squint hard you might see the groove in the black gasket. That was obviously enough to allow leakage. Put the new one in place and then went for a quick shakedown cruise. Everything looked good.

As promised I took another distance shot to better show the fitment of the bikini top with my little modification:

53148782300_f3e6dc9b5a_c.jpg


It lays a little flatter front to rear. I would have to compare to another top to see how tight one is that was made for a specific car but I don’t have any flapping so I figure it’s good.
 
Did another school pick-up run yesterday and the temp gauge was slowly rising as I was sitting in line. Didn’t see anything amiss when I got home. Today I decided to make sure my fan works so I rigged up a pigtail to connect to the fan connector and then used my old battery charger for a constant 12v supply. Fan runs as it should.

Final component that I hadn’t looked at was the fan relay. If you haven’t ever looked for it, it’s tucked away under the passenger front fender outboard of the fuse panel over there. It’s under the black protector you can see in this picture:

53158074585_9fd919ccb5_c.jpg


After removal of multiple other pieces you end up with this:

53157066597_0de29ee3cd_c.jpg


The fan relay is the one closest to the firewall. Note, you have to pry really hard to get it off the mounting bracket, so hard I was afraid I was going to break something. Made another pigtail to test this with/without power. The relay switched as it should and I saw continuity when the relay was closed. Got everything buttoned back up. The only other thing that could be affecting the cooling system is the temperature sensor (well, that and the water pump but that doesn’t seem to be the problem).

While under the hood I checked around and saw the clutch fluid was a tad low (probably from when I changed it before MATG) so I opened the cap to fill it. There was some crud in the bottom so I sucked it all out and filled it with fresh.

Took a drive to do some auto-tuning and to run a data log (to check the coolant temperature). Noticed the AFR was a lot different between the wideband gauge and what Tuner Studio was seeing (gauge was richer). The only thing I changed that might have caused that was to set my wideband input to a different AEM model (to see if that did anything for me). So I recalibrated the MS for the model I was using originally and that brought the readings into line. I don’t really understand that as the voltage settings for the two different widebands are the same, but at least it’s working well now.
 
Had another issue with the coolant temperature rising. Tested both fans again, it seemed that the A/C fan had more flow than the cooling fan (both are the same fan). I figured there was a chance that the cooling fan took a good dose of the supercharger oil and maybe was not operating at full output. So, I ordered a new Spal fan from Summit Racing. FYI, when I originally bought the fans back in 2011 they were $65 each. Now they are $89.

While waiting on that I had a hard think about the supercharger. With an upcoming trip I didn’t want to worry about having it fail so made the difficult decision to remove it for now. I have been working on that over the past couple of days. I got the stock intake setup I bought a while back from storage and proceeded to remove everything, right down to the intercooler. Doing this was a little bit of a PITA because of the bending of brackets for the A/C condenser I had to do when installing the MP62. This has to be done, mainly for the A/C receiver/drier as otherwise you won’t get the condenser far enough out of the way to keep the radiator from hitting it. I found that two nuts holding the receiver onto its bracket had gone missing at some point and the body of the receiver showed signs of rubbing on the intercooler bracket bolt (luckily hadn’t worn through). I did have to buy a new upper radiator hose as I had cut that one down for the radiator being moved back 4-5” for the intercooler. The air temperature sensor wiring had to be extended for the same reason. I also couldn’t find the throttle cable bracket I had fabbed up for when I sent to ‘charger off for repairs a while back so made another. I have ordered a stock replacement for that from SNS Mazda Parts, since I don’t know just how long I will leave it in this configuration. Luckily I did still have the upper mounting brackets for the A/C condenser (next time I will put all that stuff in a baggie and label it). While I was underneath I cleaned all the supercharger oil that had coated a lot of stuff (power steering pump, A/C compressor etc).

I took her out for a shake-down run, will have to do some tuning but she ran well. Going to take some getting used to not having the instant-on throttle response of the ‘charger though. Sucks not having that sweet whine either. I have to do some thinking over my way forward for power enhancement, whether it is getting the supercharger looked at, going turbo or maybe even an engine swap. Rest assured if I do that I will stay in the Mazda family.
 
Last edited:
Had another episode of the temperature gauge going up without the fan coming on. Last thing to try was a coolant temperature sensor. Picked one up locally and installed that. On that shake-down I was surprised to see that the coolant was getting colder. Best guess is either it was the wrong one, or a manufacturing defect. Pulled it today and went back up to the local place, explained what went on. They double-checked that the number I gave them crossed correctly to the part number they sold me and it did. Despite electrical items not normally being refunded after use, they did so and said they would damage it out. I have another sensor coming from Amazon.

Received the throttle cable bracket and installed that, I didn’t realize that it is tilted to feed the throttle cable into the throttle body at an angle (not something I have ever looked at on a stock Miata). Alex at SNS also included a sticker that had MATG on it so that is now on my tool cabinet. I put the cable through the two holders along the firewall so it stays where it should. While I was under the hood I lubed the wiper linkage with this dry lube:

53186048583_3a50dc0b18_c.jpg


I also used the same to lube the antenna mast after cleaning it with alcohol.

I went ahead and removed the stock radio with my aux in cable in favor of the Nakamichi I had installed a while back. It’s more radio than I really need but figure it will work out better for my trip with Bluetooth capability. I did send off the old double-DIN 626 radio I originally installed when I bought her to see about getting the cassette deck repaired and a Bluetooth module installed at this place: https://sites.google.com/view/bishops-vintage-car-stereo-rep/home That will give me an in-dash 6 CD changer, cassette player and the Bluetooth. Should cover everything I want and let me listen to my old cassettes. I’ll let everyone know how that works out.
 
New sensor showed up from Amazon. Installed it and ran a test. At first everything looked good, needle on temp gauge was rising as normal. When it hit a certain point it then dropped below the zero. I dug into my settings on the Megasquirt and found the calibration settings for the coolant sensor were off. Probably my fault although I don’t recall changing anything. I did some searching online and found recommended settings for the sensor so did those. Note, these were a little different from the settings associated with the sensor I have in TunerStudio (but not by much). Ran the car after that and saw the same result. Frustration level was high at this point so I stepped away.

Did some more thinking and decided having nothing to lose I would install the coolant temperature sensor I started with. Started her and monitored things via TunerStudio, temperature came up as normal and the gauge followed suit. Went for a short test drive after the static test performing a data log during, and it all seemed fine. I’m going to do some more test driving tomorrow to see if everything is good for my trip.
 
My test drive went well, so I took her on my trip. Car ran ok during the drive although not without some hiccups. Top was down most of the way but I had to put it up the end of the first day due to rain. That was when I found out the interior was a lot warmer than it should have been. Keep in mind I always have the top down and generally use my CoolBreeze scoop when it’s warm, which is likely why I didn’t realize this before. I have already started looking at solutions for this involving insulating the exhaust where it passes through the transmission tunnel. Also, my A/C is in need of a charge because it didn’t get as cold as it should have.

As far as the engine went the AFR was higher than it should have been. Also, at the end of the second day I was in traffic and found the throttle was sticking some. Thinking about some things, I remember from a while back reading that there could be problems with oiled air filters gumming up the IAT sensors. Since mine is an open element GM type this could lead to erroneous readings. I was out yesterday and picked up some sensor cleaner along with some duct tape. I pulled the IAT out of the airbox hole and taped that up. The sensor will be cleaned and then installed in way of the intake opening on the side of the driver’s fender. It may or may not have any impact on things but I wanted to remove a possible variable. I also repositioned the throttle cable to relieve the bend where it comes out of the firewall.

I decided it would be good to go ahead and get a new IAT sensor (since it probably was contaminated by oil carried over from the supercharger) along with a Mazda coolant temperature sensor for peace of mind. Those have been ordered and will be waiting on me when I get home.

Finally, the stock radio I sent off for modification was received but when he did his initial testing, he found the CD player was faulty. I am sure I sent him the one I had been using, if so that means it got damaged in shipment. I am good at packaging things normally but apparently not in this case. I have at least one other at home so told him I would test it and send it to him to be modified. Sucks, but there you have it.

Oh, the phone holder I bought worked out well. I put it in the middle of the windshield angled towards me and it has enough extension so that I could reach it with no issues. The one I bought was this one: https://www.amazon.com/dp/ (commissions earned)

I am going to glue a piece of rubber onto the side arm that rests on the dash. If it is just hanging in space it bounces when you hit a bump and I would rather not stress it too much. The rubber should keep the arm from dinging up the dash surface.
 
Back