NB MX-5 Hey, it's Minnie!

After some thought, I decided to buy a set of NB2 seats in parchment leather. While I love my Recaros, they aren't very comfortable for longer trips. Since the wife and I were headed to MATG in August I figured it would be a good buy. They should be here the next week.

Still hadn't heard anything from Jon Bond Performance about my supercharger despite several efforts to get in touch with them. I may need to look into options for action.
 
I sent a message to JBP and heard back within a very short time. From what he told me this must have been a busy time of year for them, plus they have had snow and illness impacting their productivity. He said mine had been disassembled and he would be in touch shortly with an evaluation.
 
Received the condition analysis and repair cost estimate for the supercharger. It had bearing failure (likely due to the lack of oil, which was probably due to faulty seals), some rotor contact with the housing, a failed bypass valve and failing rotor coatings. The casing and housings can be repaired without replacement, rotors will be cleaned up and coated, the housing will be honed to remove the marks. All the consumable items will be replaced. I think I dodged a big bullet by catching it when I did. Based on their advertised turnaround time, it should be back here waiting on me when I got back home.
 
I had to go back to work for two weeks so the other Chief could attend some meetings. Got home last night, but thanks to various issues the supercharger wasn't here. Supposed to show up tomorrow. In order to keep from bashing my head against the wall in frustration, I decided to get some other work done.

I went over to my storage and removed the sliders from my stock seats. Came back home and started in on the NB2 seats. First thing was to pull them out of the box. The seller packaged them very well, and even included instructions to assemble the seats (they broke them down into backs and bottoms for ease of shipping). The seat pans were discolored with the usual "rust" that you find on stock seats. In this case it was more of a patina on the metal.

33687128162_920da0e95d_c.jpg


I decided to hit it a lick with WD-40 and a red cooktop Scotchbright pad to remove any nastiness.

33029876323_d309d4a671_c.jpg


That cleaned it up somewhat. I decided for s**** and grins to see what I could do with some metal polish I have, the not as rusty looking area in the middle is the result:

33687127582_f07abeb08e_c.jpg


This was the polish:

33714049371_2e44940fc3_c.jpg


Some day when I am bored (maybe after I retire), I'll pull them out, tear the seats down and polish away. It's nice to know I can get them that clean.
 
After assembling the seats, I proceeded to clean the leather. Here's the initial views before starting:

33714048691_32c2aea27e_c.jpg


33029874953_1157af5a39_c.jpg


Kind of scuzzy. Here is the result after some scrubbing with Lexol Cleaner, a microfiber cloth and a scrub brush:

33029874363_f75af9b055_c.jpg


https://c1.staticflickr.com/3/2839/33458890720_921ed272b0_c.jpg/img]

Not too shabby given they are used seats. Finally, here is how they looked after some Lexol Conditioner:

[img]https://c1.staticflickr.com/3/2868/33458890120_a0d366909a_c.jpg

33802271746_7b136caf99_c.jpg


Finally, the money shot with them installed:

33458888760_131f7e3bd9_c.jpg
 
While I had my Recaros and these stock seats sitting side by side, I decided to measure just what the difference was that keeps the stock seats from hitting the B pillar area. Taking a width measurement 18" up from the bottom shows the stock seats are 16" wide. The Recaros are only 17" in the same spot, which isn't that much. The true difference lies in the cross-section of the seat backs. The Recaros are squared off and blocky, while the stock seats have a taper that gives the clearance needed. Here's pictures of the stock seat showing this clearance:

33458909790_4cf0b51eca_c.jpg


33714072661_b3e5dd1294_c.jpg


After I got the seats done (but before installing them), I changed out the interior trim in the B pillar area. This was to remove the wear shown from the Recaros, and also to get rid of the opening for the hard top side strikers. I also changed out the fog light/cruise master switch for the stocker. I had replaced it with a used one that showed less wear on the lettering, but the cruise stopped working (at this point I don't know for sure just when that transpired). I have read some information that says the switches are different between years and will cause a problem. I have already tried changing out the vacuum motor with no operation so that was another test.
 
She's alive! UPS showed up around noon, I had everything back together (including putting my tools away) in about an hour. Pictures would come once my wife was done with the camera memory card. The 'charger is pretty though, nice coating on the rotors now and the bypass was working. I don't know how long the old one was faulty but I was losing some boost compared to what I had now. The sound under boost seems to be a bit less, but it's still there.
 
Here's some pictures. Supercharger as unpacked:

33822250556_8f36dcd558_c.jpg


From there I had to install two mounting brackets and the throttle body before installing it. Here's the recoated rotors:

33822252136_143dbb5543_c.jpg


So pretty.

All the used parts were returned. The bearings were all rough to one degree or another, one of the front rotor bearings was about five minutes away from catastrophic failure:

33822254206_a55fbffdec_c.jpg


I dodged a huge bullet with this one. Good thing I have all those years of training myself to listen for out of the ordinary noises etc.

While I was putting it all back together I also installed the Mazda 626 Fiamm horns I bought. They are basically the same as the ones I had installed but with only one wire connection (the ground is done through the mounting stud). As I noted before I will have to grind down some on the rear 949 subframe brace as I heard it rubbing on the exhaust. I do like the RB muffler, it's quieter than the Brainstorm I had and seems a bit throatier as well.
 
Did a little Sunday modification. I decided that the radio I have is overkill for my use. There are a lot of threads on Miata.net about adding an aux-input to the factory radio, so I went about that. I already had the wire harness from my cassette deck to use, just had to buy some 4.7k ohm resistors along with the stock pocket for under the radio. Instead of using a jack to connect my phone I cut up a piece I had bought for the wife's car at one point with a 3.5mm mini plug. After researching which wire would go where, I sat down and commenced cutting things up. I used my new Dremel to make cuts in the side of the pocket for the switch (I used one of the same ones that I bought to control the antenna for my Nakamichi). This was followed by twisting wires and soldering them together. A little heat shrink and electrical tape and it was all together. The test came next to make sure everything worked before I buttoned it all up, it was a success! I slide the pocket in place first, due to the switch sticking out I had to angle it with the left side going in first, then snapped it in place. I ran the connection wire down the right side of the center console and then back to where it was going to come out. Put the stock radio in, that took a little finagling to get the wires in back out of the way so it would seat all the way. I then drilled a 3/8" hole in the front of the center console cubby, pulled the connection wire through, put a grommet on it and then into the hole. Here's pictures of the highlights:

33777543092_a927b1044c_c.jpg


33777542732_de39f0393a_c.jpg


33777543382_027a59ddff_c.jpg


If anyone is interested in doing this, go to M.net and search for aux-in or line-in mods. If you can't find them let me know and I can provide the links.
 
After installing the RB muffler, I was getting some contact between the exhaust piping and the rear 949 subframe brace when cold (thermal growth of the pipe when everything was hot made clearance). Removed it this evening and ground some more off that area (like I did before). After multiple test fits and grinding I ended up with enough clearance. Hit it with some semi-gloss black to prevent rust and reinstalled, one of these days I'll find some gold that matches the original paint and paint both the front and rear braces.

My nifty trunk organizer with the pockets didn't want to stay in place with the industrial Velcro I used. After a lot of searching I figured out what was used previously (at least I hope what was used). I tried ordering some double sided adhesive pads from a specialty supplier but their website was screwed up and they didn't answer my request for help. Off to Amazon I went, bought some 3M urethane double sided adhesive tape that is 1/8" thick. Since I didn't think to measure thickness of the old stuff I am hoping this will do the trick. It was arriving the next day so I would know then. No pictures as I have basically done both of these jobs before.
 
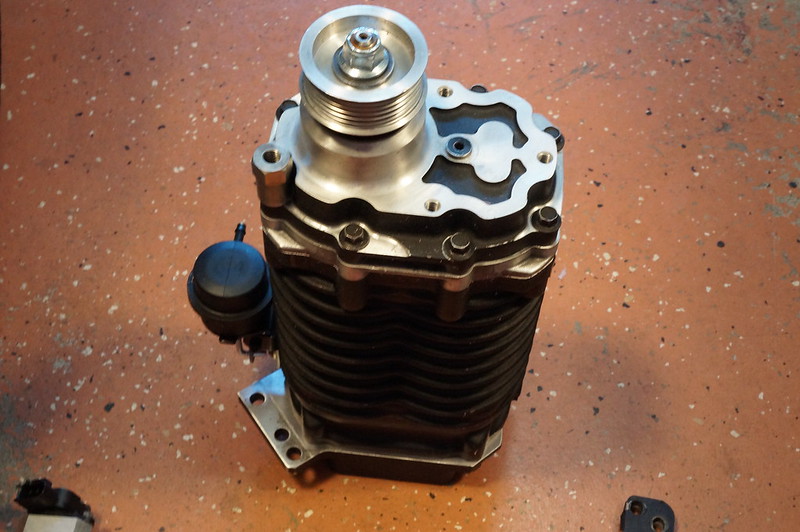
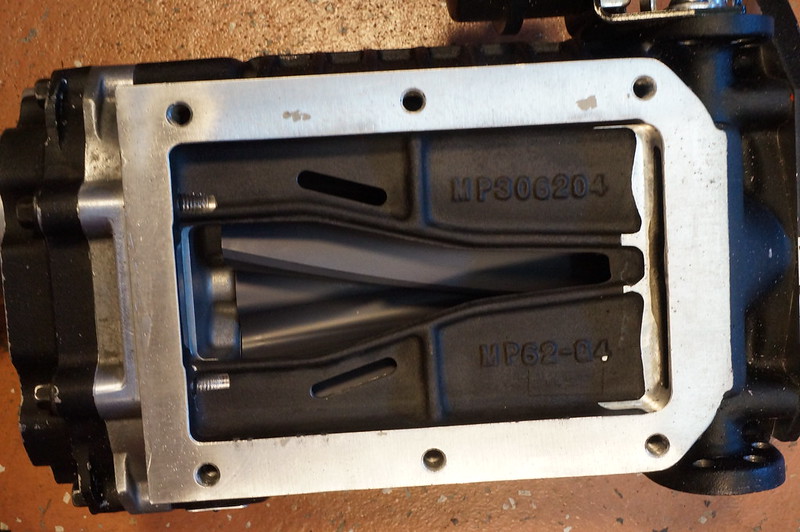
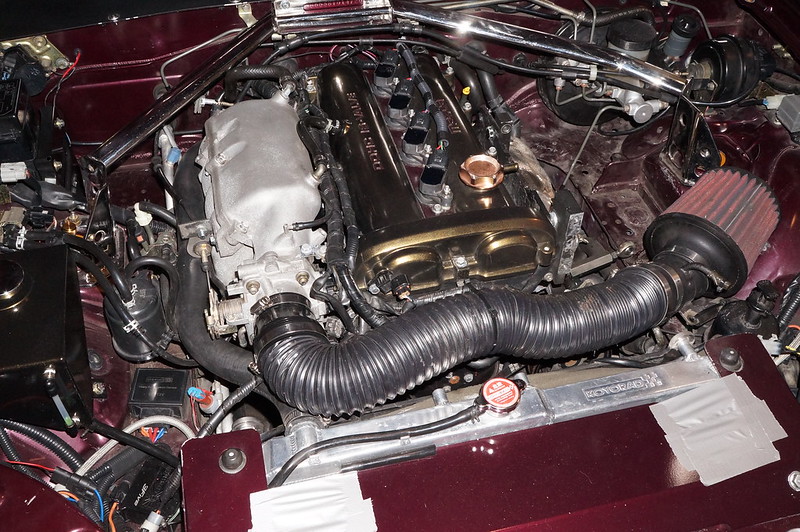
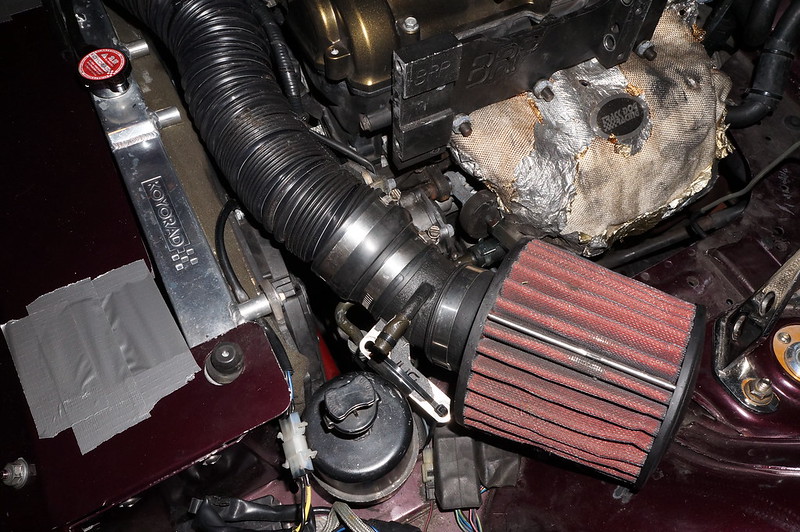
When I pulled out of the garage to run errands, I noticed some black substance on the floor. Got out and looked at/felt it, seemed suspiciously like supercharger lubricant. Looked at the snout and sure enough there was a track of oil running down from the nose bearing seal. @$#%(^&)&*#!! Pulled the belt and wired the bypass valve open. I sent a message to JBP asking for a replacement seal to install myself. He got back to me fairly quickly and said that according to their records my nose shaft had some damage which they took care of by sleeving. He said they would need to look at it to see what the problem was, that it might not just be the seal. This morning first thing I removed the 'charger, when I did that I noticed what appeared to be oily residue inside the rotor housing. At that point I decided to send the whole thing back to him. Really sucks since I only have about two weeks at home to enjoy the car. I'm going to see if I can rig up an NA intake so I can drive her while I wait for the 'charger to come back to me.

In other (hopefully happier) news, I got the double sided adhesive tape I ordered for the trunk saddlebags. Just got done installing that, I had to use two layers of tape on the right side of the trunk due to the wire harness that runs down that side of the trunk lid. Without two layers the saddlebag won't adhere to the lid. I'll see how well it works, early result is that tape is strong stuff. It's hard getting the line-up exactly right, when I tried to reposition the piece the tape was already on there and I couldn't move it around.
 
Sometimes procrastination comes in handy. I still had bits and pieces from the M45 setup so I pulled that out of storage to see what I could do with it. I also stopped by AutoZone and picked up a 3"-2 1/2" reducer. With that in hand, and my years of making repairs with what we had on hand (especially on old ships) here is what I ended up with:

33195185054_7782802319_c.jpg


I used the stock throttle body and put the IAC in its normal place. I had to make a little bracket to hold the throttle cable in place, since I never had a stock one:

33195183804_84fa32c752_c.jpg


Finally, I had to use the metal tube that normally mounts on the supercharger to connect the air filter to the crossover tube. This also allowed me to have a way to tie the filter down. I used some tape and zip ties to close off two openings in the tube so I wouldn't get any unfiltered air:

33195182744_b8df16fe50_c.jpg


Voila! And, success! She fired right up and idled normally. This made me a very happy man.
 
'charger was scheduled to be delivered to JBP a few days later. Hoped the turnaround would be quick.

While I was removing the 'charger, I didn't watch what I was doing closely enough and broke the top right off the dipstick. No big deal I figured, got the part number off Mazda Motorsports and while at the dealer this morning getting the wife's RX-8 airbag recall done I asked the parts guy to order me one. According to what he saw the part has been discontinued. Say what? When I got home I went to Priority Mazda online and ordered from them. That was kind of strange to say the least.
 
Dipstick showed up. I pulled out the old one and inserted the new one. Easy-peasy.

JBP called. They said it was definitely leaking from the nose seal, but when they took everything apart there was nothing apparently wrong. All the seals were replaced anyway, and they were going to fill the oil compartment right up and leave it inverted overnight to see if anything else showed. I was supposed to hear back from them the next day but nothing.

While I was sitting around idle that evening I decided to do a foamectomy. For anyone who doesn't venture into Miata.net to be familiar with this term, you just remove the seat bottom cover and cut some foam off the seat. Long-time readers of this space will know that I did this to the original factory NB1 driver's seat. Same thing this time, and as I am still a glutton for punishment I reused the hog rings. I took 1-1 1/4" off the bottom of the foam, this lets the seat cover sit nicely so it doesn't appear to be any different. Once I had that job done, I pulled the back seat cover off enough to insert the inflatable lumbar support I have. With everything buttoned up and the seat back in the car, I gave it a sit to see how it was going to work for me. Acid test will be once I take a trip, but I like it a lot sitting statically.
 
The supercharger was finally on its way back to me. As UPS was showing it being out for delivery I decided to do some prep work so once it showed I can slot it back in. The prep work consisted of pulling my N/A setup back off, as well as cleaning out the charge pipes and intercooler. There was some oil residue inside everything downstream of the 'charger. After looking at clearances my masochistic side flared up and I figured I could pull the intercooler without removing the front bumper etc. I was successful but it was extremely tight.

34222673836_d72a9b9067_c.jpg


Here's a shot of the passenger side bolt holding the intercooler to the mounting bracket:

34222673236_e4ca955e28_c.jpg


I had a wee bit more room on the driver's side so it wasn't as hard getting that bolt out. Once the intercooler was removed I cleaned it and the pipes with brake cleaner until they were clean. After airing out I put the intercooler back in. When I removed it I noticed that passenger side bolt had been impacting the A/C dryer. It hadn't worn through yet but it wasn't pretty (couldn't really get a picture). The mounting bracket holes are slotted so I made sure to move it towards the driver's side to give some clearance. Not sure how good you can see it in this picture, but there is room now.

33452882453_aee8eb7e7f_c.jpg


Now I just had to wait on delivery of the supercharger.
 
'charger showed up. I heard the UPS truck so went out to save the guy some steps. He's blabbing on the phone in the back of the truck. I wanted to go in and b**** slap him. He finally remembered he was supposed to be working and I got the package. Opened it up, there was nothing written to say what they had found. I did get a call from them last week after they opened it up, they said then they did see it was leaking from the snout but didn't find any physical cause for it. They said it might have been that the belt was too tight (I told them I had an auto-tensioner) or that the pulley didn't have well-defined ribs. Sounded like reaching to me. Based on the parts I got in the box they did go ahead and replace the seals and all the front bearings, so they do stand behind their warranty. I buy the next larger size belt just in case the one I was using was too tight.

Got everything installed the way it should be. Fired her up and the new belt moved off center. Shut her off and installed the original 4-rib belt I got with the 'charger to see what would happen. Started her again and the belt stayed put, go figure. Just got back from a shake-down run and everything is the way it should be. I can't really explain it, but when I am running with the 'charger she feels lighter on her feet, like she is floating just above the ground. Feels more eager too, like let's go! The belt stayed where it should have so once things cooled down a bit I would try putting the 6-rib back on.
 
I went back to work about a week later. True to form I let myself get swamped at the end with other jobs, so I left the four-rib belt in place. It was working and my wife didn't need all the power (so she says). I did have something planned for when I get home, stay tuned to this space to see what would transpire.
 
Spent some money with Rev9. Bought two pieces, might be considered as one piece since they go together. Yes, it's a tease. Everyone reading this (all three of you) will just have to wait until I was home shortly for pictures. That is provided shipping was as stated and the package was waiting for me.
 
Unfortunately it looked like everyone, myself included, would have to wait for a while. The parts I ordered were made to order, with a 1 1/2 month fabrication time. Rev9 sent me an e-mail asking if I still wanted the order to be processed (of course!). So if I'm really lucky, it would show up just in time for me to install it before I headed back to work the next time.
 
Back